Cinematic Video Color Grading for Beginners
Introduction: Why Color Grading Makes Videos Cinematic

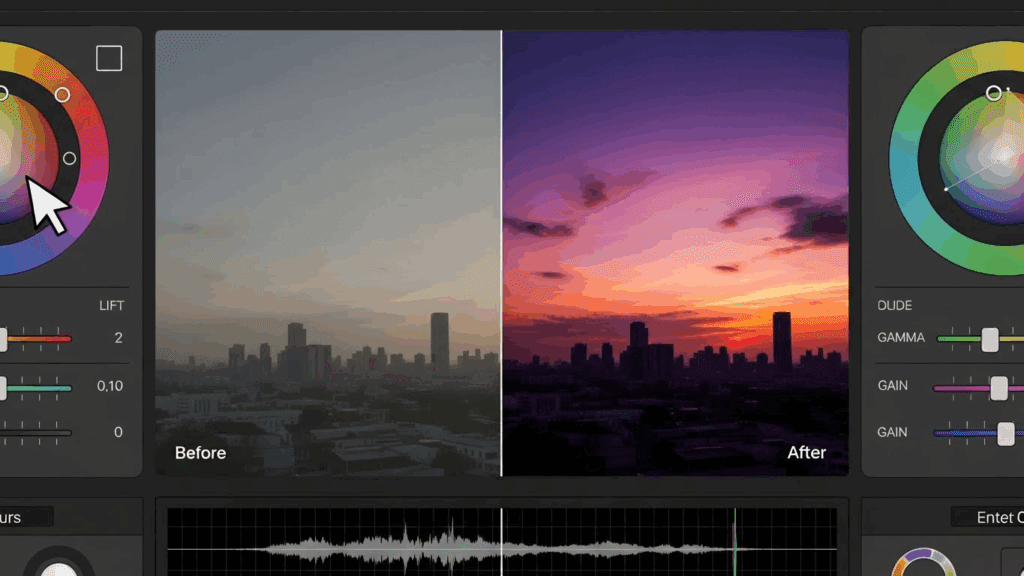
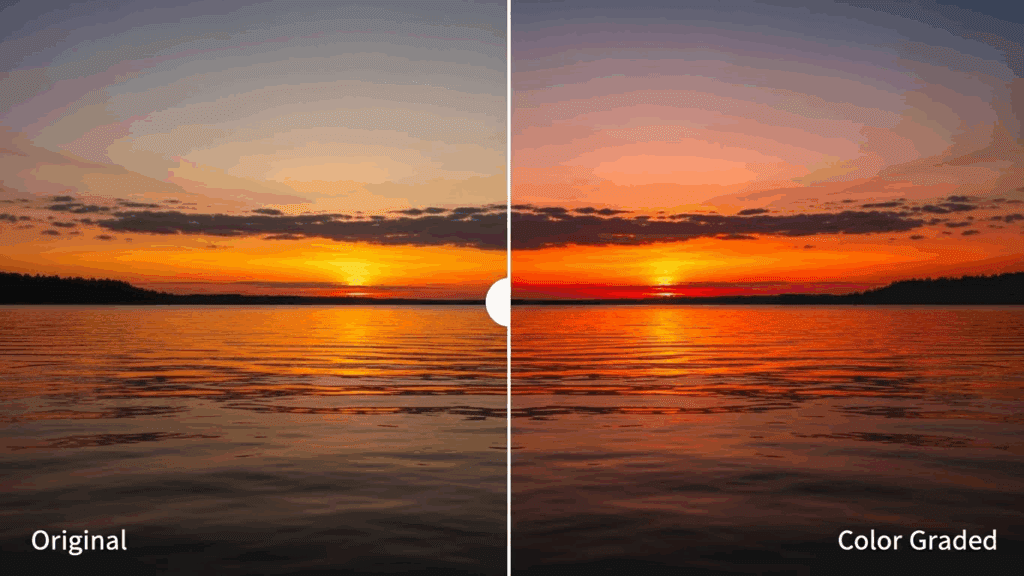
Color grading is the secret ingredient to cinematic videos. You can have strong composition, smooth camera movement, and good lighting, yet your footage may still look flat and amateur. The difference between ordinary footage and a cinematic image often comes down to how color is controlled, shaped, and stylized. For beginners, color grading can feel technical and intimidating, but the fundamentals are straightforward once you understand the process.
This guide focuses on practical, beginner-friendly color grading techniques that create cinematic mood without overwhelming you. You will learn how to manage color temperature and tint, choose and customize LUTs, and build an efficient workflow that separates correction from creative grading.
Step-by-Step Beginner Workflow
A simple step-by-step workflow helps beginners achieve consistent cinematic results.
Step one is importing and organizing your footage.
Group your clips from the same scene to maintain consistent color throughout the project.
Step two is basic correction.
Adjust the exposure to protect highlight details and preserve shadows. Set the white balance using temperature and tint controls. Normalize the contrast and saturation to balance the image.
Step three is applying for a LUT or creative grade.
Choose a LUT that fits your desired mood and reduce its intensity. Tweak the shadows, midtones, and highlights to refine the look.
Step four is refining skin tones.
Use hue and saturation tools to make sure skin tones look natural—not too orange or green.
Step five is consistency.
Compare clips side by side and match their color grade. Cinematic videos feel polished when every shot looks like it belongs in the same visual world.
Practical Examples of Cinematic Styles
A cinematic travel look often uses warm highlights and slightly cool shadows. This creates contrast and depth while keeping the image inviting.
A dramatic cinematic look may reduce overall saturation and push shadows toward blue or green. The Contrast is often higher and highlights are controlled to avoid harshness.
A cinematic interview look prioritizes natural skin tones, soft contrast, and subtle warmth. The goal is professional realism rather than stylization.
By studying these styles and practicing on different footage, beginners can quickly develop an eye for cinematic color.
Understanding Color Temperature and Tint

Color temperature and tint are the foundation of cinematic color grading. If these are incorrect, no creative look will feel right.
Color temperature controls how warm or cool your image appears. Warm images lean toward yellow and orange tones, while cool images lean toward blue. Cinematic videos often use temperature creatively to support emotion. Warm tones can suggest comfort, nostalgia, or romance. Cooler tones can imply tension, isolation, or professionalism.
Tint adjusts the balance between green and magenta. Many beginner editors ignore tint, but even a slight green or magenta cast can make skin tones look unnatural. Cinematic footage almost always has neutral, healthy skin tones before any creative styling is applied.
A practical approach is to start by correcting white balance using a neutral reference in the frame, such as a white shirt or gray object. Once the image looks natural, you can push temperature slightly warmer or cooler depending on the mood you want to create.
Basic Correction vs Creative Grading Workflow
One of the most important concepts in cinematic color grading is separating basic correction from creative grading. Beginners often try to do everything at once, which leads to inconsistent results.
Basic correction focuses on making the image technically correct. This includes exposure, contrast, white balance, and saturation. The goal is not to make the image cinematic yet, but to make it clean and balanced.
Creative grading comes after correction. This is where you shape the mood using color contrast, shadows, highlights, and stylistic color shifts. Cinematic looks are created at this stage, not during correction.
For efficiency, many editors use two layers or nodes: one for correction and one for creative grading. This makes it easier to adjust or remove a creative look without breaking the technical foundation of the image.
LUT Selection and Customization for Cinematic Moods
LUTs, or Look-Up Tables, are popular tools for cinematic color grading. A LUT applies a predefined color transformation to your footage. While LUTs can speed up your workflow, they are not magic solutions.
Choosing the right LUT depends on the mood you want. Teal and orange LUTs are common for action and travel videos. Muted, desaturated LUTs work well for dramatic or emotional storytelling. Warm, contrast-heavy LUTs are often used for lifestyle and commercial content.
Customization is essential. Applying a LUT at 100% intensity rarely produces professional results. Reduce the strength until the effect feels natural. Adjust exposure, contrast, and saturation after applying the LUT to fine-tune the look.
You should also ensure that your footage is properly corrected before applying a LUT. LUTs are designed for specific color spaces and exposure levels. Poorly corrected footage will produce poor results, regardless of the LUT quality.
Common Mistakes Beginners Make
One common mistake is over-saturating colors. Cinematic footage is usually more controlled and restrained than beginner edits.
Another mistake is ignoring skin tones. If skin looks unnatural, the entire image feels amateur, no matter how creative the grade is.
Using LUTs without correction is also a frequent problem. LUTs enhance good footage but exaggerate problems in poorly corrected clips.
Finally, beginners often change color randomly without a clear goal. Cinematic grading always supports mood and story.
Final Checklist for Cinematic Color Grading
Color grading is a skill built through repetition and observation. By mastering temperature, tint, LUT usage, and workflow, beginners can transform flat footage into cinematic video with confidence. Before exporting your video, run through this checklist.
- Is exposure balanced with no clipped highlights?
- Does white balance correct and skin tone shows natural?
- If the creative look consistent across all clips?
- How saturation is being controlled and intentional?
- Does the color grade support the mood of the video?
If you can answer yes to all of these, your video is on the path to a cinematic finish.
Frequently Asked Questions
Q: What is cinematic color grading?
A: Cinematic color grading is the process of adjusting color, contrast, and tone to create a professional, film-like mood that supports storytelling.
Q: Do beginners need expensive software for color grading?
A: No. Many beginner-friendly editors and free tools offer strong color grading features that are sufficient for cinematic results.
Q: Should I always use LUTs for cinematic video?
A: No. LUTs are optional tools. Strong cinematic looks can be created manually with basic color controls.
Q: How important is skin tone in cinematic grading?
A: Skin tone is critical. Natural skin tones help maintain realism and professionalism in cinematic video.
Q: How long does it take to learn cinematic color grading?
With regular practice, beginners can achieve noticeable improvements within a few weeks and continue refining their style over time.


