AI Image to Video Generator · Free, WAN 2.1 & Top Picks

Best AI Image to Video Generator Tools: Free, WAN 2.1 & Top Picks

Discover the best AI image to video generator tools, including WAN 2.1, Runway, Higgsfield, Flixier, VEO 3, Sora 2, and VidAU AI for free, cinematic, browser-based, and ad-ready video creation.

By the VidAU Editorial Team · AI image-to-video guide · 13 min read

WAN 2.1 has become the go-to free option for turning still images into short animated clips, but it is one of several strong tools worth comparing before you commit.

The best ai image to video generator for most creators in 2025 is WAN 2.1, a free, open-source model you can install locally with an 8GB GPU. It turns a single image into a short animated clip without subscriptions or watermarks. If you want zero setup, browser tools like Higgsfield, Runway, and Flixier also work well.

This guide is for content creators, social media marketers, YouTube creators, and digital artists who want practical recommendations. We focus on free tools first, then cover paid options, technical requirements, and which tool fits each use case so you can choose without wasting an afternoon testing every platform.

Quick Summary

  • WAN 2.1 is the top free ai image to video generator in 2025, installable locally via Pinokio AI with an 8GB GPU and no watermark.
  • Higgsfield AI and Runway are the strongest browser-based alternatives, with Higgsfield offering 50+ cinematic effects for product and B-roll clips.
  • Most image-to-video tools work best with short 3 to 5 second clips and prompts that describe motion, camera movement, and what to keep static.
  • Local open-source tools suit tech-savvy users, while no-login browser tools and platforms like VidAU AI suit marketers who need fast, ad-ready output.
 ai image to video generator

What Is an AI Image to Video Generator?

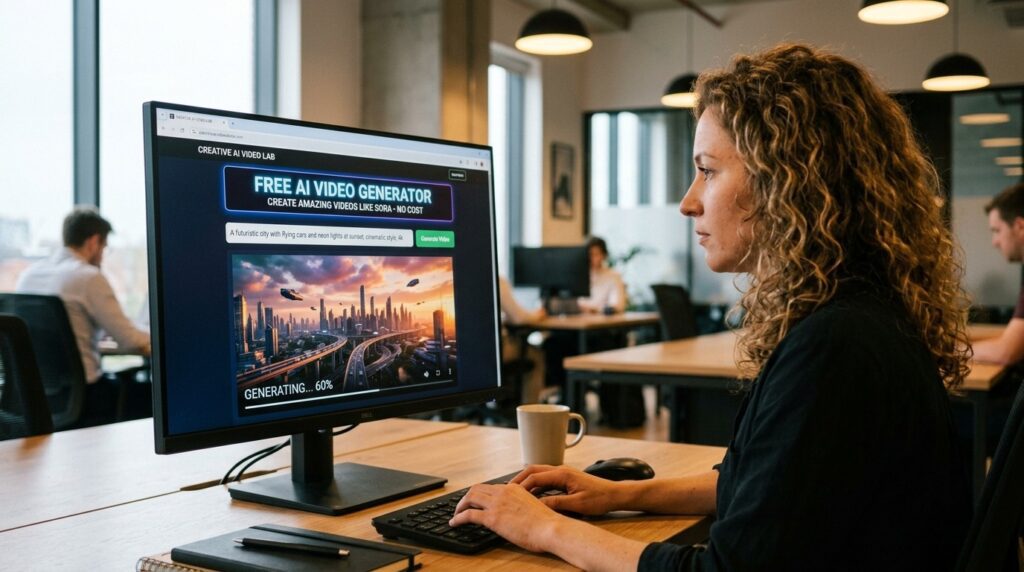
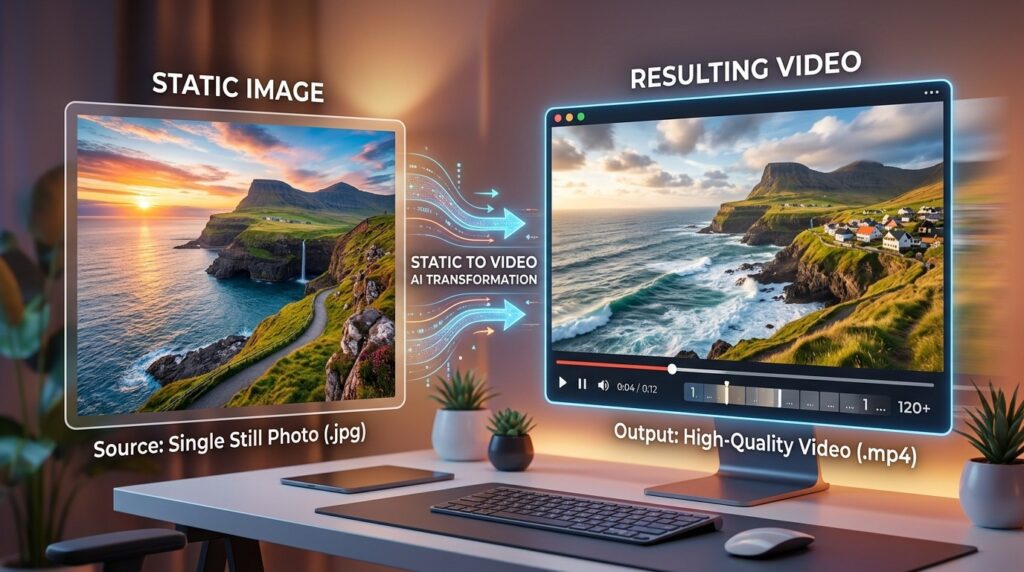
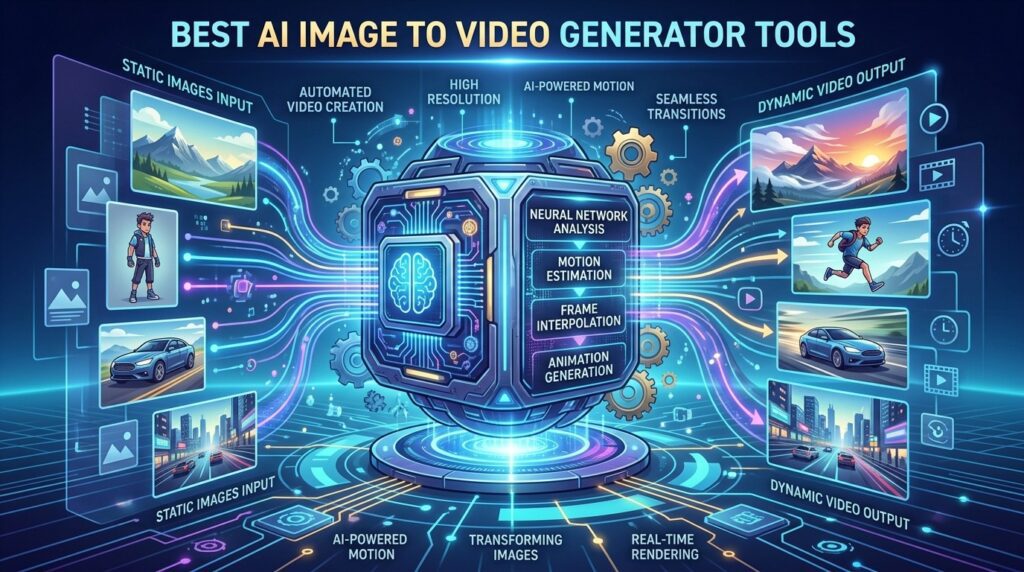
An AI image to video generator is a tool that turns a static image into a short animated video using machine learning. You upload a photo, add a text prompt describing the motion, and the model predicts how the scene should move across a few seconds, adding camera movement, subtle animation, and background dynamism.

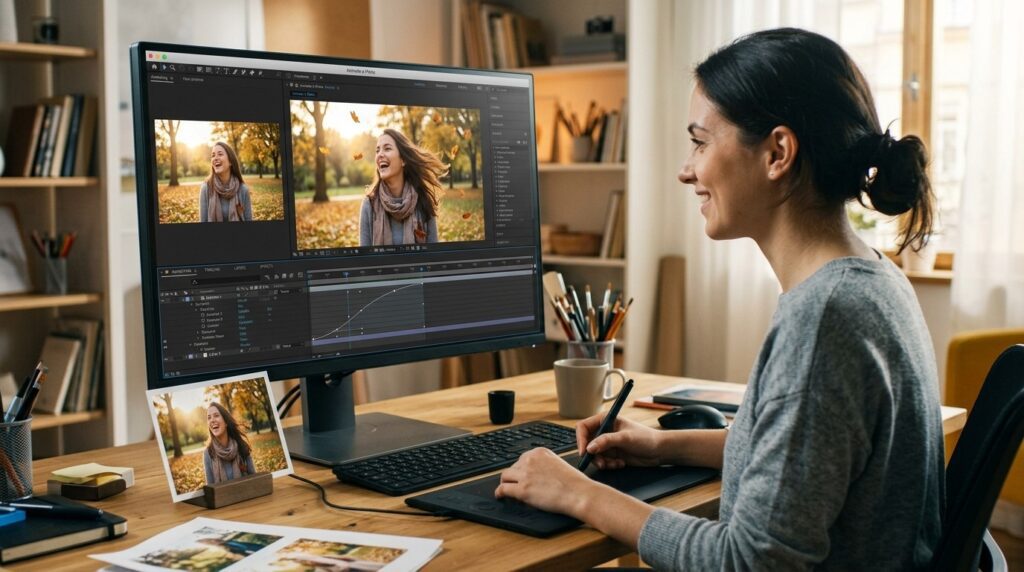
These tools sit between text-to-video generation and traditional editing. Instead of typing a full scene from scratch, you start with an image you already control, then guide the motion. That makes results more predictable for product shots, portraits, and B-roll.

Key Takeaways

  • Image-to-video starts from a real photo, so you keep more control over the final look.
  • Prompts should describe motion, not just the scene.
  • Output clips are usually short, often 3 to 5 seconds.

Why Does WAN 2.1 Lead the Free Image to Video Options in 2026?

WAN 2.1 leads because it is genuinely free, open-source, and produces clean output without watermarks. Based on the surge of March 2026 tutorials, with one install guide passing 420,000 views, demand for a free, locally installable image-to-video model is clearly high.

The appeal is simple. You are not paying per generation, you are not capped by credits, and your clips do not carry a logo. For creators producing daily content, that removes the two biggest friction points with paid platforms.

WAN 2.1 handles both image-to-video and text-to-video, so a single setup covers most short-form needs. The trade-off is that you need decent hardware and some patience with setup, which I cover next.

Key Takeaways

  • WAN 2.1 is 100% free with no watermark.
  • It supports both image-to-video and text-to-video.
  • Setup and hardware are the main barriers, not cost.

How Do You Install and Use WAN 2.1 for Image to Video?

You install WAN 2.1 using Pinokio AI, a free installer that handles the technical setup for you. Most popular tutorials follow this same path because it avoids manual command-line work. Here is the core workflow.

Step 1: Check your hardware first.

WAN 2.1 runs best with at least an 8GB GPU, a requirement noted repeatedly across recent guides.


Step 2: Download and install Pinokio AI from its official site.


Step 3: Use Pinokio to install WAN 2.1 locally on Windows.

Mac options are limited depending on your setup.


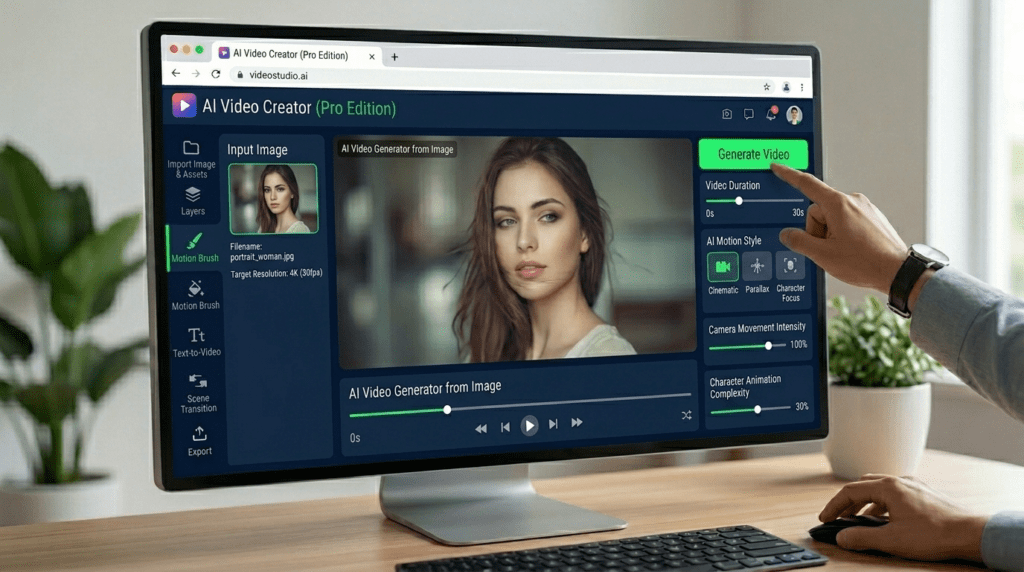
Step 4: Open the wan2.1 image to video module and upload your image or paste a URL.


Step 5: Write a clear prompt describing the motion you want.

Then adjust resolution and inference steps.


Step 6: Generate, preview, and re-run with adjusted settings if the motion looks off.

If you do not want a local install, you can try WAN 2.1 through hosted versions on Hugging Face. Those spaces are often congested, so generation can fail or queue during busy periods. Fal AI offers a paid hosted version for heavier use.

Setup note

WAN 2.1 removes cost, watermark, and credit limits, but the trade-off is local setup, GPU requirements, and more patience than a browser-based tool.

What Are the Best Free Image to Video AI Tools Without Login?

 ai image to video generator

The best image to video ai without login options let you generate clips directly in the browser with no account. Several free tools and trial-based platforms fit this need, though most require a login once you want to download or save work.

Fully no-login workflows are rare for video because rendering is resource-heavy. WAN 2.1 run locally is the closest to truly unlimited and login-free once installed. Browser tools like Flixier let you start instantly, then prompt for an account when you download or open the editor.

Google VEO 3, accessed through certain free workflows, also produces strong image-to-video and text-to-video results, but availability and access methods change often, so treat any free unlimited claim with caution.

If you are creating AI video ads from product images (https://www.vidau.ai/product-sample-to-video/), a dedicated platform may save more time than chaining free tools together.

No-login reality check

Truly no-login video generation is rare because rendering is resource-heavy. Running WAN 2.1 locally is the closest option to unlimited, login-free image-to-video generation after installation.

Best AI Image to Video Generators Compared

Here is a quick comparison of the main options based on how each is positioned in current tutorials and product pages. Use it to match a tool to your priorities rather than chasing the single best image to video ai generator.

ToolCost & AccessBest For
WAN 2.1Free, local installNo-cost, no-watermark clips
Higgsfield AIPaid, browserCinematic effects and product video
RunwayPaid, browserPolished creative control
Google VEO 3VariesHigh-quality short clips
Sora 2Paid platformsCinematic AI video
VidAU AIBrowserAd-ready marketing video

A few notes from reviewing how these tools are presented. Higgsfield leans into 50+ cinematic effects and product imagery, which suits eCommerce B-roll. Runway is a steady choice for creators who want fine control. Sora 2 sits at the high-quality, more expensive end, usually accessed through third-party platforms.

VidAU is an AI video ad platform that generates video ads from product URLs, images, or scripts in 49 languages. It is less of a raw image-to-video model and more of a workflow tool, so it fits marketers who need finished ads rather than a single animated clip. If you only want to animate one portrait, a focused model like WAN 2.1 is the simpler pick.

If your goal is turning product shots into short marketing clips, the VidAU AI Video (https://www.vidau.ai/vidau-ai-video/) and URL to Video (https://www.vidau.ai/url-2-video/) tools are built around that exact job, while UGC Avatars (https://www.vidau.ai/ugc-avatars/) help when you need a spokesperson on camera.

Generate With VidAU Now

Use VidAU AI Video, URL to Video, Product Sample to Video, Text to Video, Text to Speech, UGC Avatars, Video Enhancer, and Object Remover when you need product-focused clips, ad-ready output, narration, cleaner footage, and repeatable marketing workflows.

VidAU workflow

Where VidAU fits beside raw image-to-video generators

  1. Use WAN 2.1 for raw free clips: Choose WAN 2.1 when you want no-cost, no-watermark image-to-video output and you have the GPU for local setup.
  2. Try browser tools for speed: Choose Higgsfield, Runway, Flixier, or VEO 3 when you want fast browser-based clips and accept credits, plans, or login limits.
  3. Use VidAU for ad-ready marketing video: Choose VidAU AI Video when the goal is finished marketing video rather than one animated clip.
  4. Turn product assets into campaign content: Use Product Sample to Video and URL to Video when product images or URLs need to become short ad creatives.
  5. Add voice, people, and cleanup: Use Text to Speech for narration, UGC Avatars for spokesperson content, Video Enhancer for soft clips, and Object Remover when distracting elements need cleanup.

What Are the Technical Requirements and Ease of Use for Each Tool?

Technical requirements vary widely, and this is where most creators choose wrong. Local tools like WAN 2.1 need real GPU power, while browser tools need almost nothing beyond a stable connection.

  • WAN 2.1: needs roughly an 8GB GPU and a Windows setup through Pinokio. Higher skill, zero cost.
  • Higgsfield and Runway: run in the browser, low technical barrier, paid plans.
  • Google VEO 3: browser-based, quality is strong, access methods shift over time.
  • Flixier: browser-based, beginner-friendly, login needed to download.
  • VidAU: browser-based, built for ad workflows, no local hardware needed.

My general read: if you are comfortable installing software and have the GPU, WAN 2.1 gives the best cost-to-output ratio. If you want to start in five minutes, pick a browser tool and accept the trade-off of credits or watermarks on free tiers.

ToolTechnical RequirementEase of Use
WAN 2.1Roughly an 8GB GPU and Windows setup through PinokioHigher skill, zero cost
HiggsfieldBrowser-basedLow technical barrier, paid plans
RunwayBrowser-basedLow technical barrier, paid plans
Google VEO 3Browser-based with shifting access methodsStrong quality, access varies
FlixierBrowser-basedBeginner-friendly, login needed to download
VidAUBrowser-based, no local hardware neededBuilt for ad workflows

Tip

Choose WAN 2.1 when your hardware and patience can support local setup. Choose browser tools when speed matters more than unlimited free generations.

What Common Mistakes Do Creators Make With Image to Video Tools?

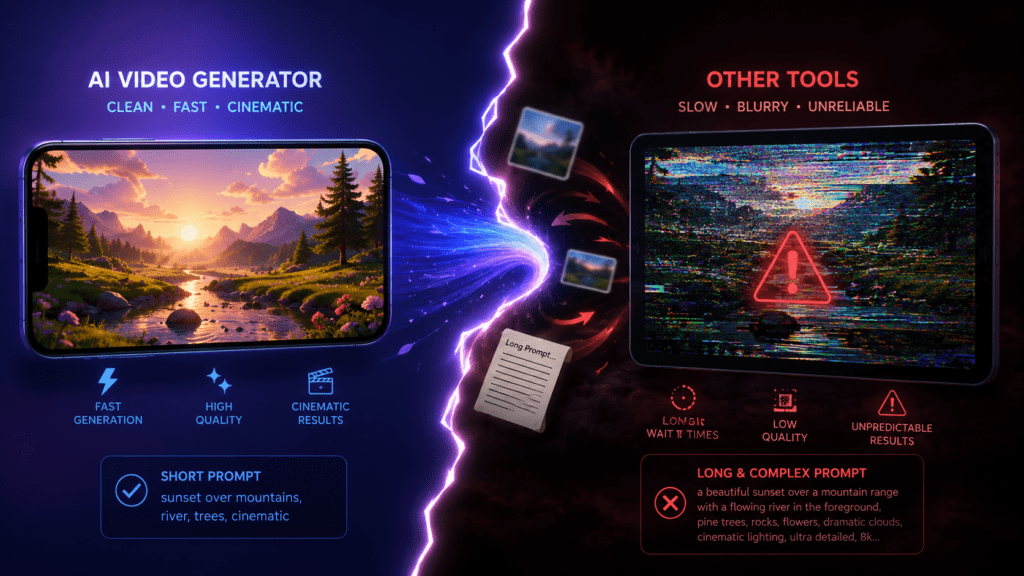
The most common mistake is writing vague prompts. Image-to-video models need motion direction, not just a scene description. Tell the tool what moves, what stays still, and how the camera should behave.

Other frequent issues:

  • Ignoring hardware limits, then blaming the model when WAN 2.1 fails on a weak GPU.
  • Expecting long clips. Most tools generate short segments, so plan to stitch them in an editor.
  • Using busy source images. Clean, single-subject images animate more reliably.
  • Skipping resolution and inference-step settings, which directly affect quality and render time.
  • Relying on congested free Hugging Face spaces during peak hours, then assuming the tool is broken.

If your clips look soft after generation, run them through a video enhancer (https://www.vidau.ai/vidau-video-enhancer/) or remove distracting elements with an object remover (https://www.vidau.ai/object-remover/) before final export.

Watch out

Do not write vague prompts, ignore GPU limits, expect long clips from short-video models, use overly busy source images, skip resolution settings, or rely on congested hosted spaces as if they were always stable.

How Do You Choose the Right Tool for Your Workflow?

Choose based on three factors: budget, hardware, and output type. There is no single best image to video ai generator for everyone, so match the tool to the job in front of you.

If you want free and unlimited and you have a capable GPU, install WAN 2.1. If you want fast cinematic clips and do not mind paying, use Higgsfield or Runway. If you are producing repeated marketing videos from products, a workflow platform saves more time than a raw model.

For scripted clips, text to video (https://www.vidau.ai/text-to-video/) tools pair well with image-to-video output, and text to speech (https://www.vidau.ai/vidau-text-to-speech/) can add narration without recording. The point is to build a short pipeline rather than expect one tool to do everything.

Tip

Pick by budget, hardware, and output type. Free local generation, fast browser generation, and finished marketing-video workflows solve different problems.

Key takeaway

Final Thoughts

For 2025, WAN 2.1 is the clear free leader if you can meet the 8GB GPU requirement and handle a short setup through Pinokio. For instant, no-install work, Higgsfield, Runway, Flixier, and VEO 3 cover most browser-based needs, each with its own cost and quality trade-offs.

If your real goal is finished marketing video rather than a single animated image, start with a workflow built for it. Try VidAU AI Video (https://www.vidau.ai/vidau-ai-video/) to turn product images or URLs into ad-ready clips, then reach for a dedicated image-to-video model when you need a specific cinematic shot.

FAQ

Here are answers to common questions about the best AI image to video generator tools, WAN 2.1, image to video AI without login, browser-based generators, watermarks, clip length, product video workflows, and hardware requirements.

What is the best image to video AI generator in 2025?

For free use, WAN 2.1 is the strongest image to video AI generator in 2025 because it is open-source, watermark-free, and supports both image and text input. For browser-based work, Higgsfield, Runway, and Google VEO 3 are top picks, with the right choice depending on budget and hardware.

Is WAN 2.1 image to video really free?

Yes, WAN 2.1 image to video is free and open-source. You can install it locally through Pinokio AI at no cost and generate clips without watermarks or credits. You only need suitable hardware, ideally an 8GB GPU, and some patience during the initial setup process.

Can I use an image to video AI without login?

Truly no-login video tools are rare because rendering is resource-heavy. WAN 2.1 run locally is the closest to login-free unlimited use after install. Browser tools like Flixier let you start instantly but usually require an account before you can download or save your finished clip.

What hardware do I need to run WAN 2.1?

WAN 2.1 runs best with at least an 8GB GPU, a requirement noted across multiple recent install guides. Windows is the most documented setup path through Pinokio AI. Lower-spec machines may face slow renders or failed generations, so check your GPU before installing the model locally.

Do free AI image to video generators add watermarks?

It depends on the tool. WAN 2.1 produces watermark-free output since it runs on your own machine. Many browser-based free tiers add watermarks or restrict downloads until you upgrade. Always check the free plan terms before relying on a tool for client or commercial content.

How long are clips from AI image to video tools?

Most AI image to video tools generate short clips, often around 3 to 5 seconds per render. For longer videos, you generate several clips and stitch them together in an editor. Planning your shots in short segments leads to cleaner, more controllable results than expecting one long output.

Which AI image to video tool is best for product videos?

For product and B-roll, Higgsfield AI is strong thanks to its cinematic effects, and platforms built for ads can speed up repeated work. VidAU AI focuses on turning product URLs, images, or scripts into video ads, which suits eCommerce marketers who need finished, ad-ready output rather than single clips.

Can AI turn any photo into a good video?

Not every photo works well. Clean, single-subject images with clear lighting animate more reliably than busy or cluttered scenes. Prompts that describe motion, camera movement, and what should stay static produce better results. Low-resolution or crowded source images often lead to distorted or unstable generated motion.

Video Text Removal · Mobile & Desktop Methods

How to Remove Text from Video: 5 Easy Methods (Mobile & Desktop)

Learn five practical ways to remove unwanted text, captions, watermarks, and logos from video using CapCut, InShot, Canva, AI video text remover tools, and Adobe After Effects.

By the VidAU Editorial Team · Video editing guide · 13 min read

Struggling to remove unwanted text from your videos using just your phone? You can erase captions, watermarks, and logos with free mobile apps like CapCut and InShot in minutes.

You can remove text from video using free mobile apps like CapCut and InShot, online tools like Canva, AI watermark removers, or desktop software like Adobe After Effects. The fastest method for most creators is the duplicate-and-mask technique in CapCut on mobile, which covers text by blending a clean section of the same footage over it. This guide walks through five practical methods step by step.

This tutorial is built for content creators, social media users, and beginner-to-intermediate video editors who want accessible options without expensive software. We tested the most-viewed mobile and desktop approaches and ranked them by speed, quality, and difficulty so you can pick the right one for your clip.

Quick Summary

  • The CapCut mobile duplicate-and-mask method is the most reliable free way to remove text from video without watermarks on a phone.
  • InShot and Canva work well for quick crop, blur, or overlay fixes when text sits near a video edge.
  • Masking covers text while content-aware fill in After Effects actually removes and reconstructs the background, which matters for text in busy scenes.
  • Beginners editing 9:16 social clips benefit most from mobile masking, while complex footage with moving text needs desktop tools.
remove text from video

What Is Removing Text from Video?

Removing text from video means deleting or hiding unwanted on-screen elements like captions, watermarks, logos, or burned-in subtitles. Most free methods do not truly erase text; they cover it using a mask, overlay, or crop. True removal, which reconstructs the background behind the text, requires AI tools or content-aware fill in advanced software.

That distinction matters. A video text remover that masks text works best when the area behind the text is simple, like a solid color or a slow-moving background. A caption remover that crops the frame works when the text sits at the top or bottom edge. Knowing which is which saves time.

Key Takeaways

  • Masking and overlays cover text but do not rebuild the background.
  • Cropping removes text only when it sits near the frame edge.
  • AI and content-aware fill attempt actual removal and reconstruction.

Why Text Position and Background Decide Your Method

The right method depends on where the text sits and what is behind it. We reviewed the highest-viewed text-removal tutorials, and the same pattern shows up: simple backgrounds and edge-positioned text are easy, while text over faces, motion, or detailed scenes is hard.

Use this quick logic before you start:

  • Text near the top or bottom edge: crop or use the overlay-and-mask method.
  • Text on a solid or slow background: duplicate-and-mask in CapCut works well.
  • Text over busy or moving backgrounds: use AI tools or After Effects.
  • Watermark you do not have rights to remove: stop and check copyright first.

Set realistic expectations. Basic masking on a phone rarely looks perfectly seamless on complex footage. For clean results on detailed scenes, an AI or desktop method is worth the extra effort.

Copyright warning

If the watermark belongs to content you do not own or have permission to edit, stop and check copyright first. Only edit videos you own or have permission to alter.

Method 1: How to Remove Text from Video in CapCut Mobile

CapCut mobile is the best free starting point because its duplicate-and-mask workflow covers text using a clean copy of the same footage. This is the technique most high-view tutorials rely on, and it works without leaving a watermark.

Here is the step-by-step process:

Step 1: Open CapCut and import your video

Open CapCut and tap New Project, then select your video from the gallery.


Step 2: Add the clip to the timeline

Tap Add to import the clip into the timeline.


Step 3: Duplicate the video layer

Select the video layer, swipe the bottom menu until you find Duplicate, then tap it to create a copy.


Step 4: Turn the duplicate into an overlay

Tap Overlay so the duplicated clip becomes a separate layer above the original.


Step 5: Open the Mask tool

Select the duplicated overlay layer, swipe the menu, and tap Mask.


Step 6: Choose a rectangle mask

Choose the Rectangle mask shape, then size it to match the text you want to cover.


Step 7: Feather the mask

Tap Adjust, select Feather, and increase the feather value so the edges blend softly.


Step 8: Move clean footage over the text

Move the overlay so a clean area of footage sits directly over the text, then confirm with the checkmark.


Step 9: Preview and adjust

Preview the result and nudge the overlay until the covered area looks natural.

Feathering is the step most beginners skip. Without it, you get a hard rectangle outline that screams edit. A soft feather makes the patch blend into the surrounding pixels.

Verdict: Best free mobile method for captions, simple watermarks, and burned-in subtitles on calm backgrounds.

Tip

Do not skip feathering. A soft feather helps the duplicate-and-mask patch blend naturally into the surrounding footage instead of leaving a visible rectangle.

Method 2: How to Remove Text from Video with InShot

InShot is the simplest caption remover for beginners who want a quick fix. It does not have a true content-aware tool, but its crop, sticker, and blur features cover text fast, which is why it appears in so many free tutorials.

Follow these steps:

  1. Open InShot, tap Video, and import your clip.
  2. If the text sits near an edge, tap Canvas or Crop and trim the frame to cut it out.
  3. For text in the middle, tap Sticker or PIP to overlay a matching color block or a clean image patch.
  4. Resize and position the cover so it sits over the text.
  5. Use a slight feather or blur where available so the patch is less obvious.
  6. Export at the highest resolution to avoid quality loss.

Verdict: Great for fast watermark and edge-text cleanup, but covering text in the center looks less natural than CapCut masking. For more on improving exported clips, a video enhancer (https://www.vidau.ai/vidau-video-enhancer/) can sharpen footage that loses quality after heavy editing.

Method 3: How to Use Canva to Crop or Cover Text

Canva works as an online video text remover for users who already create graphics there. It handles text removal through cropping and overlay elements rather than reconstruction, which suits social posts and short clips.

Quick workflow:

  1. Open Canva and start a video project, then upload your clip.
  2. Drag the clip onto the canvas and select it.
  3. Use the crop handles to trim away edge text.
  4. For interior text, add a rectangle element, color-match it to the background, and place it over the text.
  5. Adjust transparency or add a subtle shadow so the cover blends.
  6. Download as MP4.

Verdict: Best when you want text removal plus design edits in one browser tab, especially for marketing graphics and simple backgrounds.

If you create a lot of marketing content, it helps to know where text removal fits in a larger workflow. Tools like VidAU AI Video (https://www.vidau.ai/vidau-ai-video/) can generate fresh ad creatives from a product URL or script, which is sometimes faster than salvaging a cluttered old clip.

Method 4: AI Video Text Remover Tools

AI video text remover tools attempt true removal by analyzing the frame and reconstructing the background behind the text. This is the closest a non-desktop user gets to seamless results, and it shines on backgrounds that are too detailed for masking.

General steps across most AI tools:

  1. Upload your video to the online tool.
  2. Draw a selection box around the text or watermark.
  3. Let the tool process and rebuild the covered area.
  4. Preview and refine the selection if edges look smudged.
  5. Export the cleaned clip.

Tools in this category include HitPaw Video Enhancer and various online AI watermark removers shown in popular tutorials. They handle moving text better than manual masking, though results vary with footage complexity and free tiers often cap resolution or length.

Verdict: Best for text over busy or moving backgrounds when manual masking fails. Set expectations: AI removal can still leave slight artifacts on fast motion.

Mid-article tip

If your goal is producing clean videos rather than fixing damaged ones, generating new footage is often smarter. The URL to Video (https://www.vidau.ai/url-2-video/) and text to video (https://www.vidau.ai/text-to-video/) tools build watermark-free clips from scratch, so you never inherit someone else’s burned-in text.

Method 5: How to Remove Text from Video in After Effects

image
image

Adobe After Effects offers the strongest desktop method through its Content Aware Fill feature, which removes text and reconstructs the background frame by frame. This is for advanced users handling complex footage, not the primary mobile audience.

The core process:

  1. Open your video in After Effects.
  2. Use the pen or rectangle tool to draw a mask around the text you want gone.
  3. Open the Content-Aware Fill panel under Window.
  4. Click Generate Fill Layer so After Effects analyzes surrounding pixels.
  5. Adjust the content-aware settings, including the fill method and range, to reduce flicker.
  6. Render the result and review for artifacts.

Verdict: The highest-quality option for moving text on detailed backgrounds, but it has a steep learning curve and requires a paid subscription. Most social creators do not need it.

Common Mistakes When You Remove Text from Video

Most text-removal problems come from skipping small steps. After reviewing the top tutorials and testing the workflows, these are the errors that ruin results most often:

  • Skipping feathering, which leaves a hard rectangle outline around the patch.
  • Using a mask on a busy background where the cover never blends.
  • Cropping too aggressively and losing important parts of the frame.
  • Expecting basic masking to look seamless on moving footage.
  • Exporting at low resolution, which makes the patched area more visible.
  • Removing watermarks from videos you do not own without checking copyright.

That last point matters. Removing a watermark or text from content you do not have rights to use can violate copyright and fair use. Only edit videos you own or have permission to alter.

Watch out

The biggest mistakes are skipping feathering, masking busy backgrounds, cropping too aggressively, expecting seamless mobile masking on moving footage, exporting at low resolution, and removing watermarks without rights.

Key Takeaways

  • Match the method to text position and background complexity.
  • Always feather mask edges for natural blending.
  • Use AI or After Effects for moving text on busy scenes.
  • Respect copyright when removing watermarks.

Create Clean Video Ads With VidAU

Use VidAU AI Video, URL to Video, Text to Video, and Video Enhancer when you want fresh, watermark-free clips instead of repeatedly patching old footage with burned-in text.

VidAU workflow

When making new video is faster than removing text

  1. Use Video Enhancer after heavy edits: Sharpen footage that loses quality after masking, cropping, overlaying, or repeated exports.
  2. Use URL to Video for fresh ad clips: Build watermark-free videos from product pages instead of salvaging cluttered old footage.
  3. Use Text to Video for clean creative from scratch: Generate new footage from scripts or prompts when burned-in text is too hard to remove cleanly.
  4. Use VidAU AI Video for full ad workflows: Create fresh product ads from URLs, images, or scripts instead of patching someone else’s layout.
  5. Choose the fastest path: If text removal takes more time than rebuilding the clip, generating clean footage is often the smarter workflow.

Key takeaway

Final Thoughts

For most creators, the CapCut mobile duplicate-and-mask method is the fastest free way to remove text from video, with InShot and Canva as quick backups for edge text. When the background is busy or the text moves, step up to an AI tool or After Effects content-aware fill, and always feather your masks for clean results.

If you find yourself repeatedly cleaning up old clips, it is often faster to make new ones. The VidAU AI Video (https://www.vidau.ai/vidau-ai-video/) platform generates video ads from product URLs, images, or scripts in 49 languages, so you start with clean, watermark-free footage instead of patching someone else’s text.

FAQ

Here are answers to common questions about how to remove text from video, free mobile text removal, CapCut masking, InShot, Canva, content-aware fill, AI video text remover tools, watermarks, copyright, quality loss, and when to create clean clips from scratch.

Can I remove text from a video for free on my phone?

Yes. CapCut and InShot both offer free mobile text removal. CapCut’s duplicate-and-mask method covers text without leaving a watermark, while InShot uses crop, sticker, and blur tools. Both work well for captions and simple watermarks, though seamless results depend on the background behind the text.

What is the difference between masking and content-aware fill?

Masking covers text with an overlay or shape but does not rebuild the background, so it works best on simple scenes. Content-aware fill, found in After Effects and AI tools, analyzes surrounding pixels and reconstructs what was behind the text, giving cleaner results on detailed or moving footage.

Why does my removed text still leave a visible box?

A visible box usually means you skipped feathering. Feathering softens the mask edges so the patch blends into the surrounding pixels. Increase the feather value in CapCut’s mask adjustment or add a slight blur in InShot. Exporting at higher resolution also reduces how noticeable the patch looks.

Can I remove text from a video without losing quality?

You can minimize quality loss by exporting at the original or highest available resolution and avoiding repeated re-exports. Masking and overlay methods keep quality intact in the untouched areas. If footage looks degraded after editing, a video enhancer can sharpen the final clip before publishing.

Which app is best to remove captions from videos?

CapCut is the best free caption remover for most users because its masking tool handles burned-in subtitles on calm backgrounds. For captions near the frame edge, InShot’s crop tool is faster. For captions over busy or moving scenes, an AI video text remover or After Effects produces cleaner results.

Is it legal to remove watermarks from videos?

It depends on ownership. Removing watermarks or text from videos you created or have permission to edit is fine. Removing watermarks from content you do not own can violate copyright and fair use rules. Always confirm you have the rights before editing or republishing any video.

How do AI tools remove text from video?

AI video text remover tools let you draw a box around the text, then analyze surrounding frames to rebuild the background behind it. They handle moving text better than manual masking. Results vary with footage complexity, and free tiers often limit resolution, length, or output quality.

Do I need After Effects to remove text from video?

No. After Effects offers the highest-quality removal through content-aware fill, but it requires a paid subscription and has a learning curve. Most social creators get good results with free mobile apps like CapCut or with online AI tools, reserving After Effects for complex, moving text on detailed backgrounds.

What is the fastest way to remove a watermark from a video?

For a watermark near the edge, cropping in InShot or Canva is fastest. For a centered watermark, the CapCut overlay-and-mask method is quick and free. For watermarks over busy footage, an AI watermark remover gives the cleanest one-click result, though it may cap resolution on free plans.

Can I avoid removing text altogether?

Yes. Instead of patching old clips, you can generate clean footage from scratch using text-to-video or URL-to-video tools, which produce watermark-free output. This is often faster than fixing cluttered videos and avoids the artifacts that masking and AI removal can leave behind on complex backgrounds.

Vidnoz AI Image to Video · Free Photo Animation Workflow

Vidnoz AI Image to Video: Turn Photos into Stunning Videos for Free

Learn how Vidnoz AI Image to Video converts static photos into short animated clips using models like Kling, Ultra, and Runway, with practical workflows for real photos, cartoons, low-resolution images, animals, and social video.

By the VidAU Editorial Team · AI image-to-video guide · 12 min read

Vidnoz AI Image to Video converts a static photo into a short animated clip in one click, and the free tier lets you generate roughly 5 to 8 videos a day without editing skills.

Vidnoz AI Image to Video converts a static photo into a short animated video in one click, and the free tier gives you roughly 5 to 8 video generations per day. You upload an image, pick an AI model like Kling or Ultra, add a short prompt if you want, and the tool animates the scene. No timeline editing or motion graphics skills are needed.

This guide is for content creators, social media marketers, and beginners who want to animate photos without learning editing software. I reviewed the available Vidnoz tutorials and model tests to map a realistic workflow, including which model fits real photos, cartoons, low-resolution images, and animals.

Quick Summary

  • Vidnoz AI Image to Video animates a still photo in one click using models like Kling, Runway, and Ultra, with about 5 to 8 free generations daily.
  • The Kling model targets high-precision facial animation and lip-sync, while the Ultra model adds more expression range and control for emotional delivery.
  • Results vary by input quality, so high-resolution photos animate more cleanly than low-res or heavily stylized images.
  • Creators, social marketers, and non-editors benefit most, especially for short vertical clips like reels, TikToks, and YouTube Shorts.
vidnoz ai

What Is Vidnoz AI Image to Video?

Vidnoz AI Image to Video is a free AI video generator that turns a single static image into a short animated clip. The AI analyzes the photo, infers motion, and produces movement such as facial animation, gentle camera drift, or scene action based on your selected model and optional text prompt.

The tool sits inside Vidnoz AI’s broader suite, which also includes talking photo avatars and text to video. For this guide, the focus stays on photo animation specifically, not the full avatar feature set.

Key Takeaways

  • The vidnoz image to video ai workflow is upload, choose model, prompt, generate.
  • Free users get about 5 to 8 daily generations, useful for quick social testing.
  • Output realism depends on the model and the quality of your source image.

Who This Vidnoz Image to Video Tool Is For

This vidnoz ai photo to video tool fits people who need short animated clips fast and do not want to learn editing software. It works well for:

  • Content creators making reels, Shorts, and TikTok clips
  • Social media marketers testing creative hooks
  • Beginners animating old or AI-generated photos
  • Hobbyists reviving still images into moving scenes

It is less suited to long-form video, precise frame control, or fully branded product ads. For those, a dedicated video platform makes more sense, which I cover near the end.

Important limitation

Vidnoz AI Image to Video is useful for fast single-photo animation, but it is less suited to long-form video, precise frame control, or fully branded product ads.

How to Use Vidnoz AI Image to Video Step by Step

Here is the full vidnoz image to video workflow, structured like the video tutorials people search for.

Step 1: Open the Image to Video tool

Go to the Vidnoz Image to Video page and sign in. The free plan covers your daily generation quota, so you do not need to pay to test the feature.


Step 2: Upload your photo

Upload a clear, well-lit image. High-resolution photos animate more cleanly. If you only have a low-res or old photo, expect softer motion and occasional distortion around edges.


Step 3: Choose an AI model

Select a model based on your goal. Pick Kling for facial detail and lip-sync accuracy, or Ultra for stronger expression range. Other options like Runway suit broader scene motion.


Step 4: Add a short prompt (optional)

A short prompt guides the motion. For example, a noodle figure dancing on a plate or a monkey vlogger talking to the camera. Keep prompts specific but short for cleaner results.


Step 5: Generate and review

Click generate with one tap. The AI processes the image and returns a short clip. Review the motion, then regenerate with a different model or prompt if the result drifts.


Step 6: Download and post

Export the clip and drop it into your social schedule, or layer it with audio in a separate editor. For voiceover, you can pair it with a text to speech tool (https://www.vidau.ai/vidau-text-to-speech/) before posting.

Tip

Start with a clear, well-lit, high-resolution photo and a short, specific prompt. Then review the first output as a draft before using more of your daily free generations.

How Do the Kling and Ultra Models Compare?

The Kling model focuses on high-precision facial animation with natural details and lip-sync accuracy, while the Ultra model adds more expression and emotional control. Choosing the right one depends on your image type and how much movement you want.

ModelBest ForTrade-off
KlingReal faces, lip-sync, natural detailCan distort heavy stylized art
UltraExpressive, emotional deliveryMore movement may look unnatural
RunwayGeneral scene motionLess facial precision

From reviewing the Vidnoz model tests, the practical takeaway is simple. Use Kling when a human face is the focus, and switch to Ultra when you want more visible emotion or motion in the scene.

Model choice

Use Kling when a human face is the focus. Then, Use Ultra when you want stronger expression or more visible motion. Explore Runway when the goal is broader scene movement rather than facial precision.

Create Video Ads With VidAU

Use VidAU AI Video, URL to Video, Product Sample to Video, Text to Speech, and UGC Avatars when you need scripted product ads, brand control, multilingual output, and repeatable ad-ready video at scale.

VidAU workflow

Where VidAU fits beside Vidnoz AI Image to Video

  1. Use Vidnoz for quick single-photo animation: Upload one image, choose a model, add an optional prompt, and create a short clip for social testing.
  2. Use VidAU for full product ads: Use VidAU AI Video when the project needs scripted product ads, stronger brand direction, or repeatable campaign output.
  3. Turn product pages into video: Use URL to Video when you need to convert a product page into a video instead of animating only one static photo.
  4. Add human-facing ad formats: Use UGC Avatars when the ad needs a spokesperson-style clip rather than image animation alone.
  5. Add audio and localization: Use Text to Speech when your animated clip or product video needs controlled narration before publishing.

Example Workflows by Image Type

The vidnoz ai video generator handles different inputs with different results. Based on the published model tests, here is what to expect.

High-resolution real photos: These animate the most cleanly. Facial movement and lip-sync look natural, so Kling is a safe first choice.

Cartoon and AI-generated images: Results are hit or miss. The model can keep the style or distort details, so test both Kling and Ultra and pick the cleaner output.

Low-resolution and old photos: Useful for reviving family pictures, but motion stays softer and edges can warp. Keep expectations modest and the clip short.

Animals: Pets and creatures, like the monkey vlogger example from creator tests, can animate well for fun viral content, though detail varies by frame.

Image TypeExpected ResultRecommended Approach
High-resolution real photosClean facial movement and natural-looking lip-syncStart with Kling
Cartoon and AI-generated imagesHit-or-miss style preservation; possible detail distortionTest both Kling and Ultra
Low-resolution and old photosSofter motion with possible edge warpingKeep clips short and expectations modest
AnimalsFun viral-style animation with detail variation by frameUse short, specific prompts and review carefully

Key Takeaways

  • Match the model to the input: Kling for faces, Ultra for expression.
  • Sharp source images beat any model choice for clean results.
  • Short, specific prompts reduce weird distortions.

Common Mistakes With the Vidnoz AI Video Generator

Most beginners waste free generations on avoidable errors. Here are the ones I would steer you away from.

  • Uploading blurry or tiny images and expecting clean motion
  • Writing long, conflicting prompts that confuse the model
  • Using one model for every image type instead of testing two
  • Expecting long clips when the tool is built for short outputs
  • Skipping a quick review before downloading the final clip

Results vary by image and model. Treat the first generation as a draft, then refine the prompt or switch models before spending your remaining daily quota.

Watch out

Do not spend free generations on blurry images, long conflicting prompts, the same model for every input, long-clip expectations, or final downloads without reviewing the animation first.

When a Video Ad Platform Fits Better Than a Photo Animator

AI image to video

Vidnoz AI Image to Video is great for animating single photos, but it is not built for full ad production. If you need scripted product ads, brand control, or multilingual output, a dedicated platform fits better.

VidAU is an AI video ad platform that generates video ads from product URLs, images, or scripts in 49 languages. For ecommerce sellers, you can turn a product page into a video with URL to Video (https://www.vidau.ai/url-2-video/), animate product shots through VidAU AI Video (https://www.vidau.ai/vidau-ai-video/), or create spokesperson clips with UGC Avatars (https://www.vidau.ai/ugc-avatars/).

The honest limitation is direction: Vidnoz is the simpler pick for quick single-photo animation, while VidAU is the better fit when you need repeatable, ad-ready video at scale. If you mainly want to test a creative hook from one image, Vidnoz does the job for free.

Workflow NeedBetter FitWhy
Quick single-photo animationVidnoz AI Image to VideoSimple one-click workflow and free daily generations
Testing a creative hook from one imageVidnoz AI Image to VideoFast enough for short social content and free testing
Scripted product adsVidAU AI VideoBuilt for ad-ready output from images, scripts, or product assets
Product page to videoVidAU URL to VideoConverts ecommerce pages into video workflows
Spokesperson-style product clipsVidAU UGC AvatarsCreates human-facing ad formats beyond photo animation
Multilingual ad outputVidAUSupports repeatable video ad production in 49 languages

Tip

Choose Vidnoz when you mainly want to animate one image. Choose VidAU when you need scripted product ads, brand control, multilingual versions, or repeatable ad-ready video at scale.

Key takeaway

Final Thoughts

Vidnoz AI Image to Video is a low-friction way to animate photos without editing skills, and the free daily quota makes it easy to test ideas before committing time. Pick Kling for faces, Ultra for expression, start with high-resolution images, and treat your first output as a draft.

If your goal shifts from animating one photo to producing full product ads in multiple languages, move to a video ad workflow with VidAU AI Video (https://www.vidau.ai/vidau-ai-video/) or convert your store pages directly with URL to Video (https://www.vidau.ai/url-2-video/). Match the tool to the job, and you save both time and generations.

FAQ

Here are answers to common questions about Vidnoz AI Image to Video, the Vidnoz image to video AI workflow, Vidnoz AI photo to video, free daily generations, Kling, Ultra, old photos, cartoons, AI-generated images, video length, editing skills, distortion, and VidAU video ad workflows.

Is Vidnoz AI Image to Video free to use?

Yes, Vidnoz AI Image to Video offers a free tier that allows roughly 5 to 8 video generations per day. You can test models like Kling and Ultra without paying. Daily limits mean you should plan your generations and refine prompts before spending your remaining free quota.

What is the best Vidnoz model for animating faces?

The Kling model is the strongest choice for animating real faces because it targets high-precision facial animation and lip-sync accuracy. For more dramatic expression or emotional delivery, switch to the Ultra model. Test both on the same photo and keep whichever output looks most natural for your clip.

Can Vidnoz AI photo to video animate old or low-resolution images?

Yes, but results vary. Low-resolution and old photos can be animated, which is useful for reviving family pictures, yet motion stays softer and edges may warp. For cleaner output, use the highest-resolution version you have and keep the generated clip short to limit visible distortion.

Does Vidnoz image to video work with cartoons and AI-generated images?

It can, though results are inconsistent. Cartoon and AI-generated images sometimes keep their style and sometimes distort details depending on the model. The practical approach is to test both Kling and Ultra on the same image, then pick the version that preserves the look you want.

How long are videos created with the Vidnoz AI video generator?

The tool produces short animated clips rather than long-form videos. It is designed for quick social content such as reels, TikToks, and YouTube Shorts. If you need longer or scripted videos, pair the clip with an editor or use a dedicated text to video or video ad platform instead.

Do I need editing skills to use Vidnoz image to video ai?

No editing skills are required. The workflow is upload a photo, choose a model, add an optional short prompt, then generate with one click. The AI handles the motion automatically, which makes it suitable for beginners, content creators, and social marketers who want fast results without software.

How is Vidnoz different from a video ad platform like VidAU?

Vidnoz focuses on animating single photos quickly and for free. VidAU is an AI video ad platform that builds video ads from product URLs, images, or scripts in 49 languages. Choose Vidnoz for quick photo animation, and VidAU when you need repeatable, ad-ready, multilingual video at scale.

Why does my Vidnoz video look distorted?

Distortion usually comes from a low-quality source image, a stylized input the model struggles with, or a long, conflicting prompt. Upload a sharp, well-lit photo, write a short specific prompt, and try a different model. Treat the first generation as a draft and refine before using more daily credits.

AI Photo Editor · Generative Fill, Upscaling & Object Removal

Best AI Photo Editor in 2026: Top Tools Compared

Compare the best AI photo editor tools for generative fill, object removal, background removal, upscaling, enhancement, fast browser edits, and social media content workflows.

By the VidAU Editorial Team · AI photo editing guide · 13 min read

The best AI photo editor depends less on a feature checklist and more on how you actually work, whether that is precise object removal, fast enhancement, or quick social posts.

The best AI photo editor in 2026 isn’t a single winner. It’s the tool that fits how you work. Adobe Photoshop leads on precision and generative fill, Topaz Photo AI handles enhancement and upscaling, and Pixlr covers fast browser-based edits. Your right pick depends on whether you need detailed retouching, quick fixes, or social-ready output.

This guide is for photographers, content creators, social media managers, and hobbyists who feel buried under too many AI options. I reviewed and analysed the most-watched tool comparisons and tutorials to map each editor to a specific use case, so you can choose by workflow instead of by feature list.

Quick Summary

  • Adobe Photoshop with generative fill is the best AI photo editor for precision edits, object removal, and complex compositing in 2026.
  • Topaz Photo AI is the strongest alternative for enhancement, denoising, and image upscaling on existing photos.
  • Generative fill output caps near 1024px on the long edge, so selection size and prompt quality directly affect resolution and realism.
  • Hobbyists and social media managers benefit most from browser tools like Pixlr or Canva Magic Eraser that need no software installation.
best ai photo editor

What Is an AI Photo Editor?

An AI photo editor is software that uses machine learning to edit images through tasks like generative fill, object removal, background removal, enhancement, and upscaling. Instead of manual masking and cloning, you describe a change or click an area, and the tool generates or repairs pixels automatically.

These tools fall into three rough groups: precision editors like Adobe Photoshop, enhancement specialists like Topaz Photo AI, and fast accessible editors like Pixlr and Canva. The category also overlaps with generation tools such as Adobe Firefly, which create new imagery rather than only editing existing photos.

Key definition

An AI photo editor uses machine learning to handle tasks such as generative fill, object removal, background removal, enhancement, and upscaling, replacing many manual masking, cloning, and retouching steps.

Why the Right AI Photo Editor Matters for Your Workflow

The right AI photo editor saves hours and protects image quality. The wrong one forces you to fight the software or accept soft, artifact-heavy results. A professional retoucher and a social media manager need very different things, and picking by hype usually leads to overpaying or under-delivering.

In my review of the top tool comparisons, the clearest trend is the shift from feature lists toward workflow fit. The strongest 2026 content shows creators chaining tools together, ideating in one app, editing in another, and publishing in a third, rather than expecting one editor to do everything well.

Key Takeaways

  • Choose your AI photo editor by primary task: precision, enhancement, or speed.
  • No single tool wins for every creator or budget.
  • Workflow integration matters more than raw feature count.

Best AI Photo Editor Tools Compared by Use Case

best ai photo editor

Here is how the leading tools map to real jobs. Each gets a short verdict so you can match it to your needs.

Adobe Photoshop (Best for precision and generative fill)

Photoshop remains the standard for detailed editing, layered compositing, and generative fill powered by Adobe Firefly. You can remove objects, extend backgrounds, and replace elements with text prompts, then refine with traditional tools. A newer reference image feature lets you guide generative fill with an image instead of words, which improves consistency for clothing swaps and object placement.

Verdict: Best for professionals and serious hobbyists who want full control.

Topaz Photo AI (Best AI photo enhancer and upscaler)

Topaz Photo AI focuses on enhancement, denoising, sharpening, and image upscaling. It’s the tool I’d reach for when a photo is technically weak but otherwise good, like a noisy low-light shot or a small file that needs to print large. It does not generate new scenes; it improves what you already have.

Verdict: Best for photographers who need clean, high-resolution output.

Pixlr (Best free browser-based editor)

Pixlr runs in the browser and needs no software installation, which makes it ideal for quick edits on any machine. It covers background removal, basic AI tools, and fast adjustments without a steep learning curve.

Verdict: Best for hobbyists and anyone editing on the go.

Remove.bg (Best dedicated background removal)

Remove.bg does one job well: fast, automatic background removal. It’s useful inside a larger workflow when you need clean cutouts for product images, thumbnails, or composites.

Verdict: Best as a single-purpose background remover.

Canva Magic Eraser (Best for quick social edits)

Canva Magic Eraser lets you brush over unwanted objects and remove them inside Canva’s design environment. It’s not as precise as Photoshop, but for social posts where the image sits inside a layout anyway, it’s quick and good enough.

Verdict: Best for social media managers who design and edit in one place.

Comparison Table

ToolBest Use CaseSkill Level
Adobe PhotoshopPrecision edits, generative fillIntermediate to pro
Topaz Photo AIEnhancement and upscalingBeginner to pro
PixlrFast free browser editsBeginner
Remove.bgBackground removal onlyBeginner
Canva Magic EraserQuick social editsBeginner

How to Use Generative Fill Effectively for Object Removal

Generative fill works best when your selection and prompt are precise. The tool reads the area you select, then generates pixels to match the surrounding context, so sloppy selections produce sloppy results. Object removal is one of its most reliable uses, especially for distractions like wires, people, or signs.

Follow these steps:

Step 1: Make a clean selection slightly larger than the object you want gone.


Step 2: Leave the prompt empty to remove and fill with background, or type a short prompt to replace it.


Step 3: Generate several variations and pick the cleanest blend.


Step 4: Refine edges with a layer mask or a second small selection if seams appear.

For replacement rather than removal, keep prompts specific. “Wooden park bench, daytime” beats “a bench.” The reference image feature can also guide the fill when wording fails to capture a look, which is one of the more useful recent advances.

Tip

For removal, a clean selection slightly larger than the object usually works best. For replacement, short specific prompts produce better results than vague labels.

Resolution Limits and Practical Workarounds

Generative fill in Photoshop outputs roughly 1024px on the long edge of the selection, then scales it to fit. Stretch that fill across a large area and you’ll see softness or pixelation. This is the single biggest limitation creators run into, and it’s fixable.

Workarounds that hold up in practice:

  • Keep selections close to 1024px so the fill stays sharp.
  • Generate large areas in smaller sections rather than one big fill.
  • Expand the canvas in steps for generative expand instead of one huge crop.
  • Send the final image through Topaz Photo AI to upscale and recover detail.

This is where most people waste time. They fill a huge region, get a soft result, and blame the tool. Working in resolution-appropriate selections solves it.

Key Takeaways

  • Generative fill quality depends on selection size and prompt specificity.
  • Keep fills near 1024px to avoid pixelation.
  • Pair generative fill with an upscaler for large final outputs.

Create With VidAU

After polishing product photos and creative assets, use VidAU AI Image, VidAU AI Video, Product Sample to Video, URL to Video, UGC Avatars, Text to Video, and Object Remover to turn still images into ad-ready video content.

VidAU workflow

Where VidAU fits after AI photo editing

  1. Edit photos first: Use Photoshop, Topaz Photo AI, Pixlr, Remove.bg, or Canva Magic Eraser to clean up product photos, portraits, thumbnails, or social images.
  2. Create new visuals: Use VidAU AI Image when polished assets need creative variations or new visual directions.
  3. Turn images into video: Use VidAU AI Video or Product Sample to Video to move edited product photos into short ad-ready clips.
  4. Build product-led workflows: Use URL to Video when an ecommerce page or product listing needs to become a marketing video.
  5. Add people, scripts, and cleanup: Use UGC Avatars for presenter-led content, Text to Video for script-based video, and Object Remover when a clip needs video-level cleanup instead of photo editing.

Platform and Skill-Level Recommendations

Your best AI photo editor shifts with your platform and experience. Beginners and browser-only users get the most from Pixlr and Canva Magic Eraser. Professionals who need layered control should stay in Photoshop, often paired with Lightroom for fast batch enhancement and Adobe Express for social-ready exports.

The Adobe ecosystem is worth calling out as a complete workflow option: Firefly for ideation, Photoshop for precision, Lightroom for quick enhancement and retouching, and Express for publishing. If you already pay for that suite, it covers most needs without adding new tools. The trade-off is cost and a learning curve that casual users may not want.

User TypeBest FitWhy
BeginnersPixlr or Canva Magic EraserEasy, browser-based, and useful for common edits without a steep learning curve.
Browser-only usersPixlr, Canva Magic Eraser, Remove.bgNo software installation is needed for background removal, quick cleanup, or social edits.
Professional retouchersAdobe PhotoshopLayered control, precision edits, generative fill, and advanced compositing.
Photographers needing better qualityTopaz Photo AIEnhancement, denoising, sharpening, and upscaling existing photos.
Adobe suite usersFirefly, Photoshop, Lightroom, ExpressFull workflow from ideation to precision editing, enhancement, and publishing.

Tip

Beginners should start with browser tools. Professionals who need layers, compositing, and precision should stay in Photoshop, often paired with Lightroom and Topaz Photo AI.

Common Mistakes Creators Make With AI Editing

The most common mistake is choosing a tool by its marketing instead of your task. A social media manager rarely needs Photoshop’s full depth, and a retoucher won’t be happy with a simple brush eraser.

Other frequent errors:

  • Selecting too loosely before generative fill, which causes visible seams.
  • Writing vague prompts and expecting consistent results.
  • Filling oversized regions and getting low-resolution output.
  • Skipping a final upscale pass on heavily edited images.
  • Buying a full subscription for occasional edits a free browser tool could handle.

Fix these and most AI editors perform far better than people expect.

Watch out

Do not choose tools by hype, select too loosely, write vague prompts, fill oversized regions, skip upscaling after heavy edits, or buy a full subscription for occasional edits that a free browser tool can handle.

How AI Image and Video Tools Fit a Full Content Workflow

Editing photos is often one step in a larger content pipeline. Once your images are clean, many creators turn them into video ads, product clips, or social content. This is where image and video tools start to overlap.

VidAU is an AI video ad platform that generates video ads from product URLs, images, or scripts in 49 languages. After polishing product photos in your AI editor, you can move them into video with tools like VidAU AI Image (https://www.vidau.ai/vidau-ai-image/) for creative visuals or VidAU AI Video (https://www.vidau.ai/vidau-ai-video/) for ad-ready clips. For eCommerce, the Product Sample to Video (https://www.vidau.ai/product-sample-to-video/) and URL to Video (https://www.vidau.ai/url-2-video/) workflows turn assets into short videos quickly.

VidAU isn’t a photo editor and shouldn’t replace Photoshop or Topaz for detailed retouching. But if your goal is turning edited images into video creatives, UGC Avatars (https://www.vidau.ai/ugc-avatars/) and Text to Video (https://www.vidau.ai/text-to-video/) extend the workflow past the still image. If you only need to remove an object from a clip, the Object Remover (https://www.vidau.ai/object-remover/) handles that for video instead of photos.

Workflow note

VidAU is not a replacement for Photoshop or Topaz Photo AI. It fits after photo editing, when polished still images need to become ad-ready clips, product videos, avatar videos, or social content.

Key takeaway

Final Thoughts

There is no universal best AI photo editor in 2026. Photoshop wins on precision and generative fill, Topaz wins on enhancement and upscaling, and Pixlr or Canva Magic Eraser win on speed and access. Pick the one that matches your main task, then add a second tool only where your primary editor falls short.

If your editing eventually feeds into ads or social video, line up your image tools first, then move polished visuals into video. You can start by turning edited product images into short clips with VidAU AI Video (https://www.vidau.ai/vidau-ai-video/).

FAQ

Here are answers to common questions about the best AI photo editor, generative fill, Photoshop, Topaz Photo AI, Pixlr, Canva Magic Eraser, Remove.bg, object removal, resolution limits, upscaling, beginner tools, and turning edited photos into video.

What is the best AI photo editor in 2026?

The best AI photo editor in 2026 depends on your task. Adobe Photoshop leads for precision edits and generative fill, Topaz Photo AI is best for enhancement and upscaling, and Pixlr or Canva Magic Eraser suit fast, casual edits. Choose by workflow rather than feature count, since no single tool wins for every creator.

Which AI photo editor is best for generative fill?

Adobe Photoshop is the best AI photo editor for generative fill, powered by Adobe Firefly. It supports text prompts, object removal, background extension, and a reference image feature that guides fills with an image. Results depend heavily on clean selections and specific prompts, so technique matters as much as the tool.

What is the resolution limit of generative fill?

Photoshop’s generative fill outputs roughly 1024px on the long edge of your selection, then scales it to fit. Stretching that across a large area causes softness. Keep selections near 1024px, fill large regions in sections, and run the final image through an upscaler like Topaz Photo AI for sharp results.

Is there a good free AI photo editor?

Yes. Pixlr is a strong free, browser-based AI photo editor that needs no software installation and covers background removal and basic AI edits. Remove.bg handles automatic background removal, and Canva Magic Eraser removes objects inside Canva’s design tools, which is convenient for social media managers working in layouts.

What is the best AI photo editor for beginners?

Beginners should start with Pixlr or Canva Magic Eraser. Both are easy to learn, run in the browser, and handle common tasks like background removal and object cleanup without a steep learning curve. They avoid the complexity of Photoshop while still offering useful AI editing features for everyday images.

Can AI photo editors remove objects from photos?

Yes. Most AI photo editors include object removal. Photoshop’s generative fill removes objects and rebuilds the background, Canva Magic Eraser brushes objects away, and dedicated tools handle backgrounds. For best results, select slightly larger than the object and generate a few variations, then clean up any visible edges or seams.

How do I get sharper results from generative fill?

Make clean selections close to 1024px, write specific prompts, and generate several variations. Fill large areas in smaller sections rather than one stretch, use generative expand in steps, and finish with an upscaler like Topaz Photo AI. Selection quality and prompt detail control most of the final sharpness.

Should I use one AI photo editor or several?

Most creators use several. A common workflow pairs Photoshop or Pixlr for editing with Topaz Photo AI for enhancement and upscaling. The Adobe ecosystem of Firefly, Photoshop, Lightroom, and Express covers ideation to publishing. Use one primary editor for your main task and add tools only where it falls short.

Can I turn edited photos into video?

Yes. After editing photos, you can move them into AI video tools to create ads or social clips. Platforms like VidAU generate video from images, product URLs, or scripts. This works well for eCommerce and marketing, though a video tool is not a replacement for a dedicated photo editor.

Free AI Video Generator Like Sora · Image to Video Tools

Best Free AI Video Generator Like Sora: Image to Video

Compare free Sora-style AI video generators for image-to-video, cinematic clips, Shorts, Reels, TikTok content, and budget-friendly creator workflows.

By the VidAU Editorial Team · Free AI video generator guide · 13 min read

Video content is everywhere, and creators want tools that match Sora’s quality without the paywall. If you want a free AI video generator like Sora, the strongest current options are Google Veo 3 access points, Seedance models through BytePlus, Higgsfield, and Qwen, with each handling image-to-video and text-to-video differently.

This guide compares the best free AI video generators that animate images into video, with honest notes on limits and workflows. Sora itself is hard to access directly, so this guide focuses on Sora-style alternatives that animate images and generate clips without a paid subscription.

This comparison is for content creators, YouTube automation channels, and social media marketers who make Shorts, Reels, and TikToks on a budget. We tested workflows across more than 30 models and kept the tools worth your time, with clear notes on free credits, output limits, and where each one fits best.

Quick Summary

  • Google Veo 3 via Google Vids and free access points is the most beginner-friendly free way to animate an image into cinematic video with built-in editing.
  • Seedance models through BytePlus are the best free option for image-to-video control, start-and-end-frame animation, and AI video with sound.
  • Most free tools run on credit pools that refresh over time, so use draft mode and image-to-video first to avoid wasting generations.
  • YouTube creators making Shorts, Reels, and TikTok content benefit most, especially when they start from a strong image in 9:16 or 16:9.
image

What Is an AI Video Generator Like Sora?

An AI video generator like Sora is a tool that creates video clips from text prompts or still images using a generative model, producing motion, camera movement, and sometimes sound without filming anything. Sora is OpenAI’s video model, but most creators can’t access it freely, so they rely on Sora-style alternatives.

These tools split into two core workflows. Text-to-video turns a written prompt into a clip. Image-to-video animates a photo or generated image, which gives you far more control over the look, character, and framing of the final shot.

When I reviewed the most-shared 2026 tutorials, the pattern was clear: creators who start from an image get more consistent, usable results than those relying on text prompts alone. That’s why image-to-video is the central workflow in this guide.

Key definition

An AI video generator like Sora creates video clips from text prompts or still images, producing motion, camera movement, and sometimes sound without filming, while Sora-style alternatives offer similar workflows when direct Sora access is limited.

Why Free Image-to-Video Tools Matter for Creators

Free image-to-video tools matter because paid AI video subscriptions add up fast, especially when you publish daily. A short-form creator can burn through credits in a single afternoon, and most premium plans charge per generation or per second of output.

The shift in recent content is away from paid-only tools and toward free or generous-credit alternatives. The strongest video titles from May and June 2026 repeat the same promise: free and unlimited generation, no watermark, and image-to-video control.

Here’s the honest part. Nothing online is permanently free or truly unlimited. These platforms change pricing, free credits, watermark rules, and commercial terms often, so always check the current terms before using a clip in a real project.

Key Takeaways

  • Image-to-video gives more control than text-to-video for consistent results.
  • Free tools run on credit systems, not endless generation.
  • Always verify current pricing, watermark, and commercial-use rules before publishing.

Best Free AI Video Generators Like Sora Compared by Use Case

The best free AI video generator like Sora depends on whether you need beginner-friendly editing, fine image-to-video control, or higher cinematic quality. Below is how the top free and freemium tools compare based on our review of current creator workflows.

ToolBest ForKey Trade-Off
Google Veo 3 / Google VidsBeginners animating images with editingAccess and credits vary by account
Seedance via BytePlusImage-to-video control and soundSeparate free credit pools to manage
HiggsfieldCinematic shots and ad-style videoSponsored positioning, paid tiers exist
QwenFree image generation plus video attemptsLimited free video generations
Luma AI / Runway MLPolished image-to-video clipsFree credits run out quickly

Google Veo 3 and Google Vids

Google Veo 3 paired with Google Vids is the easiest free route for animating an image into video directly in a browser. You upload an image, choose an aspect ratio, use the animate-an-image feature, and write a motion prompt. Google Vids also lets you add AI voiceovers, captions, and music, then export an MP4.

Verdict: best starting point for creators who want one tool that animates and edits.

Seedance via BytePlus

Seedance models accessed through BytePlus offer the strongest free image-to-video control, including start-and-end-frame animation, draft mode, and AI video with sound. The separate free credit pools help you keep creating longer if you manage them well.

Verdict: best free pick for creators who want more control over motion and framing.

Higgsfield

Higgsfield is built for cinematic AI video and ad-style content, and Seedance 2.0 runs well inside it for higher-quality shots. It appears as a sponsored tool across many creator videos, so weigh that when you read claims. It has paid tiers, but it’s useful when you need premium-looking results.

Verdict: strong for cinematic and marketing video, with paid options beyond the free tier.

Qwen

Qwen looks like a chatbot but hides creator modes for images and video. You can build a prompt, generate a 16:9 image, then turn it into a clip. The real limit is the small number of free video generations, so use them carefully.

Verdict: useful free combo for image plus occasional video, not heavy output.

Luma AI and Runway ML

Luma AI and Runway ML both produce polished image-to-video clips and offer free credits to start. They’re reliable for quality but run out fast, which makes them better for hero shots than daily volume.

Verdict: good for a few high-quality clips, not bulk production.

If your goal is video ads from product images or URLs rather than open-ended cinematic clips, a marketing-focused platform may fit better. VidAU is an AI video ad platform that generates video ads from product URLs, images, or scripts in 49 languages. You can explore the VidAU AI Video (https://www.vidau.ai/vidau-ai-video/) workflow or the Product Sample to Video (https://www.vidau.ai/product-sample-to-video/) tool when the output needs to convert, not just look cinematic.

Create Clips With VidAU

Use VidAU AI Video, Product Sample to Video, Text to Video, Object Remover, Video Enhancer, UGC Avatars, URL to Video, and Vid Remix when you need image-to-video ads, product clips, voice-ready creatives, and scalable campaign workflows.

VidAU workflow

Where VidAU fits beside free Sora-style tools

  1. Use Google Veo 3 and Google Vids for beginner-friendly image animation: This route fits creators who want browser-based animation, editing, voiceovers, captions, music, and MP4 export in one place.
  2. Use Seedance via BytePlus for more motion control: This route fits creators who need start-and-end-frame animation, draft mode, AI video with sound, and separate credit pools.
  3. Use Higgsfield, Luma AI, and Runway ML for cinematic clips: These tools fit creators who need higher-quality hero shots, cinematic motion, and polished image-to-video output.
  4. Use Qwen for occasional free image plus video workflows: Qwen fits creators who want to generate an image and attempt a video clip, but not heavy daily output.
  5. Use VidAU for conversion-focused video ads: VidAU fits marketers who need product images, URLs, or scripts turned into ad-ready clips rather than open-ended cinematic experiments.

How to Animate a Photo Into Video Step by Step

image
image

To animate a photo into video with a free AI tool, start with a strong image, pick the right aspect ratio, write a clear motion prompt, test in draft mode, then generate the final clip. This image-to-video workflow gives you more control than text-to-video alone.

Step 1: Choose or generate a clean base image with the subject clearly framed.


Step 2: Set the aspect ratio first.

Use 9:16 for Shorts, Reels, and TikTok, or 16:9 for YouTube.


Step 3: Open the animate-an-image or image-to-video feature in your chosen tool.


Step 4: Write a short motion prompt describing camera movement, subject action, and mood.


Step 5: Run a draft or low-credit version to check the motion before spending more credits.


Step 6: Generate the final clip, then add voiceover, captions, and music if the tool supports it.

For narration, you can pair the clip with a separate voice tool like Text to Speech if your generator lacks built-in audio. To clean up an early frame before animating, an Object Remover (https://www.vidau.ai/object-remover/) helps remove distractions that would otherwise carry into the video.

Tip

Run a draft or low-credit version before generating the final clip. This protects free credits and lets you fix weak motion before committing to a higher-quality render.

Platform-Specific Optimization for Shorts, Reels, and TikTok

The biggest optimization for short-form is locking the aspect ratio before you generate, because re-rendering in the wrong frame wastes free credits. Vertical 9:16 is the standard for Shorts, Reels, and TikTok, while 16:9 suits YouTube long-form and image-to-video that you’ll repurpose.

Keep clips short. Most free generators cap clip length, so plan 3 to 8 second shots and stitch them in an editor. Add captions and a hook in the first second, since short-form viewers decide fast.

If you publish across platforms, generate one master clip, then resize and recut rather than regenerating. To improve a soft or low-resolution output before posting, a Video Enhancer (https://www.vidau.ai/vidau-video-enhancer/) can sharpen the final file.

PlatformRecommended SetupPractical Note
YouTube Shorts9:16 verticalSet aspect ratio before generation and add a hook in the first second.
Instagram Reels9:16 verticalUse short 3 to 8 second shots and captions for fast viewing.
TikTok9:16 verticalGenerate vertical from the start instead of cropping later.
YouTube long-form16:9 horizontalUse 16:9 for clips you will repurpose or stitch into longer videos.
Cross-platform publishingOne master clip, then resize and recutResize and recut instead of regenerating per platform to save credits.

Tip

Set 9:16 before generating Shorts, Reels, and TikToks. Re-rendering or cropping after generation wastes free credits and can weaken framing.

Common Mistakes Creators Make With Free AI Video Tools

The most common mistake is generating full clips before testing, which burns free credits on results you won’t use. Run draft mode or a quick low-quality pass first, then commit credits to the version that works.

Other frequent errors:

  • Relying only on text-to-video when image-to-video gives more control.
  • Ignoring aspect ratio until after generation.
  • Writing vague prompts with no camera or motion direction.
  • Assuming a tool stays free, unlimited, or watermark-free forever.
  • Publishing commercially without checking the platform’s license terms.

That last point matters. Free access, credits, and commercial-use rights change often, and several of these tools shift their terms with little notice. Always confirm rights before you monetize a clip.

Watch out

Do not generate full clips before testing, rely only on text-to-video, ignore aspect ratio, write vague prompts, assume a tool stays free forever, or publish commercially without checking license terms.

Advanced Strategies for Consistent, Scalable AI Video

The advanced move is building a repeatable pipeline instead of jumping between tools per clip. Start with a strong base image, animate it, keep characters and products consistent across shots, then test variations before publishing.

Use reference elements where a tool supports them to lock a character, product, or location across multiple clips. This keeps a series visually consistent, which matters for branded content and recurring formats.

For higher volume, separate your steps: generate images in one tool, animate in another, and edit in a third. If you’re producing UGC-style ads at scale, dedicated workflows like UGC Avatars (https://www.vidau.ai/ugc-avatars/) or turning a page into a clip with URL to Video (https://www.vidau.ai/url-2-video/) can cut steps. You can also repurpose existing footage with VidAU Vid Remix (https://www.vidau.ai/vid-remix/) when you’d rather remix than start over.

Scaling workflow

  • Start with a strong base image.
  • Animate it with a clear motion prompt.
  • Keep characters and products consistent across shots.
  • Test variations before publishing.
  • Separate image generation, animation, and editing when volume increases.

Key takeaway

Final Thoughts

The best free AI video generator like Sora depends on your goal: Google Veo 3 for easy image animation, Seedance via BytePlus for image-to-video control, and Higgsfield or Luma for cinematic shots. Start with a strong image, set your aspect ratio, test in draft mode, and always confirm current credits and terms before publishing.

Free tools are perfect for experimenting, but they shift fast and rarely guarantee commercial rights. If your real need is conversion-focused video ads from product images, URLs, or scripts, try a marketing-built workflow like Text to Video (https://www.vidau.ai/text-to-video/) and see whether ad-ready output beats open-ended cinematic clips for your campaigns.

FAQ

Here are answers to common questions about free AI video generators like Sora, Sora access, image-to-video apps, animating photos with AI, free credits, Shorts and Reels aspect ratios, commercial use, and why image-to-video often beats text-to-video.

What is the best free AI video generator like Sora?

There is no single winner, but Google Veo 3 through Google Vids is the easiest free way to animate images, while Seedance via BytePlus offers stronger image-to-video control. Higgsfield and Luma AI suit cinematic shots. The best choice depends on whether you want simple editing or fine motion control.

Can I access Sora itself for free?

Direct free access to Sora is not reliable, since OpenAI’s video model has limited and changing availability. Most creators use Sora-style alternatives like Seedance, Google Veo 3, Qwen, or Luma AI that handle text-to-video and image-to-video without a guaranteed Sora account.

What is the best AI app to convert image to video?

For beginners, Google Vids with Veo 3 is a strong image to video generator online because it animates and edits in one browser tab. For more control, Seedance via BytePlus and Luma AI produce polished image-to-video clips, though free credits on these tools run out quickly.

How do I animate a photo into a video with AI?

Upload a clean photo, set the aspect ratio, open the animate-an-image or image-to-video feature, and write a short prompt describing camera movement and motion. Run a draft first to check the result, then generate the final clip and add voiceover, captions, or music.

Are free AI video generators really unlimited?

Rarely. Most run on free credit pools that refresh over time rather than offering true unlimited generation. Tools market themselves as free and unlimited, but limits, watermarks, and pricing change often, so verify the current terms before relying on any tool for important work.

Which aspect ratio should I use for Shorts and Reels?

Use 9:16 vertical for YouTube Shorts, Instagram Reels, and TikTok, and set it before generating to avoid wasting credits on re-renders. Use 16:9 for YouTube long-form. Generating one master clip and resizing later is more efficient than regenerating per platform.

Can I use free AI video clips commercially?

Not always, and you should never assume so. Commercial-use rights, licensing, and watermark rules differ by tool and change frequently. Review each platform’s terms of service and licensing rules before you publish, monetize, or sell any AI-generated video, especially for client or brand work.

Is image-to-video better than text-to-video?

For most creators, yes. Image-to-video gives more control over the subject, framing, and consistency because you start from a fixed image. Text-to-video is faster for quick ideas but less predictable. Many strong workflows generate an image first, then animate it for cleaner results.

AI Video Generator from Image · Veo 3.1, Sora 2, Kling AI & CapCut

AI Video Generator from Image: Turn Static Photos into Moving Videos

Compare the best AI video generator from image tools for cinematic motion, first and last frame control, AI influencers, free social clips, ad-ready workflows, and product video creation.

By the VidAU Editorial Team · Image-to-video AI guide · 13 min read

An AI video generator from image turns a single static photo into a short moving clip by predicting realistic motion, lighting, and camera movement frame by frame.

An AI video generator from image takes a still photo and produces a short animated clip with realistic motion, camera movement, and sometimes audio. The newest models, like Google Veo 3.1 and OpenAI Sora 2, add precise controls such as first and last frame setting, multi-reference inputs, and scene extensions. This guide shows the best tools and the exact workflow to use them.

This article is for content creators, social media managers, marketers, and video producers who want to animate product shots, portraits, or AI influencer images. We compare four leading tools, walk through a step-by-step image-to-video workflow, and flag the common motion and audio issues you will hit in real projects.

Quick Summary

  • Veo 3.1 is the strongest AI video generator from image in 2026, with first/last frame control, multi-reference ingredients, and scene extensions for cinematic results.
  • Sora 2 is the best alternate, offering a Storyboard workflow and clip lengths of 15 seconds for most users and up to 25 seconds on web for Pro.
  • Most tools output short clips around 8 seconds at a time, so plan to extend or stitch frames for longer sequences.
  • Beginners and budget creators benefit most from the free CapCut AI video generator, while Kling AI motion control suits AI influencer and character-consistency work.
ai video generator from image

What Is an AI Video Generator from Image?

An AI video generator from image is a tool that animates a static photo into video by generating new frames that follow the original image. It predicts motion, depth, and camera movement so a single frame becomes a few seconds of believable footage. Some tools add sound, lip-sync, and physics simulation on top.

This is different from text-to-video, which starts from a written prompt with no source image. Image-to-video gives you tighter control over the look because the first frame is fixed. You decide the subject, lighting, and composition, then let the model add motion.

The entities that matter here are clear: the source image, the prompt, motion control, frame extraction, and the output clip. Modern tools like Veo 3.1 also add first frame control, last frame control, and an ingredients feature that lets you combine multiple reference images into one scene.

Key definition

An AI video generator from image animates a static photo by generating new frames that preserve the source image while adding motion, depth, lighting changes, camera movement, and sometimes audio or lip-sync.

Why Image-to-Video Matters for Creators

Image-to-video matters because it lets you reuse assets you already trust. A product photo, a brand poster, or a generated portrait can become motion content without a reshoot. That saves time and keeps your visual identity consistent across clips.

The trend has shifted in the last year. Early AI video was mostly text-to-video, which often produced random faces and shaky composition. Now the focus is precise image-based control. Veo 3.1 and Sora 2 both pushed updates that prioritize control over raw novelty.

For marketers, this is the practical part. You can animate a product sample into a short ad, then localize it for different markets. Tools like VidAU AI Video (https://www.vidau.ai/vidau-ai-video/) and Product Sample to Video (https://www.vidau.ai/product-sample-to-video/) are built around that exact ad workflow, while general models like Veo 3.1 focus on cinematic clips.

Key Takeaways

  • Image-to-video reuses assets you already own, cutting production time.
  • Fixing the first frame gives you control text-to-video cannot match.
  • The current trend favors precise motion and frame control over flashy random output.

Best AI Video Generators from Image Compared

The best AI video generator from image depends on your goal: cinematic quality, character consistency, ad output, or a free starting point. Here is how the leading tools stack up after reviewing recent comparison tests across Veo 3.1, Sora 2, and Kling AI.

VidAU is an AI video ad platform that generates video ads from product URLs, images, or scripts in 49 languages. It fits the marketing use case rather than open-ended cinematic generation, so we treat it as the ad-focused option below.

ToolBest ForNotable Strength
Veo 3.1Cinematic image-to-videoFirst/last frame, ingredients, extensions
Sora 2Story sequencesStoryboard workflow, longer clips
Kling AIAI influencersMotion control and character consistency
CapCutBeginners on a budgetFree AI video maker, fast editing

Veo 3.1

Veo 3.1 is the most complete option for turning images into video. It supports first and last frame control, the ingredients feature for multiple reference images, scene extensions past the base clip, and richer native audio. In our review of recent side-by-side tests, it consistently held motion consistency better than earlier versions like Veo 2.0.

You can use it through Google Labs Flow, plus access points like Higgsfield, ChatLLM, Fal, and Replicate. Flow includes a Prompt-Director style formula covering subject, action, context, motion, style, framing, and audio. Verdict: best for creators who want control and cinematic quality.

Sora 2

Sora 2 is the strongest alternative, especially for multi-shot stories. Its Storyboard update lets you sequence scenes and set manual timing, with clip lengths of 15 seconds for most users and up to 25 seconds on web for Pro accounts via Storyboard. Image-to-video fidelity improved noticeably over the first Sora.

From reviewing comparison tests, Sora 2 often wins on stylized and trend-driven content, while Veo 3.1 edges ahead on realism and audio richness. Verdict: best for narrative sequences and social trends.

Kling AI

Kling AI is the pick for AI influencer and character-consistency work. Its motion control feature lets you drive a generated person with a reference video, which is hard to do cleanly in other tools. One recent free workflow paired Kling AI with Wan Video and Lovart AI to build a consistent AI influencer end to end.

That workflow used frame extraction from a reference clip, then matched pose and outfit to a generated face. Verdict: best for repeatable characters and motion-driven avatars.

CapCut AI Video Generator

The CapCut AI video generator is the accessible free starting point. It automates editing, generates scenes, and adds captions, which suits creators making TikToks, Reels, and faceless YouTube content. It is less about cinematic image-to-video and more about fast, finished social clips.

Verdict: best for beginners and high-volume social posting on a budget.

If your goal is short-form ad creatives rather than open generation, VidAU Vid Remix (https://www.vidau.ai/vid-remix/) and UGC Avatars (https://www.vidau.ai/ugc-avatars/) cover repurposing and spokesperson-style video for campaigns.

Generate Videos Now With VidAU

Use VidAU AI Video, Product Sample to Video, URL to Video, Text to Video, UGC Avatars, Vid Remix, Text to Speech, Video to Audio, Video Enhancer, and Object Remover when you need product videos, ad-ready clips, voiceover, repurposing, and cleanup workflows.

VidAU workflow

Where VidAU fits beside cinematic image-to-video tools

  1. Use Veo 3.1 for cinematic control: Choose Veo 3.1 when you need first and last frame control, ingredients, extensions, and richer native audio for open-ended cinematic clips.
  2. Use Sora 2 for story sequencing: Choose Sora 2 when the project needs Storyboard timing, narrative flow, and stylized or trend-friendly image-to-video output.
  3. Use Kling AI for AI influencers: Choose Kling AI when motion control, character consistency, and reference-video-driven movement matter most.
  4. Use CapCut for free social output: Choose CapCut when you need a beginner-friendly free AI video maker with fast editing, scenes, and captions.
  5. Use VidAU for ad-ready marketing: Choose VidAU AI Video, Product Sample to Video, URL to Video, UGC Avatars, and Vid Remix when the goal is fast multilingual ad creatives rather than open cinematic generation.

Step-by-Step Workflow to Turn an Image into a Video

image to video

The core image-to-video workflow is the same across most tools: prepare a clean image, write a motion prompt, set frame controls, generate, then extend or stitch. Follow these steps in order.

Step 1: Start with a high-quality source image.

Sharp lighting and a clear subject reduce motion artifacts later.


Step 2: Upload the image as your first frame in the tool’s image-to-video mode.


Step 3: Write a motion prompt.

Describe subject, action, camera movement, style, and audio. Keep it specific, not vague.


Step 4: Set first and last frame if the tool supports it, like Veo 3.1, to control where the motion starts and ends.


Step 5: Add reference images if you need extra characters or a location, using the ingredients feature.


Step 6: Generate the clip, usually around 8 seconds, then review for motion consistency and face stability.


Step 7: Extend the scene or save the last frame and feed it back as a new first frame to continue the sequence.

For longer projects, the frame-extraction trick matters. Save the final frame of one clip, then use it as the starting image of the next. This keeps continuity when a single generation runs out of length.

If you want voiceover or narration on top of a silent clip, generate it separately with Text to Speech (https://www.vidau.ai/vidau-text-to-speech/) and sync it during editing. To pull audio from an existing reference video, Video to Audio (https://www.vidau.ai/vidau-video-to-audio/) handles that step.

Tip

For longer sequences, save the final frame of one clip and use it as the first frame of the next. This frame-extraction method keeps continuity when a single generation runs out of length.

How to Use Motion Control for AI Influencers

Motion control lets you drive a generated character with a reference video so the movement looks natural and repeatable. This is the method behind realistic AI influencers, and Kling AI is the tool most creators reach for here.

The practical sequence runs like this. Generate a source face with an image tool such as Lovart AI. Extract motion frames from a reference clip using a frame extractor. Then transform your model image so its pose and outfit match the extracted frame. Finally, run it through Kling AI motion control or Wan Video for the AI motion pass.

Keep lighting consistent across every image, because mismatched light breaks the illusion fast. Focus on expressions, since subtle face movement is what makes a character feel real. Many free workflows finish with a watermark remover step before export.

If you need branded spokesperson video instead of a free-form influencer, UGC Avatars (https://www.vidau.ai/ugc-avatars/) gives a more controlled, ad-ready route.

Motion control note

Motion control works best when lighting, pose, outfit, expression, and reference movement stay consistent. Mismatched light breaks the illusion quickly, especially for AI influencers and generated characters.

Common Mistakes and Output Issues to Avoid

The most common mistake is starting with a low-quality image, which the model amplifies into mushy or jittery motion. A clean, high-resolution first frame prevents most artifacts. Below are the issues that show up most often in real generations.

  • Audio drops during scene extensions. Music and dialogue often cut out when you push past the base clip length.
  • Occlusion handoffs glitch. When an object passes in front of another, models sometimes lose tracking and warp the frame.
  • Not all clips extend. Older clips, including some Veo 2.0 outputs, may refuse to extend cleanly in newer tools.
  • Vague prompts produce random motion. Specify camera movement and action instead of relying on the model to guess.
  • Watermarks on free tools. Some free workflows require a separate watermark removal step before publishing.

The fix for most of these is the frame-save method. When an extension fails or audio drops, save the last good frame and run a fresh frames-to-video pass, then rebuild audio in your editor.

Watch out

Low-quality images, vague prompts, audio drops during extensions, occlusion glitches, failed extensions from older clips, and watermarks on free tools are the most common issues in image-to-video workflows.

Advanced Strategies for Longer, Ad-Ready Video

For longer or ad-ready video, chain short clips with continuity controls rather than trying to force one long generation. The reliable method is to combine first/last frame control with the ingredients feature, then stitch the segments in an editor.

Use a Prompt-Director structure for each clip: subject, action, context, motion, style, framing, and audio. This keeps motion intent clear and reduces wasted credits on bad generations. Borrowing a still from an image tool as a style reference also helps lock the look across clips.

For marketing at scale, the workflow differs. Instead of cinematic shot-by-shot building, ad platforms generate variations from a product input. URL to Video (https://www.vidau.ai/url-2-video/) turns a product page into a video, and Text to Video (https://www.vidau.ai/text-to-video/) builds from a script when you do not have source footage. To clean up imperfect output, Video Enhancer (https://www.vidau.ai/vidau-video-enhancer/) and Object Remover (https://www.vidau.ai/object-remover/) handle quality and cleanup.

One honest limitation: if you need full cinematic control, frame-by-frame motion, or open-ended creative generation, ad-focused platforms are not the right fit. Use Veo 3.1 or Sora 2 for that, and reserve VidAU for fast multilingual ad creatives.

Tip

For longer videos, chain short clips with continuity controls. For ad-ready output, use product-input workflows instead of building every cinematic shot manually.

Key takeaway

Final Thoughts

Turning a static image into video is now a controlled, repeatable process rather than a gamble. Veo 3.1 leads for cinematic image-to-video with strong frame and audio control, Sora 2 wins for story sequences, Kling AI suits AI influencers, and CapCut is the free entry point. Match the tool to your goal, start with a clean source image, and use frame extraction to extend beyond short clips.

If your real goal is short-form video ads from product images or scripts rather than open generation, try VidAU AI Video (https://www.vidau.ai/vidau-ai-video/) to build ad-ready clips in multiple languages from a single asset.

FAQ

Here are answers to common questions about AI video generator from image tools, Veo 3.1, Sora 2, Kling AI, CapCut AI video generator, motion control, AI influencers, clip length, image-to-video artifacts, product ads, and watermark handling.

What is the best AI video generator from image?

Veo 3.1 is currently the strongest AI video generator from image for cinematic results, thanks to first and last frame control, the ingredients multi-reference feature, scene extensions, and richer audio. Sora 2 is the best alternative for story sequences, while CapCut suits beginners who want a free option.

Can I turn a single photo into a video for free?

Yes. The CapCut AI video generator offers free image-to-video and editing for social content. Google Labs Flow also provides limited free Veo 3.1 credits each month, and some Kling AI workflows are free with a separate watermark removal step. Free tiers usually have shorter clips and lower limits.

How long can AI image-to-video clips be?

Most AI tools generate short base clips, often around 8 seconds per generation. Sora 2 supports 15 seconds for most users and up to 25 seconds on web for Pro via Storyboard. For longer video, you extend scenes or save the last frame and start a new clip from it.

What is the difference between Veo 3.1 and Sora 2?

Veo 3.1 generally leads on realism, audio richness, and frame-level control like first/last frame and ingredients. Sora 2 stands out for its Storyboard sequencing and stylized, trend-friendly output. In comparison tests, Veo 3.1 wins for cinematic realism while Sora 2 fits narrative and social trend content better.

How do I make an AI influencer with motion control?

Generate a source face with an image tool, extract motion frames from a reference video, then match your model image pose and outfit to those frames. Run the result through Kling AI motion control or Wan Video for the AI motion pass. Keep lighting consistent and focus on expressions for realism.

Why does my AI video have motion artifacts?

Motion artifacts usually come from a low-quality source image, vague prompts, or hard occlusion moments where one object crosses another. Start with a sharp, well-lit first frame, write a specific motion prompt with camera direction, and use the frame-save method to rebuild any glitched extensions.

Can AI image-to-video work for product ads?

Yes. You can animate a product photo into a short ad clip, then localize it for different markets. General models like Veo 3.1 give cinematic control, while ad-focused platforms such as VidAU generate ad variations from a product URL, image, or script, which is faster for high-volume marketing.

Do I need to remove watermarks from AI videos?

Some free image-to-video workflows add watermarks to exports, so creators often run a separate watermark removal step before publishing. Paid tiers and official tool exports typically allow cleaner output. Always check each tool’s terms before removing watermarks to stay within usage rules.

Talking Avatar AI · Free AI Spokesperson Videos

How to Create a Talking Avatar AI (Free Tools & Step-by-Step Guide)

Learn how to create a talking avatar AI using Canva, HeyGen, and D-ID for faceless videos, tutorials, ads, presentations, social content, and AI spokesperson videos.

By the VidAU Editorial Team · Talking avatar AI guide · 13 min read

Want to produce engaging videos without stepping in front of a camera? You can build a talking avatar ai using free tools and a short script.

You can create a talking avatar ai for free using Canva, HeyGen, and D-ID, without filming yourself or learning video editing. The fastest route for most beginners is Canva’s HeyGen app, which turns a script into a talking head video in minutes. This guide walks through the exact tools and steps to make an AI spokesperson video.

This is written for content creators, YouTubers running faceless channels, educators, marketers, and total beginners. If you have a script and a free Canva account, you have enough to build your first talking avatar today. We’ll cover both ready-made avatars and custom image animation so you can match the method to your goal.

Quick Summary

  • Canva’s HeyGen integration is the easiest free way to make a talking avatar ai from a script, with no editing skills required.
  • D-ID inside Canva is the strongest alternative when you want to animate a custom image or photo into a talking presenter.
  • Most talking avatar videos export best in 16:9 for YouTube and 9:16 for TikTok, Reels, and Shorts, so choose your format before you render.
  • Faceless YouTube creators, educators, and small business owners benefit most because they get on-camera presence without cameras, lighting, or recording.

What Is a Talking Avatar AI?

talking avatar ai

A talking avatar ai is a digital presenter that speaks your script using AI-generated voice and synced facial movement. You type or paste text, choose a voice and avatar, and the tool animates the mouth, head, and expressions to match the audio. The result looks like a person delivering your message on camera.

These tools combine text-to-speech, lip sync, and avatar animation in one workflow. You can use a ready-made AI presenter from a library or upload a photo and turn it into your own digital twin. No filming, no microphone, and no editing timeline required.

Key Takeaways

  • Talking avatars convert a written script into a spoken video.
  • Two main methods exist: ready-made avatars and custom image animation.
  • The core ingredients are an avatar, a voice, and your script.

Why Talking Avatars Matter for Faceless Content and Marketing

Talking avatars matter because they remove the biggest blocker to consistent video: being on camera. Many creators stall on video because filming feels awkward, slow, and expensive. An AI spokesperson lets you publish daily without lighting, retakes, or a studio.

For faceless Youtube channels, avatars add a human presence to otherwise voiceover-only content. For educators, they turn lesson scripts into watchable explainer clips. For marketers and small business owners, a consistent digital presenter keeps branding tight across ads, demos, and social posts.

The 2026 trend in tutorials leans heavily toward free, Canva-based methods because they bundle design and avatar creation in one place. That matters for beginners who don’t want to juggle five tools.

Key Takeaways

  • Talking avatars help creators publish without filming themselves.
  • Faceless YouTube channels, educators, marketers, and small business owners can add a consistent human presenter.
  • Free Canva-based methods matter because design and avatar creation happen in one place.

Step-by-Step Workflow Using Canva and HeyGen

The simplest free method uses Canva’s HeyGen app. Here is the workflow most beginner tutorials follow, kept general so it stays accurate as the interface changes.

Step 1: Create a free Canva account and open a new design in your target size.

Choose a format such as a 16:9 video for YouTube.


Step 2: Open the Apps panel and search for HeyGen.

Add the app to your design.


Step 3: Choose a ready-made avatar from the avatar library.

Pick an avatar that fits your tone and audience.


Step 4: Pick a voice and language.

Paste your script into the text box so the avatar speaks it.


Step 5: Generate the avatar clip.

Wait for the render to finish inside Canva.


Step 6: Drop the talking avatar onto your Canva design.

Add backgrounds, captions, logos, and B-roll.


Step 7: Preview and export your video.

Use the format your platform needs.

Free tiers limit render length and may add a watermark, so keep early scripts short while you test. Once the workflow feels natural, you can plan longer videos in segments.

Tip

Keep early scripts short while you test free render limits. Once the Canva and HeyGen workflow feels natural, plan longer videos in smaller segments.

How to Animate a Custom Image with D-ID

If you want your own face or a custom character to speak, D-ID is the go-to method, and it also runs inside Canva. Instead of choosing a library avatar, you upload an image and the tool animates it to match your script.

  1. Add the D-ID app in Canva or open D-ID directly.
  2. Upload a clear, front-facing image with good lighting and a neutral expression.
  3. Enter your script and select a text-to-speech voice, or upload your own voiceover.
  4. Generate the animation so the image talks with synced mouth movement.
  5. Export and combine the clip with your design, captions, and music.

This path suits creators who want a recognizable digital twin or a branded character. Photo quality drives the result, so a sharp, well-lit image matters more than anything else.

Custom avatar note

D-ID is strongest when you want your own face, a branded character, or a recognizable digital twin. The source image should be clear, front-facing, well-lit, and neutral.

Best Free Talking Avatar Tools Compared by Use Case

Talking avatar ai

I reviewed and analysed the most-watched 2026 tutorials on this topic, and the same three tools appear again and again. Here is how they break down by job.

ToolBest ForMethod
Canva + HeyGenBeginners and faceless YouTubeReady-made avatar plus design
Canva + D-IDCustom face or characterAnimate an uploaded image
HeyGen directBranded spokesperson videosAvatar plus custom branding tools

Canva’s avatar maker (https://www.vidau.ai/ugc-avatars/) workflows win on convenience because design and avatar live together. HeyGen used directly gives more branding control, which suits marketers building product demos. D-ID is the clear pick for custom image animation.

There are other voice and animation engines floating around in older tutorials, including legacy options, but the modern AI spokesperson workflow centers on these three. For voiceover quality, pairing your script with a dedicated text to speech (https://www.vidau.ai/vidau-text-to-speech/) engine can sharpen the audio before you animate.

If your end goal is a polished video ad rather than a single talking clip, this is a good point to widen the toolset. VidAU is an AI video ad platform that generates video ads from product URLs, images, or scripts in 49 languages. Its AI video (https://www.vidau.ai/vidau-ai-video/) and UGC Avatars (https://www.vidau.ai/ugc-avatars/) features cover spokesperson-style ad creatives when a free single-clip tool isn’t enough. The honest trade-off: if you only need one short talking head for a YouTube intro, free Canva methods are simpler and cheaper than an ad platform.

Create Avatars With VidAU

Use VidAU AI Video, UGC Avatars, Text to Speech, URL to Video, Product Sample to Video, and Vid Remix when you need spokesperson-style ads, multilingual avatar videos, product creatives, and scalable brand consistency.

VidAU workflow

Where VidAU fits beside free avatar tools

  1. Use Canva + HeyGen for simple talking heads: Choose this path when you need a quick, free talking avatar from a short script.
  2. Use Canva + D-ID for custom images: Choose this path when you want your own face, digital twin, or branded character to speak.
  3. Use VidAU UGC Avatars for spokesperson-style ads: Choose this path when you need avatar-led product creatives rather than a single intro clip.
  4. Use Text to Speech for stronger voiceover quality: Pair scripts with dedicated voice generation when pacing, tone, or language matters.
  5. Use URL to Video, Product Sample to Video, and Vid Remix for scale: Turn product URLs, product samples, or strong clips into repeatable video creatives across platforms.

Platform-Specific Optimization for YouTube, TikTok, and Presentations

The format you choose changes how your talking avatar ai should be framed and exported. Set this before you render to avoid re-doing work.

  • YouTube: Use 16:9, keep the avatar slightly off-center, and add captions for sound-off viewers.
  • TikTok, Reels, Shorts: Use 9:16, place the avatar in the upper two-thirds, and burn captions in.
  • Presentations and courses: Use 16:9, keep backgrounds clean, and let the avatar deliver one idea per slide.
  • Ads: Test 1:1 and 9:16, keep the hook in the first three seconds, and end with a clear call to action.

For short-form, write tighter scripts. A talking avatar that rambles loses viewers faster than a real presenter would. Aim for one clear point per clip.

Platform or Use CaseRecommended Format and Framing
YouTubeUse 16:9, keep the avatar slightly off-center, and add captions for sound-off viewers.
TikTok, Reels, ShortsUse 9:16, place the avatar in the upper two-thirds, and burn captions in.
Presentations and coursesUse 16:9, keep backgrounds clean, and let the avatar deliver one idea per slide.
AdsTest 1:1 and 9:16, keep the hook in the first three seconds, and end with a clear call to action.

Tip

Pick your platform format before rendering. Reframing a finished avatar clip later often causes awkward cropping, especially when moving from 16:9 to 9:16.

Common Mistakes Beginners Make with Talking Avatar AI

From reviewing dozens of tutorials and community comments, the same avoidable mistakes show up repeatedly.

  • Writing for the page, not the ear. Scripts that read fine on paper sound robotic when spoken. Read yours aloud first.
  • Ignoring the format. Rendering a 16:9 avatar for a 9:16 platform forces awkward cropping.
  • Skipping captions. Most social video plays muted, so on-screen text is not optional.
  • Using a low-quality source photo for D-ID. A blurry image produces a stiff, uncanny animation.
  • Making clips too long on free tiers. Render limits and watermarks make short, segmented clips smarter.

The biggest one is voice pacing. A natural script with short sentences fixes most of the robotic feel people complain about.

Watch out

Avoid page-style scripts, wrong aspect ratios, missing captions, low-quality D-ID source photos, and long free-tier clips. Short sentences and natural pacing fix much of the robotic feel.

Advanced Strategies for Scaling Avatar Video

Once one talking avatar works, the next goal is volume without losing consistency. This is where most teams waste time recreating the same setup over and over.

Standardize a template: same avatar, same voice, same caption style, same intro and outro. Then you only swap the script. Batch your scripts in one sitting, generate clips in a single session, and reuse the design frame.

For multilingual reach, translate your script and regenerate the same avatar with a localized voice. If you produce product or ad content at scale, a URL to video (https://www.vidau.ai/url-2-video/) or product sample to video (https://www.vidau.ai/product-sample-to-video/) workflow can turn source material into avatar-style creatives faster than building each one by hand. To repurpose a strong clip into new formats, a video remix (https://www.vidau.ai/vid-remix/) approach keeps your best message working across platforms.

Tip

Scale by standardizing your avatar, voice, caption style, intro, and outro. Then batch scripts and regenerate only the message, not the whole setup.

Key takeaway

Final Thoughts

Creating a talking avatar ai is no longer a technical project. With a free Canva account plus HeyGen or D-ID, you can turn a script into a speaking presenter in minutes, with no camera and no editing skills. Start with a ready-made avatar, keep your first clips short, and pick your format before you render.

When you outgrow single clips and need spokesperson-style ads at scale, explore VidAU’s AI video (https://www.vidau.ai/vidau-ai-video/) and UGC Avatars (https://www.vidau.ai/ugc-avatars/) tools to keep your branding consistent across languages and platforms. Pick the simplest tool that solves today’s task, then scale from there.

FAQ

Here are answers to common questions about talking avatar AI, free AI spokesperson videos, Canva HeyGen, D-ID, custom image animation, faceless YouTube channels, microphones, export formats, multilingual videos, and VidAU avatar workflows.

Can I create a talking avatar with AI for free?

Yes. You can create a talking avatar ai for free using Canva’s HeyGen or D-ID integrations. Free tiers usually limit render length and may add a watermark, so keep early clips short while you learn the workflow. This is enough to test the method before paying for any plan.

What is the easiest tool to make a talking avatar?

For beginners, Canva’s HeyGen integration is the easiest because design and avatar creation happen in one place. You add the app, choose a ready-made avatar, paste your script, pick a voice, and generate. No video editing timeline or animation skills are needed to produce a clean talking head video.

How do I make my own face into a talking avatar?

Use D-ID inside Canva or directly. Upload a clear, front-facing photo with good lighting, enter your script, choose a text-to-speech voice, and generate the animation. The tool syncs the mouth to your audio. Image quality matters most, so use a sharp, well-lit photo for a natural result.

Do talking avatar videos need a microphone?

No. Talking avatar tools include text-to-speech, so you type or paste a script and the AI generates the voice. You can record your own voice if you prefer a personal sound, but it is optional. Many faceless creators rely entirely on AI voices to stay fully camera-free and mic-free.

What format should I export a talking avatar video in?

Match the platform. Use 16:9 for YouTube and presentations, and 9:16 for TikTok, Reels, and Shorts. For ads, test 1:1 and 9:16. Choosing the format before you render avoids awkward cropping later. Add captions in every format, since most social video plays without sound.

Are talking avatars good for faceless YouTube channels?

Yes. Talking avatars give faceless channels a human presence without revealing your identity or filming yourself. They work well for explainer content, tutorials, and narration-heavy videos. Pair a consistent avatar with strong scripts and captions, and you can publish regularly without a camera, studio, or editing experience.

Can I create talking avatar videos in other languages?

Yes. Most talking avatar tools support multiple voices and languages, so you can translate your script and regenerate the same avatar with a localized voice. For larger multilingual projects, platforms like VidAU generate video content in many languages, which helps marketers reach audiences without rebuilding each video from scratch.

How long does it take to make a talking avatar video?

A short talking avatar clip usually takes a few minutes once your script is ready. Most of the time goes into writing a tight, natural script rather than rendering. Read your script aloud first to avoid robotic pacing, then generate, add captions, and export for your chosen platform.

Visla AI · Video Generator, Editor and Screen Recorder

Visla AI: Complete Guide to the AI Video Generator, Editor and Screen Recorder

Master how Visla AI handles video generation, screen recording, captions, and editing for creators, marketers, tutorials, demos, educators, podcasters, and small business workflows.

By the VidAU Editorial Team · Visla AI video guide · 13 min read

Visla AI is an AI-powered video platform that combines a video generator, an editor, and an AI screen recorder in one workflow, so you can take an idea, script, or screen capture and turn it into a finished video without juggling separate tools.

Visla AI is an AI-powered video platform that combines three jobs in one workflow: generating videos from text or written content, editing footage with automatic cuts and captions, and recording your screen with AI polish. Instead of stitching together a separate recorder, editor, and generator, you work inside a single platform built around speed and simplicity.

This guide is for content creators, marketers, small business owners, educators, and podcasters who want fewer tools and faster output. We will walk through what Visla AI does, how to use each feature, and where it fits compared to options like the CapCut AI video generator and Revid AI.

Quick Summary

  • Visla AI is an all-in-one platform that handles AI video generation, editing, and screen recording in one workflow.
  • Its newest standout feature is AI Screen Recording, which automatically trims pauses, cleans audio, and splits a take into editable scenes.
  • The editor automates cuts, captions, noise reduction, and background music, and includes a private stock library for reusable assets.
  • It fits creators, marketers, educators, and small business owners who make tutorials, product demos, and content from written material.
visla ai

What Is Visla AI?

Visla AI is a video creation platform that uses AI to generate, edit, and record videos in one place. You can type a prompt, paste written content, or record your screen, and the platform turns that input into an editable video with scenes, captions, and audio handled automatically.

The platform covers three core jobs. The AI video generator builds videos from text and written content. The editor cleans up footage with automatic cuts and captions. The AI screen recorder captures your screen and polishes the result. Mobile apps for iOS and Android extend the workflow beyond desktop.

Key Takeaways

  • Visla AI is a complete video workflow, not just a generator.
  • It works from prompts, written content, or screen recordings.
  • Automation handles editing tasks that usually take the most time.

Why Visla AI Matters for Creators and Marketers

Visla AI matters because it removes the friction of moving between separate recording, editing, and generation tools. Most creators lose hours switching apps, exporting files, and re-importing them. A single platform that handles the full chain saves real production time.

For marketers and small business owners, the value is consistency. You can turn a blog post, product page copy, or a quick screen demo into a video without hiring an editor. For educators and podcasters, written scripts or recorded sessions become finished videos with less manual cleanup.

The trade-off is control. Tools built for speed make many decisions for you, which is great for volume but limiting if you need frame-level motion design or complex animation.

Trade-off

Visla AI is built for speed and volume, but that means the platform makes many decisions for you. This can be limiting when you need frame-level motion design or complex animation.

Step-by-Step Workflow for the Visla AI Video Generator

Here is a simple workflow to generate a video from text inside Visla AI.

Step 1: Start a new project and choose the text-to-video or written-content option.


Step 2: Paste your script, blog post, or product description as the source.


Step 3: Let the AI break your content into scenes with matching visuals.


Step 4: Pull media from the private stock library or upload your own clips.


Step 5: Add or edit the AI voiceover and auto-generated captions.


Step 6: Review the timeline, adjust scenes, and export the final video.

The scene-based structure is the part that saves the most time. Instead of building a timeline from scratch, you start with a rough cut and refine it. This is also where most teams waste time if they over-edit a draft that was already close to done.

If your main goal is turning long-form written content into video, this workflow is the fastest path. For ad-style videos built from product URLs or product samples, platforms like VidAU AI Video take a similar generate-first approach.

Tip

Use the scene-based rough cut as your starting point, then refine only what matters. Over-editing a close-to-finished AI draft can waste the time the tool just saved.

How to Use Visla AI Screen Recording

visla ai

Visla AI screen recording captures your screen and applies automatic AI polish to the result. With AI Screen Recording enabled, the platform trims your pauses, cleans your audio, and breaks your take into clear, editable scenes. This is the feature highlighted in Visla’s most recent November 2025 content, and it is the strongest reason to pick the platform for demos.

Use it like this:

  1. Open the screen recorder and select what to capture.
  2. Record your tutorial, walkthrough, or product demo in one take.
  3. Let the AI remove dead air and reduce background noise automatically.
  4. Edit the auto-generated scenes instead of scrubbing raw footage.

This is useful for tutorial videos, product demos, async updates, and onboarding clips. You can record imperfectly and let the AI handle the tedious cleanup. If you only need to pull the audio from a finished recording, a tool like VidAU Video to Audio handles that specific task.

Screen recording advantage

Visla AI screen recording is strongest for demos because it lets you record imperfectly, then uses AI to trim pauses, clean audio, reduce dead air, and split the take into editable scenes.

How the Visla AI Video Editor Works

The Visla AI editor automates the editing tasks that normally eat your afternoon. It handles automatic cuts, captions, noise reduction, and background music, so you spend less time on cleanup and more on the message.

Key editor features include:

  • Automatic cuts that remove pauses and filler.
  • Auto captions generated from your audio.
  • Noise reduction to clean up rough recordings.
  • Background music that fits the video tone.
  • Private stock library so you can reuse your own brand assets.

Scene-based editing keeps things organized. You edit blocks instead of a long, messy timeline. For voiceover work specifically, a dedicated tool like VidAU Text to Speech (https://www.vidau.ai/vidau-text-to-speech/) gives you more control over narration, and an upscaler such as the Video Enhancer (https://www.vidau.ai/vidau-video-enhancer/) helps when source footage is low quality.

Want to test the generate-first approach before committing to a workflow? Try mapping one blog post or one product demo through a text to video (https://www.vidau.ai/text-to-video/) flow and compare the output to your current process.

Edit and Generate With VidAU

Use VidAU AI Video, Text to Video, Text to Speech, Video Enhancer, Video to Audio, and Vid Remix when you need ad-ready video, stronger voiceover control, sharper footage, extracted audio, or reusable campaign clips.

VidAU workflow

Where VidAU fits beside Visla AI

  1. Use Visla AI for tutorials and demos: Choose Visla when the project starts with screen recording, walkthroughs, written content, or tutorial footage.
  2. Try VidAU AI Video for product ads: Use VidAU AI Video when the goal is selling a product from URLs, images, or scripts rather than explaining a screen.
  3. Use Text to Speech for narration control: Use VidAU Text to Speech when voiceover quality, tone, or language control matters more than basic automated narration.
  4. Explore Video Enhancer for low-quality source footage: Use Video Enhancer when recorded or generated clips need higher quality before publishing.
  5. Use Vid Remix for repurposing: Use Vid Remix when one long recording or video needs to become multiple platform-ready clips.

Visla AI vs CapCut and Revid AI

Visla AI competes with the CapCut AI video generator and Revid AI, but each tool leans toward a different job. The table below compares them by use case so you can match the tool to your work.

ToolBest ForNotable Strength
Visla AITutorials, demos, written contentAI screen recording with auto polish
CapCut AI video generatorShort-form social clipsFast templated editing
Revid AIShorts, music and lyric videosLong-to-short and music-to-video tools

If your work is screen-based content like tutorials, product demos, and async updates, Visla AI is the better fit. The CapCut AI video generator suits creators making quick social edits. Revid AI is built around short-form output, including music and lyric videos.

For product ad creatives built from URLs, images, or scripts, VidAU AI sits in a different lane. VidAU is an AI video ad platform that generates video ads from product URLs, images, or scripts in 49 languages, which is closer to eCommerce ad production than screen-based tutorials.

Key Takeaways

  • Pick Visla AI for tutorials, demos, and written-content videos.
  • Pick CapCut or Revid AI for fast short-form social clips.
  • Pick a product-ad platform when the goal is selling a product, not explaining a screen.

Common Mistakes People Make with Visla AI

The most common mistake is over-editing a draft that was already close to finished. The AI gives you a strong rough cut, so heavy manual tweaking often adds little value.

Other frequent issues:

  • Recording in a noisy room and expecting noise reduction to fix everything.
  • Pasting unstructured text and getting messy scene breaks.
  • Ignoring the private stock library and re-uploading the same assets.
  • Skipping a caption review, which lets small transcription errors slip through.

Clean inputs lead to clean outputs. A short, well-structured script produces far better scenes than a long wall of text.

CTA: Create with VidAU

Watch out

Visla AI works better with clean inputs. Noisy recordings, unstructured text, unused asset libraries, skipped caption review, and excessive manual edits can reduce the time savings.

Advanced Tips for Faster Video Production

To move faster with Visla AI, treat the screen recorder as your first draft tool. Record a rough take, let the AI trim pauses and split scenes, then refine only the scenes that matter. This beats scripting everything in advance.

Build a reusable asset set inside the private stock library so every project starts with your logo, intros, and music ready. For written content, keep scripts under tight paragraphs so scene breaks land where you want them. If you repurpose one long recording into several clips, a remixing tool like VidAU Vid Remix can help you reformat existing footage for different platforms.

Tip

Use the screen recorder as a rough-take tool, build reusable brand assets in the private stock library, keep written scripts in tight paragraphs, and repurpose long recordings into multiple platform-ready clips.

Key takeaway

Final Thoughts

Visla AI works best when your content is screen-based or text-based: tutorials, product demos, async updates, and videos built from written material. The AI screen recorder with automatic trimming, audio cleanup, and scene breakdown is its strongest feature, and the editor saves real time on cuts, captions, and audio.

If your goal is selling a product rather than explaining a screen, a generate-from-URL approach may fit better. You can compare workflows by running one product through VidAU AI Video (https://www.vidau.ai/vidau-ai-video/) and seeing which output matches your goal. Match the tool to the job, start with one project, and let automation handle the cleanup.

FAQ

Here are answers to common questions about Visla AI, AI video generation, AI screen recording, captions, editing, CapCut AI video generator, Revid AI, written-content workflows, tutorials, demos, and VidAU AI Video alternatives.

What is Visla AI used for?

Visla AI is used to generate, edit, and record videos in one platform. Creators use it to turn written content into videos, record polished screen captures for tutorials and demos, and automatically add cuts, captions, noise reduction, and music. It suits creators, marketers, educators, and small business owners.

Does Visla AI have a screen recorder?

Yes. Visla AI includes an AI screen recorder that captures your screen and applies automatic polish. With AI Screen Recording enabled, it trims pauses, cleans audio, and splits your take into editable scenes, which makes it useful for tutorials, product demos, and async updates without heavy manual editing.

Is Visla AI free to use?

Visla AI offers a free trial along with paid plans, and it provides mobile apps for iOS and Android. The free option lets you test the video generator, editor, and screen recorder before upgrading. Specific pricing tiers change over time, so check the current plans on Visla’s site.

Can Visla AI turn text into video?

Yes. Visla AI can turn a prompt, script, or written content like a blog post into a video. The AI breaks your text into scenes, pulls matching visuals, adds a voiceover, and generates captions. You then review the timeline and refine scenes before exporting the finished video.

How is Visla AI different from the CapCut AI video generator?

Visla AI focuses on a complete workflow that includes screen recording, generation, and editing, which suits tutorials and demos. The CapCut AI video generator leans toward fast, templated short-form social clips. Choose Visla AI for screen-based content and CapCut when you mainly produce quick social videos.

Is Visla AI better than Revid AI?

It depends on the use case. Visla AI is stronger for tutorials, product demos, and written-content videos with its AI screen recorder. Revid AI is built around short-form output, including music-to-video and long-to-short tools. Pick Visla AI for screen and tutorial work and Revid AI for shorts.

What types of videos can you make with Visla AI?

With Visla AI you can make tutorial videos, product demos, onboarding clips, async team updates, and videos built from blog posts or scripts. The screen recorder suits walkthroughs, while the generator turns written content into scenes. It works well for educators, podcasters, marketers, and small business owners.

Does Visla AI add captions automatically?

Yes. Visla AI generates captions automatically from your audio as part of its editing automation. It also handles automatic cuts, noise reduction, and background music. You should still review captions before export, since AI transcription can introduce small errors with names, technical terms, or unclear audio.

Kapwing AI Text to Video Generator · Complete Guide 2026

How to Use Kapwing AI Text to Video Generator: Complete Guide

Learn how to use the Kapwing AI text to video generator for fast video creation, subtitles, editing, pricing decisions, and creator workflows.

By the VidAU Editorial Team · Kapwing AI video guide · 13 min read

The Kapwing AI text to video generator turns a short prompt, script, or full article into an editable video in roughly three clicks, complete with B-roll, animated text, and a voiceover.

The Kapwing AI text to video generator turns a short prompt, script, or full article into an editable video in about three clicks. It auto-adds B-roll, animated text, and a voiceover, then drops the result into Kapwing’s timeline so you can refine it. You start with AI, then fix the parts that need a human touch.

This guide is for content creators, marketers, YouTubers, and social media managers who want fast video output without advanced editing skills. We cover both the prompt and article workflows, customization, subtitles, voiceover limits, and the pricing detail that matters most for free users.

Quick Summary

  • The Kapwing AI text to video generator creates editable videos from a text prompt, script, or pasted article in roughly three clicks, adding B-roll and animated text automatically.
  • Kapwing offers two main input paths: a text prompt for short ideas and a document-to-video tool for articles or blog posts.
  • Free users hit a 3-minute text-to-speech limit, while Kapwing Pro at $16/month unlocks longer videos and unlimited cloud storage.
  • This workflow fits creators and social media managers who want a fast first draft they can edit, not a finished hands-off render.
kapwing ai text to video generator

What Is the Kapwing AI Text to Video Generator?

The Kapwing AI text to video generator is an online tool that converts text input into a video with stock B-roll, animated text overlays, transitions, and an AI voiceover. You give it a prompt, script, or article, and it produces a draft inside Kapwing’s editor that you can change at any point.

The key thing to understand: AI generation is the starting point, not the finished product. Kapwing builds a rough video automatically, then hands you a fully editable timeline. That difference shapes how you should use it.

Key definition

The Kapwing AI text to video generator converts a prompt, script, or article into an editable video draft with stock B-roll, animated text, transitions, and AI voiceover inside Kapwing’s timeline.

Why Text-to-Video Matters for Creators and Marketers

Most teams lose time turning a written idea into footage. You write the script, then hunt for clips, time the captions, and record a voiceover. Kapwing’s AI video generator compresses that into one pass.

For short-form social content, that speed is the point. You can test five hooks in the time it used to take to edit one. The trade-off is that AI picks generic B-roll, so the polish still depends on your edits.

Key Takeaways

  • AI generation gives you a fast first draft, not a final video.
  • The biggest time savings come from automated B-roll, captions, and voiceover.
  • Editing after generation is where your video actually gets good.

Step-by-Step: Generate a Video From a Text Prompt

The prompt workflow is the fastest way to use Kapwing’s AI video generator. It works best for short, specific ideas rather than vague requests.

Step 1: Open Kapwing’s AI Studio and choose the text-to-video option.


Step 2: Type a clear prompt describing your video.

For example: “A 30-second video on three tips for better morning routines.”


Step 3: Pick an aspect ratio that matches your platform.

Use 9:16 for TikTok and Reels, 16:9 for YouTube, and 1:1 for feed posts.


Step 4: Click generate and wait for Kapwing to assemble the draft.


Step 5: Review the auto-added B-roll, text overlays, and voiceover in the editor.

That’s the three-click idea in practice. The more specific your prompt, the closer the first draft lands to what you want.

Tip

Use a short, specific prompt and choose the aspect ratio before generating. Vague prompts produce weaker scenes, while platform-matched formatting reduces rework later.

How to Turn an Article or Blog Post Into a Video

Kapwing’s document-to-video tool converts an article, blog post, or any pasted text into a video. This is useful when you already have written content and want a video version for social or YouTube.

  1. Open the article-to-video tool in Kapwing’s AI Studio.
  2. Copy and paste your article text, or add the source content.
  3. Choose your aspect ratio and voice settings.
  4. Generate the video and let Kapwing pull out key points into scenes.
  5. Open the timeline to trim, reorder, and fix the script as needed.

Articles with clear structure work best. Listicles, how-to posts, and short news pieces convert more cleanly than long, dense essays. Expect to trim hard, since the AI often keeps more text than a video needs.

Best fit

Kapwing’s article-to-video workflow works best with structured written content such as listicles, how-to posts, and short news pieces, but long dense essays usually need aggressive trimming.

How to Customize and Edit Your AI-Generated Video

kapwing ai text to video generator

After generation, your video lands in Kapwing’s standard editing timeline, where everything is editable. This is the step most creators skip, and it’s the difference between a generic clip and something worth posting.

Here’s what to adjust first:

  • Swap weak B-roll for clips that actually match your script.
  • Tighten text overlays so each line is short and readable.
  • Fix transitions that feel abrupt or repetitive.
  • Re-time the voiceover against the visuals so they line up.

You can also edit the video by editing the text in newer Kapwing workflows, which speeds up trims. Treat the AI output like a rough cut from an assistant: useful, but it needs your judgment.

Watch out

The AI-generated draft is not the final video. Skipping the edit step is how creators end up with mismatched B-roll, stiff pacing, weak overlays, and voiceover timing problems.

Using the Kapwing Subtitle Generator and Text-to-Speech

The Kapwing subtitle generator auto-transcribes your audio into captions, which you can then style or animate. Animated subtitles tend to hold attention on social feeds, and Kapwing lets you apply preset social styles or customize fonts and colors.

To add captions, open the subtitles tab, auto-generate them, then review for accuracy and click to animate. You can also translate captions into other languages and export hard-coded subtitles or a separate SRT file.

For voiceover, Kapwing’s text-to-speech reads your script aloud. One limit to plan around: free users get a 3-minute text-to-speech cap. If your video runs longer, you’ll need to upgrade or split the project.

Tip

Always review auto-generated subtitles before publishing. Animated captions can help retention, but names, jargon, punctuation, and timing still need a human check.

Kapwing Pricing and Free-Plan Limits

Kapwing pricing starts with a free plan and a Pro plan at $16/month. The free tier lets you test the AI video generator, but the limits show up quickly once you make real content.

PlanNotable Limits or PerksBest For
Free3-minute text-to-speech capTrying the AI tools
Pro ($16/mo)Longer videos, unlimited cloud storageRegular creators

The 3-minute text-to-speech limit is the one to watch. If you produce talking-head explainers or longer narrated videos, that cap forces an upgrade. For short social clips under three minutes, the free plan covers a lot.

Generate Videos With VidAU

Use VidAU AI Video, URL to Video, Text to Video, Text to Speech, and UGC Avatars when you need product-focused video ads, multilingual output, ad variations, and faster creative production from scripts, URLs, or product assets.

VidAU workflow

Where VidAU fits alongside Kapwing

  1. Use Kapwing for editable drafts: Start with a prompt, script, or article when you need a rough cut inside a flexible editing timeline.
  2. Try VidAU for ad-first workflows: Use VidAU AI Video, URL to Video, or Text to Video when the main goal is product-focused video ads rather than general content.
  3. Use voice tools when narration matters: Use VidAU Text to Speech when you need a dedicated voiceover workflow or multilingual delivery outside Kapwing’s free text-to-speech limits.
  4. Use UGC formats for spokesperson content: Use VidAU UGC Avatars when the video needs a presenter-led or native ad style.
  5. Pair tools when useful: Generate a draft in Kapwing, then create ad versions or multilingual variants in VidAU when campaign speed and product output matter most.

Common Mistakes and an Alternative Worth Checking

The most common mistake is treating AI output as the final video. The generator gives you a draft; skipping the edit step is how you end up with mismatched B-roll and stiff pacing.

A few other traps:

  • Writing vague prompts that produce off-topic scenes.
  • Pasting a full long-form article without trimming, which bloats the video.
  • Ignoring the 3-minute text-to-speech limit until export fails.
  • Leaving auto-captions unreviewed, since names and jargon often misfire.

If your main goal is video ads rather than general content, it’s worth comparing tools built for that. VidAU is an AI video ad platform that generates video ads from product URLs, images, or scripts in 49 languages. For product-focused output, its URL to Video (https://www.vidau.ai/url-2-video/) and Text to Video (https://www.vidau.ai/text-to-video/) workflows aim at ad creatives, and UGC Avatars (https://www.vidau.ai/ugc-avatars/) cover spokesperson-style content. The honest trade-off: if you mostly need a flexible editor for varied content rather than ads, Kapwing’s broader toolkit may fit you better.

You can also pair tools. Generate a draft in Kapwing, then use a dedicated Text to Speech (https://www.vidau.ai/vidau-text-to-speech/) workflow or VidAU AI Video (https://www.vidau.ai/vidau-ai-video/) for ad versions when you need multilingual output.

Watch out

Kapwing’s AI output should be treated as a draft. Review the B-roll, trim long article imports, watch the 3-minute text-to-speech cap, and check auto-captions before publishing.

Key takeaway

Final Thoughts

The Kapwing AI text to video generator is a fast way to turn a prompt, script, or article into an editable draft. Pick the right input path, generate, then spend your real effort customizing B-roll, captions, and timing. That edit step is what separates a usable video from a generic one.

Start with a short prompt on the free plan to learn the flow, and watch the 3-minute text-to-speech limit before you commit to longer projects. If your focus is product video ads at scale, compare a purpose-built option like VidAU AI Video (https://www.vidau.ai/vidau-ai-video/) and test which output fits your channel best.

FAQ

Here are answers to common questions about the Kapwing AI text to video generator, prompt-to-video workflows, article-to-video, Kapwing subtitle generator, text-to-speech limits, Kapwing pricing, editable AI drafts, and ad-focused alternatives.

How does the Kapwing AI text to video generator work?

You enter a text prompt, script, or pasted article, and Kapwing’s AI assembles a video with B-roll overlays, animated text, transitions, and a voiceover. The result opens in Kapwing’s editing timeline, where every element stays fully editable so you can refine the AI draft before exporting.

How many clicks does it take to make a video in Kapwing?

Kapwing markets a three-click process for its AI video generator. You type your prompt, choose settings like aspect ratio, and click generate. After that, the AI builds a draft, but expect to add editing time if you want the video polished for a specific audience or platform.

Can Kapwing turn an article into a video?

Yes. Kapwing’s document-to-video tool lets you copy and paste an article, blog post, or document, then generates a video that pulls key points into scenes. Structured posts like listicles and how-to guides convert most cleanly. You’ll usually need to trim the script down for video length.

What is the Kapwing text-to-speech limit for free users?

Free users have a 3-minute text-to-speech limit on the Kapwing AI video generator. If your narrated video runs longer than three minutes, you’ll need to upgrade to Kapwing Pro or split the content into shorter projects to stay within the free-plan cap.

How much does Kapwing cost?

Kapwing pricing includes a free plan and a Pro plan at $16/month. Pro adds longer videos, unlimited cloud storage, custom font uploads, and access to premium features. The free plan is enough to test the AI video generator and short social clips under the text-to-speech limit.

How do I add subtitles in Kapwing?

Open the subtitles tab and use the Kapwing subtitle generator to auto-transcribe your audio into captions. You can then style or animate them with preset social styles, translate them into other languages, and export hard-coded subtitles or a separate SRT file. Always review auto-captions for accuracy first.

Are Kapwing AI videos editable after generation?

Yes. AI generation is only the starting point. Kapwing places your generated video in its standard editing timeline, so you can swap B-roll, edit text overlays, adjust transitions, re-time the voiceover, and change the script. This editing step is what turns a generic draft into a usable video.

Is Kapwing good for making video ads?

Kapwing works for general video content and short social clips, but it isn’t built specifically for product ads. For ad-focused output, a platform like VidAU generates video ads from product URLs, images, or scripts in 49 languages. Compare both to match your channel, budget, and ad workflow.

AI TikTok Videos · Step-by-Step 2026 Guide

How to Make AI Videos for TikTok (Step-by-Step Guide for 2026)

Learn how to make AI videos for TikTok using free AI video generators, CapCut formatting, captions, hooks, and TikTok-specific optimization.

By the Sarah Iruoje · AI TikTok video guide · 9 min read

Most people assume making AI videos for TikTok requires expensive software or advanced editing skills. It doesn’t. Free AI tools have made it possible for anyone with a phone or laptop to produce polished, vertical short-form videos ready for TikTok in under an hour.

Knowing how to make AI videos for TikTok is now a practical skill, not a niche one. Whether you’re a creator building a following, a marketer promoting a product, or a beginner just starting out, the workflow is accessible and repeatable.

This guide walks you through every step — from picking an AI video generator to formatting your short-form video correctly and optimizing it before you post.

Featured image placeholder for how to make AI videos for TikTok, AI video generation, CapCut formatting, 9:16 vertical video, captions, TikTok optimization, and VidAU short-form video workflows.

Quick Summary

  • Use a free AI video generator to create your base video from a text prompt, URL, or product image
  • Convert any horizontal or square output to TikTok’s required 9:16 vertical format using CapCut
  • Keep videos between 15 and 60 seconds, add captions, and hook viewers in the first two seconds
  • Post consistently, use relevant hashtags, and engage early after publishing to support reach
ai tiktok video generator

What Is an AI TikTok Video?

An AI TikTok video is any short-form vertical video where AI tools handle part or all of the production — this includes generating visuals from text prompts, creating voiceovers, writing scripts, or automating editing. The output is then formatted to TikTok’s 9:16 aspect ratio and posted as a short-form video.

The AI does the heavy lifting. You guide it with a prompt, a URL, or a product image, then polish the result before posting.

Key definition

An AI TikTok video is a short-form vertical video where AI handles visuals, voiceover, scripts, or editing, and the final result is polished and formatted for TikTok’s 9:16 aspect ratio.

Why How to Make AI Videos for TikTok Matters in 2026

TikTok’s algorithm rewards consistency and watch time above almost everything else. Creators who can produce multiple videos per week have a structural advantage. AI tools solve the production bottleneck.

Three things make this relevant right now:

  • Volume: AI lets you produce 5 to 10 short videos in the time it used to take to make one
  • Cost: Most capable AI video generators have free tiers that are genuinely usable
  • Quality: AI-generated visuals, voiceovers, and captions have improved enough to hold viewer attention

This is where most creators waste time, they spend hours on production instead of using AI to handle the baseline and focusing their energy on hooks and posting strategy.

Key Takeaways

  • AI helps creators produce more short-form videos without spending hours on manual production.
  • Free AI video tools are now usable enough for beginners, creators, and marketers.
  • Hooks, formatting, captions, and posting strategy still determine how well the final TikTok performs.

Step-by-Step Process for How to Make AI Videos for TikTok

Step 1: Define Your Concept and Script

Before touching any tool, write two things: a one-sentence hook and a 3-to-5 sentence script. TikTok rewards clarity. The hook should appear on screen or in audio within the first two seconds.

Examples of hooks that work:

  • “You’re losing followers because of this one mistake…”
  • “This product does exactly what it claims — here’s proof”
  • “Three things nobody tells you about [topic]”

Keep the full script under 90 words for a 30-second video.


Step 2: Choose Your AI Video Generator

For an ai tiktok video generator, you have several solid free options. The right one depends on what kind of content you’re making:

Content TypeRecommended ToolFormat Output
Text prompt to videoVidAU Text to Video, Pika, KlingHorizontal or vertical
URL or product to videoVidAU URL to VideoCustomizable
Avatar or spokespersonVidAU UGC AvatarsVertical-ready
Script with voiceoverVidAU Text to Speech + editingAudio + visuals

For product-focused TikToks, tools like VidAU Product Sample to Video or URL to Video can turn a product image or landing page into a short promotional clip quickly.

For avatar-based content where a digital spokesperson delivers your script, UGC Avatars work well for direct-to-camera TikTok styles without needing to appear on camera yourself.


Step 3: Generate the Base Video

Paste your script or prompt into your chosen AI generator. Most tools will produce a 15-to-60-second clip. Download the output — even if it’s horizontal or square, that’s fine. You’ll fix the format in the next step.

Tips for better AI output:

  • Be specific in your prompt. “A woman walking through a farmers market holding fresh vegetables, sunny morning, warm tones” produces better results than “a woman outside”
  • If the tool lets you set the aspect ratio upfront, choose 9:16
  • For voiceover-based videos, use VidAU Text to Speech to generate a natural-sounding narration from your script

Step 4: Convert Videos for TikTok Using CapCut

This is the step most guides skip over. Many AI generators output 16:9 horizontal video. TikTok requires 9:16 vertical. If you upload horizontal video, TikTok adds black bars, which tanks watch time.

Here’s how to convert videos for TikTok in CapCut:

On mobile (iPhone or Android):

  1. Open CapCut and tap “New Project”
  2. Import your AI-generated video
  3. Tap the canvas ratio button and select 9:16
  4. Reposition or scale your footage to fill the vertical frame
  5. Use CapCut’s background fill or blur feature to fill empty space if needed
  6. Export at 1080×1920 resolution

On desktop (CapCut PC):

  1. Create a new project and set canvas to 1080×1920 (9:16)
  2. Import your AI video clip
  3. Use the “Fit” or “Fill” option to adjust the footage
  4. Add captions using auto-caption or manually type them in
  5. Export as MP4 at the highest resolution available

CapCut’s “long to shorts” feature — often called capcut long to shorts in tutorials — also lets you paste a longer video and have CapCut automatically identify highlight clips for vertical short-form output. This is useful if you generated a longer AI video and want to extract the best 30 seconds.


Step 5: Edit for TikTok Engagement

Once your video is in the right format, spend 10 to 15 minutes on these edits:

  • Captions: Auto-captions increase watch time significantly. CapCut generates them automatically. Clean them up manually
  • Hook frame: The first frame should show something visually interesting or display the hook text
  • Music or audio: TikTok’s native sounds help discovery. Layer trending audio under your AI voiceover at low volume
  • Pacing: Cut dead air. Every second should serve the hook or the payoff
  • Text overlays: Add 1 to 2 short text overlays to reinforce key points visually

Step 6: Upload and Optimize on TikTok

Before posting:

  • Write a caption that includes a light question or CTA to encourage comments
  • Add 3 to 5 relevant hashtags — mix niche-specific and broader ones
  • Choose a cover frame that shows the hook clearly
  • Post when your audience is active (generally evenings in the US, but check your own analytics)
  • Suggested Visual: Screenshot of CapCut’s canvas ratio settings panel showing 9:16 selected with a vertical preview frame.

Tip

Do not skip the CapCut formatting step. Even strong AI-generated footage can lose watch time if it appears on TikTok with black bars or poor framing.

Best Tools for How to Make AI Videos for TikTok

You don’t need a full stack. A two-tool workflow works fine for most creators:

  • AI video generator — handles visuals and audio production
  • CapCut — handles format conversion, captions, and final edits

For text-based or educational TikToks, VidAU Text to Video lets you turn a written script directly into a visual video. For brands creating short product ads, VidAU AI Video handles the full ad creation workflow from script to finished clip.

If your AI video needs quality improvement before posting, run it through a Video Enhancer to sharpen resolution before uploading.

Create AI TikTok Videos With VidAU

Use VidAU AI to create TikTok-ready videos from scripts, product URLs, product images, AI avatars, voiceovers, and existing clips, then adapt them for short-form campaigns.

VidAU workflow

From script or product page to TikTok-ready video

  1. Start with your TikTok idea: Write a hook and short script, or use a product URL, brief, or product image as your starting point.
  2. Generate the base video: Use VidAU Text to Video, VidAU URL to Video, Product Sample to Video, or UGC Avatars depending on the content type.
  3. Add voice and personality: Use VidAU Text to Speech for natural narration or AI avatars for talking-head TikTok formats.
  4. Improve and repurpose: Use Video Enhancer to sharpen quality and VidAU Vid Remix to create new versions from existing clips.
  5. Format and publish: Convert to 9:16, add captions, optimize the hook frame, and post consistently with relevant hashtags.

Platform-Specific TikTok Optimization

TikTok’s algorithm doesn’t treat all videos the same. A few practical notes:

Format requirements:

  • Resolution: 1080×1920 minimum
  • Aspect ratio: 9:16
  • File format: MP4 or MOV
  • Max file size: 287.6 MB
  • Recommended length: 15 to 60 seconds for discovery; 1 to 3 minutes for engaged followers

What TikTok responds to:

  • High completion rate — viewers watching to the end signals quality
  • Shares and saves — weighted heavily in distribution
  • Early engagement — comments and likes in the first 30 minutes matter
  • Consistent posting — 3 to 5 times per week tends to outperform sporadic posting

For AI-generated content specifically, adding a real text overlay or human-sounding caption tends to improve performance over purely automated output. TikTok audiences respond to personality, even in AI videos.

Suggested Visual: Side-by-side comparison showing a horizontal 16:9 AI video with black bars on TikTok versus a correctly formatted 9:16 vertical video.

Optimization areaRecommended setup
FormatUse 1080×1920, 9:16 vertical, MP4 or MOV, and avoid black bars.
LengthUse 15 to 60 seconds for discovery and 1 to 3 minutes for engaged followers.
RetentionUse captions, a strong hook, clear text overlays, and pacing that keeps viewers watching to the end.
EngagementEncourage comments, saves, and shares, especially in the first 30 minutes after publishing.
ConsistencyPost 3 to 5 times per week rather than posting sporadically.

Tip

TikTok rewards completion, saves, shares, early engagement, and consistency. Format your AI videos correctly, then focus on hooks, captions, and posting rhythm.

Common Mistakes When Making AI Videos for TikTok

Uploading horizontal video. The single most common error. Always convert to 9:16 before uploading. Black bars kill retention.

Using AI audio without reviewing it. AI voiceovers occasionally mispronounce words or add awkward pauses. Listen through before posting.

Skipping captions. A large portion of TikTok users watch with sound off. No captions means you’re losing half your potential audience.

Making the video too long. For discovery, under 45 seconds performs better than longer cuts for most niches. Test before committing to longer formats.

Generic prompts. Vague AI prompts produce generic-looking videos. Specific, detailed prompts produce content that looks intentional.

Over-relying on AI alone. AI handles production. You still need to bring a clear idea, a strong hook, and an understanding of what your audience actually wants to see.

Watch out

AI TikTok videos usually fail because of horizontal formatting, unreviewed AI audio, missing captions, overlong edits, generic prompts, or relying on AI without a clear hook and audience strategy.

Advanced Strategies for AI TikTok Videos

Batch create content. Generate 5 to 10 AI video drafts in one session, then edit and schedule them over two weeks. This keeps your output consistent without daily effort.

Remix your own content. If a clip performs well, use tools like VidAU Vid Remix to repurpose it with different intros or audio. One strong idea can become three or four TikTok variations.

Test hooks systematically. Take the same 20-second core video and record three different opening hooks. Post all three in one week and compare completion rates. The data tells you what your audience responds to.

Use AI avatars for talking-head content. If you don’t want to appear on camera, an AI avatar reading your script can replace the traditional talking-head format. Tools like UGC Avatars produce human-looking presenters that work well for educational or product-focused TikToks.

Optimize your audio layer separately. Use VidAU Video to Audio to extract audio from existing strong-performing videos, study the pacing, and replicate it in new AI-generated content.

Tip

Use AI to scale your TikTok system: batch drafts, remix winners, test hooks, create avatar-led videos, and study strong audio pacing before generating new clips.

Key takeaway

Final Thoughts

Learning how to make AI videos for TikTok is really a two-part skill: using AI to handle production, and using an editor like CapCut to get the format and polish right. Neither part is difficult once you’ve done it a few times.

Start with one video this week. Write a clear hook, generate your base clip with a free AI tool, convert it to 9:16 in CapCut, add captions, and post it. The process gets faster every time.

If you’re creating product-focused or branded TikTok content, tools like VidAU AI Video and VidAU URL to Video can shorten the workflow even further — turning a product page or script into a finished short-form video without manual editing.

FAQ

Here are answers to common questions about how to make AI videos for TikTok, free AI video generators, ai tiktok video generator tools, CapCut formatting, capcut long to shorts, vertical video conversion, TikTok video length, AI disclosure, and VidAU workflows.

What is the best free AI video generator for TikTok?

Several free options work well including VidAU AI, Pika, and Kling — the best fit depends on whether you need text-to-video, product video, or avatar-style content.

How do I convert videos for TikTok’s vertical format?

Import your video into CapCut, set the canvas to 9:16 (1080×1920), reposition the footage to fill the frame, and export before uploading to TikTok.

How long should an AI TikTok video be?

For discovery and new accounts, 15 to 45 seconds performs well; longer videos work better once you have an engaged existing audience.

Does TikTok penalize AI-generated videos?

TikTok currently does not penalize AI-generated content as long as it follows community guidelines and clearly discloses AI use when required.

Can I make AI TikTok videos on my phone?

Yes — both iPhone and Android users can use CapCut and most AI video generators directly from a mobile browser or app.

What is the capcut long to shorts feature?

It’s a CapCut tool that automatically identifies the most engaging moments in a longer video and cuts them into short vertical clips ready for TikTok or Shorts.

Scroll to Top