AI Agent Icon · Microsoft Copilot Studio, Branding, Testing & Publishing
AI Agent Icon: How to Create and Add a Custom Icon in Microsoft Copilot Studio
Create, upload, preview, and publish a custom AI agent icon in Microsoft Copilot Studio with branding, readability, and troubleshooting tips.
By the VidAU Editorial Team · AI agent icon guide · Microsoft Copilot Studio, Testing, Publish, brand systems, Snowflake back ends, ai for insurance agents, best ai agent builder, VidAU AI Image, VidAU AI Video, Text to Speech, UGC Avatars, Video Enhancer, and URL to Video
Can’t find where to change your AI agent icon in Microsoft Copilot Studio? This hands-on setup guide shows exactly how to create and add a custom icon in the current no-code flow and how to preview it before you publish.
Getting your ai agent icon right is a fast way to make Copilot feel on-brand for your team. Below, I walk through where the icon setting lives in Microsoft Copilot Studio, how to upload and preview it, and what to check before publishing. I also include a quick branding checklist and simple fixes when the icon does not look right after rollout.
I reviewed and analysed current Copilot Studio tutorials that show adding a custom icon in the same no-code flow you use for personality, knowledge sources, testing, and publishing. If you only have a few minutes, follow the numbered steps and the icon will be set correctly.
Quick Summary
- Microsoft Copilot Studio lets you add a custom ai agent icon from the agent settings, then verify it in Testing before publishing.
- A simple branding rule works best: use square artwork with strong contrast and clear edges so the icon reads well at smaller sizes.
- Follow in-app prompts for accepted formats and size, then confirm the thumbnail in Testing before you press Publish to update Microsoft 365 Copilot surfaces.
- Non-technical admins and creators benefit most, especially teams rolling out multiple branded agents across Microsoft 365.
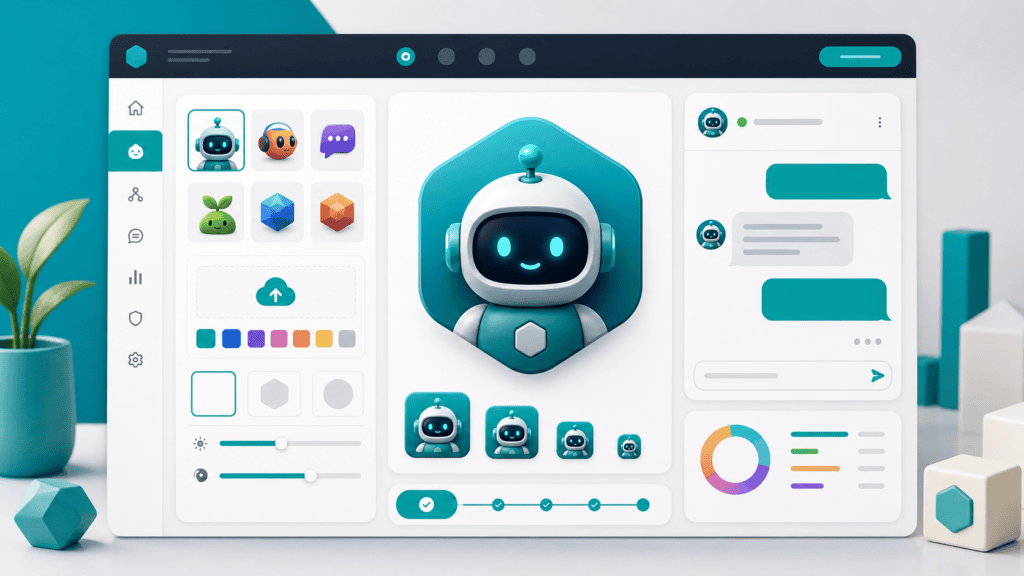
What Is an AI Agent Icon?
An ai agent icon is the small, branded image that represents your Copilot agent across Microsoft 365 surfaces and inside Microsoft Copilot Studio. It helps users recognize your agent quickly, builds trust, and sets expectations for tone and purpose.
Good icons are simple, recognizable at small sizes, and consistent with brand colors and the agent personality. In most cases, you will upload this asset in your agent settings and see it appear in Testing before you publish.
Definition
An ai agent icon is the small, branded image that represents your Copilot agent across Microsoft 365 surfaces and inside Microsoft Copilot Studio.
Who Is This For?
This guide is for non-technical business users, admins, and creators in US-based teams who are configuring Copilot agents and want a professional, branded icon without digging through menus. It is especially useful when multiple agents exist, each with different audiences, knowledge sources, and publishing requirements.
Best fit
This guide is especially useful for non-technical business users, admins, and creators configuring multiple Copilot agents with different audiences, knowledge sources, and publishing requirements.
How do I add an ai agent icon in Microsoft Copilot Studio?
The fastest path is to set the icon while you configure the same core settings you already use for personality, instructions, knowledge sources, and publishing.
1) Open your agent
- Launch Microsoft Copilot Studio and open the agent you want to brand.
- From the main overview, confirm you are editing the correct agent name and environment.
2) Go to agent settings
- In the left panel, select Settings for the open agent.
- Look for a visual or appearance section that includes Icon or similar branding controls.
3) Add a custom icon
- Choose Upload or Change icon.
- Select your artwork file and follow any on-screen prompts for cropping or background handling.
- Keep it simple: square art with strong contrast and a clear silhouette typically works best.
4) Save your changes
- Save or Apply within the icon control so the new image becomes the current agent icon.
- Confirm the icon now appears in the agent header or a preview tile inside settings.
5) Verify in Testing
- Open the Testing panel for your agent.
- Run a quick test conversation and confirm the icon renders in the header or the active agent list.
- If your artwork looks fuzzy or cropped, return to Settings and adjust the source art.
6) Confirm knowledge sources still work
- While you are in Testing, ask one or two questions that confirm your website or document sources are active.
- An agent can look on-brand but still feel off if its knowledge is not discoverable.
7) Publish
- When satisfied, select Publish for the agent.
- After publishing, check a user-facing Microsoft 365 surface to confirm the new icon appears as expected.
How do I preview the icon and publish with confidence?
You preview the icon directly in Testing and by scanning any inline thumbnail inside settings before you publish. Use a quick two-step spot check:
- Small-size proof: In Testing, confirm the icon remains readable in smaller UI placements.
- Cross-surface check: After you publish, open a common endpoint where users access the agent and confirm the update.
If the change does not appear immediately in an endpoint, wait a short while, refresh, or try a different client to rule out caching.
Key Takeaways
- Always preview in Testing before publishing.
- Validate readability at small sizes on a typical user device.
- If you do not see the update, clear cache or wait briefly, then recheck.
What branding checklist should I use for the ai agent icon?
Use this lean checklist before you upload:
- Strong contrast: Foreground mark must read against both light and dark themes.
- Simple silhouette: Avoid intricate letterforms or thin lines that disappear.
- Square-friendly: Design for a square frame with safe margins all around.
- On-brand color: Match your brand palette and agent personality.
- Consistent system: Use the same visual logic across multiple agents to reduce confusion.
- Accessibility: Test for legibility at small sizes and consider color-blind safety.
Icon design tip
Clarity at small sizes matters more than micro-specs. Use square-friendly artwork, strong contrast, a simple silhouette, and safe margins before you upload.
Troubleshooting: Why does my icon look wrong after upload or publish?
If your icon looks off, use these fast fixes:
- Blurry or soft edges: Export a crisper source image and avoid ultra-thin strokes.
- Cropped incorrectly: Add safe padding around edges so vital details do not touch the frame.
- Disappears in dark mode: Increase foreground contrast or add a subtle keyline.
- Wrong background: If transparency looks odd, try a flat background and retest.
- Not updating in endpoints: Clear local cache, sign out and back in, or wait briefly for propagation after Publish.
- Permission issues: Ensure you have edit and publish rights for this agent.
Key Takeaways
- Most issues come from artwork that is too detailed or too tight to the frame.
- A quick re-export with more contrast and padding usually solves visibility problems.
- Publishing can take time to propagate; verify again after a short window.
Does the builder choice affect icon branding and consistency?
Your icon is set in Microsoft Copilot Studio, so ensure the builder you choose supports clear branding across endpoints. When comparing options and searching for the best ai agent builder, look for a visible icon control, predictable previews, and straightforward publishing. Branding clarity tends to reduce user support tickets and adoption friction.
Small asset workflow you can use
| Stage | Recommended Tools | Why |
|---|---|---|
| Icon design | Any vector editor or brand kit | Simple, scalable, crisp edges |
| Export to upload | PNG or similar, per in-app prompts | Predictable transparency and clarity |
| Studio branding | Microsoft Copilot Studio | Single place to set the icon |
| Communication asset | Brand guidelines doc | Keep multi-agent visuals consistent |
Note: Follow in-app prompts for accepted formats and size. Do not over-optimize; clarity at small sizes matters more than micro-specs.
How does this apply to Snowflake back ends and regulated teams?
Front-end branding lives in Copilot Studio regardless of where your data sits. Whether you are buidling an ai bot agent using Snowflake on the back end, rolling out ai for insurance agents, or balancing multiple environments, set the icon in the same place and verify it in Testing. Keep back-end integrations and front-end visuals managed as separate concerns.
Regulated-team note
Keep back-end integrations and front-end visuals managed as separate concerns. Set the icon in Copilot Studio, verify it in Testing, and document approvals when working with regulated teams such as ai for insurance agents.
Mid-article CTA: Need a fast way to create crisp, on-brand icon art?
VidAU is an AI video ad platform that generates video ads from product URLs, images, or scripts in 49 languages. If you also need supporting visuals for your agent rollout, you can create brand-matched graphics with VidAU AI Image, then use those assets inside Copilot Studio.
If you plan to introduce the agent with a short launch clip or onboarding tip, consider:
- Produce a quick announcement video with VidAU AI Video .
- Give your video a clear voiceover using VidAU Text to Speech .
- Add a friendly face for internal explainers with UGC Avatars .
- Clean up any logo bumpers with Video Enhancer .
- Turn a policy URL into a short explainer with URL to Video.
Create Supporting Visuals For Your Agent Rollout With VidAU
Use VidAU AI Image for brand-matched graphics, then introduce your Copilot agent with VidAU AI Video, VidAU Text to Speech, UGC Avatars, Video Enhancer, and URL to Video.
VidAU workflow
Where VidAU Fits In An AI Agent Icon Rollout
- Use Copilot Studio for the actual icon setting: Upload, preview, test, and publish the ai agent icon from the agent’s settings inside Microsoft Copilot Studio.
- Use VidAU AI Image for supporting visual assets: Create brand-matched graphics that can support your rollout and align with the icon system.
- Use VidAU AI Video for launch clips: Produce a quick announcement video when introducing the agent to users.
- Use VidAU Text to Speech and UGC Avatars for onboarding: Add clear voiceover or a friendly face for internal explainers and training content.
- Use Video Enhancer and URL to Video for polish and policy explainers: Clean up logo bumpers or turn a policy URL into a short explainer for teams using the agent.
Common mistakes when setting an ai agent icon
Avoid these pitfalls that cause most icon confusion:
- Over-detailed graphics that vanish at small sizes.
- Inconsistent icons across agents that look too similar or too different.
- Skipping the Testing step and discovering issues after publishing.
- Relying on a transparent mark that disappears in dark mode.
- Forgetting safe margins around edges, causing accidental crops.
- Not documenting asset sources and versions in your brand kit.
Mistake to avoid
Do not skip the Testing step. Most icon issues show up when the artwork is small, cropped, too detailed, low contrast, or disappearing in dark mode.
Key takeaway
Final Thoughts
A clear ai agent icon reduces friction, speeds recognition, and makes your Copilot deployment feel professional. Set the icon in Copilot Studio, confirm it in Testing, and publish once it looks right at small sizes and in dark and light themes. Keep your artwork simple and consistent.
If you need supporting visuals, create on-brand graphics with VidAU AI Image and then upload them in Copilot Studio. When you are ready to introduce your agent to users, produce a quick walkthrough with VidAU AI Video.
FAQ
Here are answers to common questions about changing an ai agent icon in Microsoft Copilot Studio, accepted icon size or format, previewing before publish, Teams or Outlook update delays, behavior and knowledge source impact, consistent multi-agent branding, Snowflake back ends, ai for insurance agents, choosing the best ai agent builder, and using AI tools to create icon artwork quickly.
Where do I change the ai agent icon in Microsoft Copilot Studio?
Open your agent in Microsoft Copilot Studio, go to Settings, and find the appearance or icon control. Upload your artwork, save, and confirm the new icon in Testing. When it looks right, publish to push the update to Microsoft 365 Copilot surfaces.
What size or format should I use for the icon?
Follow the in-app prompts for accepted formats and size. As a general rule, start with square artwork, strong contrast, and a simple silhouette. Avoid fine details, add safe margins, and test in both light and dark themes before you publish.
How do I preview the icon before I publish?
Use the Testing panel inside Copilot Studio to preview the icon in context. Check that it reads clearly at small sizes and does not crop awkwardly. If anything looks off, return to Settings, adjust the artwork, and preview again before you publish.
My new icon does not show in Teams or Outlook. What should I do?
First, confirm you pressed Publish after updating the icon. Then allow some time for propagation, refresh your client, or sign out and back in. Local cache can delay updates. If it still does not appear, recheck permissions and confirm you edited the correct environment.
Will changing the icon affect my agent’s behavior or knowledge sources?
No. The icon is a front-end branding element. It does not change instructions, personality settings, or knowledge sources. Still, it is smart to run a quick Testing session to confirm that your agent’s responses remain aligned with your content.
How can I keep icons consistent across multiple agents?
Document a small brand system: color palette, shape language, and safe margins. Create a master icon template, export variants from that template, and store final assets in a shared folder. Use the same upload and Testing routine for each agent, then publish when proofs look consistent.
Does this apply if I am using Snowflake for the back end?
Yes. Front-end branding remains in Copilot Studio even if your data lives elsewhere. Whether you are buidling an ai bot agent using Snowflake or another data stack, set and preview the icon in the same place, then publish to update endpoints.
Any tips for regulated teams, like ai for insurance agents?
Keep the icon neutral, professional, and tied to your official brand marks. Document approvals, version files, and publish steps in a change log. After publishing, validate the icon in a typical user surface and capture a quick screenshot for audit trails.
How do I choose the best ai agent builder if branding is a priority?
Look for a builder that offers clear icon controls, predictable previews, and straightforward publishing. You want low-friction updates and consistent rendering across user endpoints. If you already use Microsoft Copilot Studio, its built-in icon setting provides a reliable branding path.
Can I use AI tools to create the icon artwork quickly?
Yes. Use brand-safe templates or AI-assisted image tools to create simple, high-contrast symbols. Always proof at small sizes before upload, and keep a few variations ready. If you need polished visuals fast, consider creating assets with a focused image tool and then upload in Copilot Studio.