Creating Cinematic AI Videos Via ai clip maker Guide
ai clip maker tools are changing how creators produce videos.Forget the hype about AI taking over Hollywood. While AI video tools are super powerful, there’s no magic button to create whole movies with one prompt. The real trick is keeping things consistent: making sure characters, voices, and scenes stay the same across different clips. This guide breaks down a simple 4-step process to make AI videos with consistent characters, using tools like Google Whisk, Flow, a custom Gemini Gem, and ElevenLabs.
AI clip makers are built for creators who want speed and control without sacrificing quality. Whether you’re producing social videos, short skits, or brand ads, these tools let you handle scriptwriting, visuals, and voiceovers in one flow. They don’t replace your creativity, they streamline it. With the right setup, you can turn prompts into cinematic clips that look professional and feel cohesive all without a full production crew.
Key Takeaways
- AI video generation is powerful but not yet a Hollywood replacement.
- Consistency (characters, voice, setting) is the biggest hurdle.
- A multi-step workflow combining different AI tools is necessary.
- Image generation is the first step to define your character.
- Precise reference in image tools helps maintain character likeness.
- Video generation tools need a starting frame for consistency.
- AI voice tools are needed to fix inconsistent audio.
- A video editor is still required to put it all together.
The Reality of AI Video Generation
Right now, AI video tools are amazing, but they aren’t going to replace the entire movie industry overnight. The flashy demos you see often show off what’s possible in a very limited way. The real challenge isn’t just making a cool clip; it’s making multiple clips that look and sound like they belong together. Think about how ChatGPT writes a story. It remembers what happened in the first scene and continues the narrative smoothly. That’s consistency, and it’s the main problem with AI video.
The reality is that most AI video tools still work best in short bursts, a few seconds of impressive visuals rather than full, coherent stories. Each clip might look stunning on its own, but once you try to connect several together, inconsistencies show up. Characters might shift faces, voices may sound different, or lighting can change unexpectedly. These small breaks ruin immersion. To create believable videos, you need structure, a repeatable workflow, and the right combination of tools that help AI maintain visual and narrative continuity from one scene to the next.
Step 1: Generating Your Character’s Image
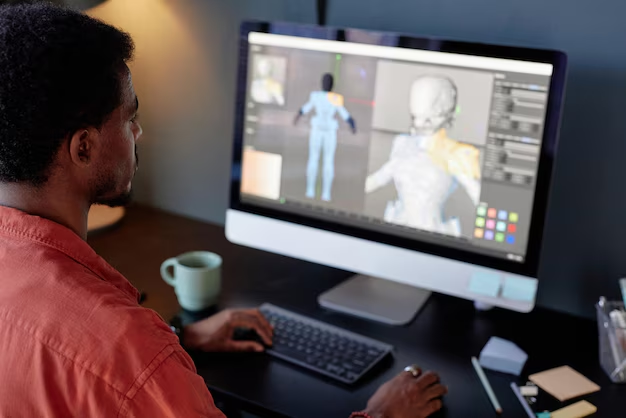
Even though we’re making videos, the first step is actually creating a static image of your character. We’ll use Google’s free image tool, Whisk. The specific tools aren’t as important as the workflow itself.
Here’s how to do it:
- Prompt for Your Character: Use a prompt to describe the character you want. Don’t worry about sharing prompts later.
- Disable Precise Reference (Initially): For the first try, turn off precise reference to give the AI more creative freedom.
- Generate and Refine: Generate a few options. If you like an image but want to tweak something, use the ‘refine’ button and enable ‘precise reference.’ This tells the AI to stick closely to the original image while making your specific change, like altering a color.
- Download: Once you’re happy, download the image. This image is the foundation for your consistent character.
Step 2: Creating the Starting Frame
Now, we need to put your character into a scene. We’ll use Whisk again for this.
- Upload Character Image: Drag your character’s image into the ‘character box’ in Whisk. This tells the AI to include this exact character in the next scene.
- Enable Precise Reference: Make sure ‘precise reference’ is turned on. This is key to keeping the character looking the same.
- Prompt for the Scene: Use a prompt to describe the scene you want, including the character and their surroundings.
- Generate and Select: Generate the scene. You might need to try a few times to get the best result where your character is fully in frame and looks right.
- Repeat for Multiple Scenes: If your skit has more than one scene, repeat this process for each scene’s starting frame, ensuring the character remains consistent.
Step 3: Generating the Video Footage
With our starting frames ready, it’s time to create the actual video clips using a tool like Google’s Flow app.
- Use ‘Frame to Video’: Select the ‘frame to video’ option and upload your first starting frame.
- Add Your Prompt: Paste a prompt that describes the dialogue and action you want in the scene.
- Set Output Options: Choose settings like landscape orientation and request multiple outputs (e.g., four per prompt). This increases the chance of getting at least one usable clip.
- Generate and Choose: Use video to video AI tool to Generate the video. Review the outputs and select the best one. You might get some bad ones, but having multiple options helps.
- Repeat for All Scenes: Do the same for your other scenes. You’ll end up with video clips where your character looks consistent, but the audio might still be off.
Step 4: Ensuring Consistent Voice and Finalizing
The final step is to fix the audio and put everything together.
- Consistent Voice: Use an AI voice tool like ElevenLabs. Upload your video clip, choose a voice for your character, and generate new speech. Do this for all clips, making sure to select the exact same voice for your character each time.
- Video Editing: Import your original video clips and the new audio files into a video editor (like Final Cut Pro).
- Replace Audio: Detach the original audio from the video clips. Manually replace only your AI character’s lines with the new, consistent audio you generated. This keeps the other voices (if any) original while ensuring your character’s voice is the same across scenes.
- Add Finishing Touches: You can add background sound effects to make the scene more believable.
By following these steps, you can create multi-scene AI videos with characters that are consistent both visually and audibly. Remember, the tools are just that – tools. Building a smart workflow that combines their strengths is what really makes the magic happen.
Comparison of AI Clip Maker Tools
| Tool | Main Use | Strength | Limitation | Best For |
| Google Whisk | Image and frame generation | Precise character consistency | Limited animation control | Visual creators who want character stability |
| Flow (Google) | Frame-to-video generation | Smooth motion generation | Output quality varies | Short clips and dynamic visuals |
| ElevenLabs | Voice consistency and cloning | Realistic tone and clarity | Paid plans for custom voices | Storytelling and dialogue-heavy videos |
| Runway ML | AI scene generation | Cinematic visual output | Higher hardware demand | Film-style creators |
| VidAU AI | Script-to-video automation | All-in-one workflow for clips | Requires structured prompts | Social media marketers and ad creators |
Tips for Creating Professional AI Clips
1. Start with a Clear Concept
AI tools need structured direction. Define your story, tone, and key visuals before prompting.
2. Use Reference Images Early
Lock in character design before video generation. It saves time and keeps the output consistent.
3. Write Short, Scene-Based Prompts
AI performs better with short prompts focused on a single action or moment rather than complex multi-scene requests.
4. Keep Lighting and Angles Consistent
Re-use similar environment descriptions (“same lighting setup,” “camera angle unchanged”) to avoid visual jumps between clips.
5. Sync Audio Manually
Even with voice tools, edit final audio layers in post to maintain pacing and emotion.
6. Test Multiple Outputs
Generate several clips per scene. Pick the smoothest motion and most natural facial expressions.
7. Edit for Flow
Use your video editor to adjust transitions, pacing, and timing. A well-cut sequence hides AI imperfections.
AI Clip Maker Workflow Summary
| Step | Task | Recommended Tool | Output | Purpose |
| 1 | Generate character image | Google Whisk | Static character image | Define the look and identity of your main character |
| 2 | Create scene starting frames | Google Whisk (Precise Reference ON) | Scene stills | Keep character consistent across scenes |
| 3 | Generate video sequences | Google Flow | Short video clips | Animate the frames to bring the character to life |
| 4 | Generate consistent voice | ElevenLabs | AI voice audio | Maintain tone and personality across all clips |
| 5 | Edit and combine final scenes | Final Cut Pro / CapCut / DaVinci Resolve | Complete video | Merge visuals, sync audio, and polish transitions |
Conclusion
AI clip makers have changed how creators produce videos. They remove many technical barriers but still depend on human input for structure, story, and flow. Tools like Google Whisk, Flow, and ElevenLabs show how far AI has come, yet combining them in a smart workflow is what creates professional, cinematic results.
When you focus on consistency, in visuals, motion, and voice, you bridge the gap between short clips and a complete story. That’s how you use AI not as a replacement, but as an extension of your creative process.
FAQs
1. What is an AI clip maker?
An AI clip maker is a tool that helps you generate short videos using artificial intelligence. It automates parts of video production like image generation, animation, and voiceover, reducing the need for manual editing.
2. Can AI clip makers create full movies?
Not yet. Current tools excel at generating short, high-quality clips. Building a full-length movie still requires a mix of AI and manual editing for story flow and consistency.
3. How do I keep my character consistent across multiple AI videos?
Use reference images and precise prompts. Tools like Google Whisk allow you to “lock in” character features so the same face appears across all scenes.
4. What’s the best AI tool for video voices?
ElevenLabs is one of the top options for voice consistency. It allows you to clone a voice and apply it across multiple clips.
5. Do I need a video editor after using AI clip makers?
Yes. A video editor helps you merge clips, fix pacing, add transitions, and sync the final audio. Even with AI tools, editing ensures professional polish.


