Realistic AI Video · Cinematic 4-Step Workflow
How to Make Ultra Realistic AI Videos in 4 Steps
Learn how to create realistic AI videos with a 4-step workflow. Explore avatars, cinematic animation, character consistency, and pro tips.
By the VidAU Editorial Team · Realistic AI video guide · 4-step cinematic workflow
The fastest way to make ultra realistic AI videos is to treat each step like a film pipeline: plan, generate, animate, then polish. Most creators skip the planning and post-processing and wonder why their clips look fake.
The most reliable way to make realistic ai videos is to run a four-step pipeline: storyboard the shots, generate cinematic images, animate them, then add film grain and color grading. Most creators jump straight to a prompt box and skip planning and post-processing, which is exactly why their clips look synthetic. Tools like Higgsfield Cinema Studio 2.5, Midjourney, HeyGen, and Enhancor each handle one part of this chain well.
This guide is for content creators, video producers, and marketers who want cinematic AI footage for YouTube and TikTok without filming. You will get the same 4-step process top tutorials use, plus the consistency tricks that separate believable characters from obvious fakes. We will keep the focus on realism at every stage.
Quick Summary
- The strongest 4-step workflow for realistic ai videos is storyboard, generate cinematic images, animate, then post-process with film grain and color grading.
- Higgsfield Cinema Studio 2.5 covers image-to-video cinematic shots, while HeyGen handles photorealistic talking avatars with near 100% lip sync.
- Realism breaks most often at the source image and the final grade, so 4K source quality, consistent character sheets, and subtle grain matter more than any single prompt.
- This workflow fits faceless YouTube channels, TikTok short-form creators, and marketers producing product or press-style videos without a camera.
In This Guide
- What ultra realistic AI video means and how it works
- Why a 4-step workflow matters for realistic ai videos
- Step 1: Storyboard and prepare your shots
- Step 2: Generate cinematic, photorealistic images
- Step 3: Animate images into video
- Step 4: Post-process for realism
- Best tools for realistic ai videos compared by use case
- Platform-specific tips for YouTube and TikTok
- Common mistakes that break realism and how to fix them
- Final Thoughts
- FAQ

What Is an Ultra Realistic AI Video?
An ultra realistic AI video is AI-generated footage that mimics how a real camera captures light, motion, and human expression, so viewers cannot easily tell it was not filmed. It usually combines a photorealistic base image, natural lip sync or motion, and post-processing like film grain and color grading.
Realism is not one setting. It is the result of a chain: source quality, consistent characters, believable movement, and a final grade. When the marketing team at VidAU AI reviewed recent realistic ai tutorials, the clips that held up best all shared the same trait, careful source images and restrained post-processing rather than aggressive prompts.
Key Takeaways
- Realism comes from the full pipeline, not a single prompt.
- A strong source image is the foundation of every believable shot.
- Subtle grain and color grading sell the final result.
Why a 4-Step Workflow Matters for Realistic AI Videos
A 4-step workflow matters because realism breaks at predictable points, and a fixed process catches each one before it ships. Skip storyboarding and your shots feel random. Skip post-processing and the footage looks too clean and digital. The structure forces quality checks at every stage.
I reviewed and analysed the highest-ranked realistic ai tutorials, and nearly all of them used the same four phases: preparation, cinematic image, animation, and touch-up. That repetition is a signal. The creators getting consistent results are not guessing, they are running a repeatable pipeline.
This matters most for creators who publish often. A workflow you can repeat beats a lucky single render you cannot reproduce next week.
Workflow principle
A repeatable workflow beats a lucky render. Planning, image quality, restrained animation, and post-processing each protect realism at a different stage.
Step 1: Storyboard and Prepare Your Shots
Start by planning every shot before you generate anything. Storyboarding is where realistic ai videos are won or lost, because it forces you to decide framing, lighting, camera angle, and character consistency in advance.
Write a short script, then break it into shots. For each shot, note the camera angle, mood, and lighting direction. This is also where you build a character sheet, a set of reference images that lock your character’s face, hair, and clothing across scenes.
For consistent characters, many creators use a soul character or train a custom model on a handful of reference photos. Astria AI, for example, trains a private model so freckles and micro-expressions stay intact across renders. That consistency is what stops your character’s face from shifting between clips.
If your project is script-led, like an explainer or branded video, a storyboard-first approach pays off. It lets you inspect the shot plan before spending render credits, then refine from there.
Tip
Storyboard before generating. Decide framing, lighting, camera angle, and character consistency while changes are still cheap.
Step 2: Generate Cinematic, Photorealistic Images
Generate your base images next, because the source image sets the ceiling for realism in the final video. A weak image will not become realistic later, no matter how good your animation is.
Use a tool built for photorealistic output. Midjourney and NanoBanana2 are common picks for cinematic stills, while Astria AI is strong for realistic images of a specific person. Prompt for real photography cues: natural lighting, shallow depth of field, lens type, and skin detail.
Here is a practical prompt structure that mirrors what works in tutorials:
- Subject and expression, for example a confident young woman with a soft genuine smile
- Wardrobe and styling details
- Lighting and mood, such as soft natural light
- Camera and lens cues, like professional photography style, front facing
Keep backgrounds plain when the shot needs a clean talking-head, and add environment detail only when the scene calls for it. After generating, run the image through a realism enhancer like Enhancor to recover skin texture and fine detail that AI often smooths over.
If you want to generate creative visuals for these base frames, VidAU AI Image is one option for producing campaign-ready stills.
Key Takeaways
- The base image caps the realism of the whole shot.
- Prompt with real camera and lighting language.
- Enhancing texture beats over-smoothing in post.
Step 3: Animate Images Into Video

Animate your photorealistic images into motion using an image-to-video tool. This is the step where stills become cinematic shots, and where motion control decides whether the result feels filmed or floaty.
For cinematic sequences, Higgsfield Cinema Studio 2.5 turns a base image into camera-driven motion using motion controls for pans, push-ins, and tracking shots. For talking-head content, HeyGen’s photo-to-video feature animates a single photorealistic image into a talking avatar with near 100% lip sync.
Keep movement subtle. Realistic motion is small and physical, a slight head turn, natural blinks, gentle camera drift. Over-animated shots are an instant tell. Pair your avatar with a natural voice from a tool like ElevenLabs, then fine-tune expression and timing.
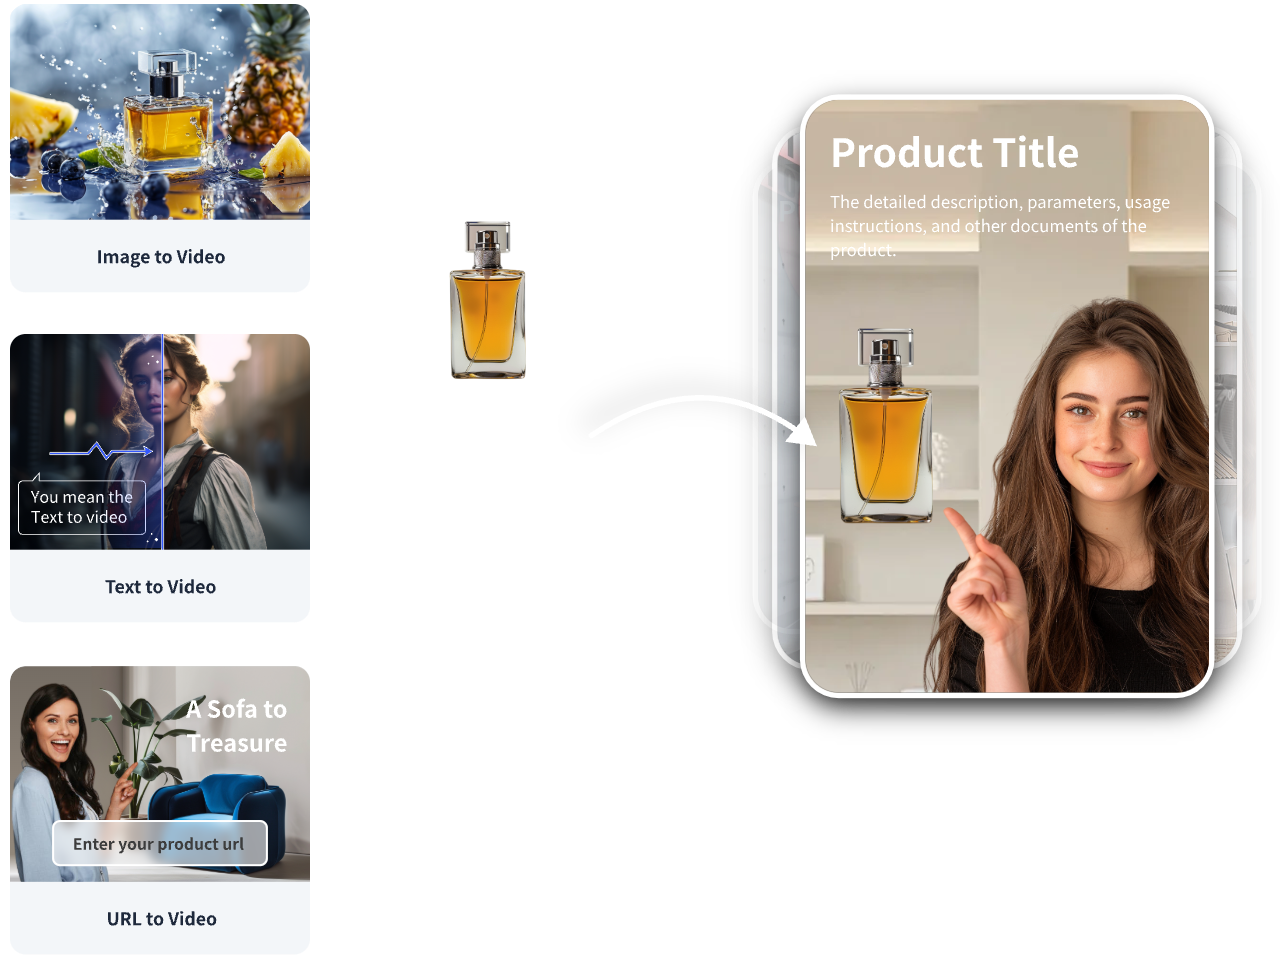
For talking avatars and spokesperson-style clips without filming, UGC Avatars and VidAU AI Video are useful when you need ad-ready out put fast. If you script first, Text to Video turns a written scene into video, and Text to Speech handles the voiceover.
Want to skip the camera entirely and generate ad-ready realistic clips from a product page or script? Try building one with VidAU AI Video and compare the output to your manual pipeline.
Motion tip
Keep movement subtle. Realistic motion is small and physical: a slight head turn, natural blinks, or gentle camera drift.
Step 4: Post-Process for Realism
Finish with post-processing, because this is where clean AI footage starts to look like real film. The two biggest levers are film grain and color grading. Both add the imperfection that real cameras introduce.
Add a light layer of film grain to break up the too-perfect digital look. Then color grade for mood, lifting shadows slightly, warming or cooling tones, and matching shots so the sequence feels like one shoot. Subtlety wins. Heavy grading reads as a filter, not a film.
A practical note from creator forums: editors chasing a cinematic look often discover the editor is not where sharpness is created. As one popular thread put it bluntly, you cannot get that look in CapCut alone. Source quality, lighting, and grading carry the realism, with dedicated upscalers like Topaz Video AI used for detail. If your source clip is soft, Video Enhancer (https://www.vidau.ai/vidau-video-enhancer/) is one way to recover quality before the final grade.
Realism warning
Subtlety wins. Heavy grading reads as a filter, not a film. Source quality, lighting, and grading carry the realism more than a single export setting.
Create Realistic Avatars With VidAU
Use VidAU AI Video, UGC Avatars, VidAU AI Image, Text to Video, Text to Speech, Video Enhancer, and VidAU ad workflows when you need realistic, brand-ready clips without filming.
VidAU workflow
Where VidAU fits in a realistic AI pipeline
- Use VidAU AI Image for campaign-ready stills: Generate creative base frames when you need source visuals for a realistic AI workflow.
- VidAU AI Video for ad-ready realistic clips: Turn scripts, images, or product pages into finished video when speed matters more than hand-directed film control.
- UGC Avatars for spokesperson-style content: Create talking-avatar or press-style video formats without filming a real presenter.
- Use Text to Video and Text to Speech for script-led projects: Convert written scenes into video and add consistent narration or dubbing.
- Use Video Enhancer before the final grade: Clean up soft source clips before adding film grain, color grading, and final polish.
Best Tools for Realistic AI Videos Compared by Use Case
The best tool depends on the shot you need. Here is how the main options map to each stage of the realistic ai workflow.
| Stage | Recommended Tools | Best For |
|---|---|---|
| Storyboard and consistency | Character sheets, Astria AI | Locking a consistent character |
| Photorealistic images | Midjourney, NanoBanana2, Enhancor | Cinematic stills and skin detail |
| Animation and lip sync | Higgsfield Cinema Studio 2.5, HeyGen | Camera motion and talking avatars |
| Voice and audio | ElevenLabs, VidAU Text to Speech | Natural narration and dubbing |
| Ad-ready output | VidAU AI Video, UGC Avatars | Fast realistic videos without filming |
No single tool wins every stage. Higgsfield is strong for cinematic motion but is not built as a multilingual ad generator. VidAU is an AI video ad platform that generates video ads from product URLs, images, or scripts in 49 languages, which makes it a better fit when you need fast, repeatable ad creatives rather than a single hand-crafted film.
One honest limitation: if your goal is a fully hand-directed cinematic short with frame-by-frame artistic control, a dedicated film tool plus manual grading will give you more control than any automated ad workflow.
Honest limitation
If your goal is a fully hand-directed cinematic short with frame-by-frame artistic control, a dedicated film tool plus manual grading will give you more control than any automated ad workflow.
Platform-Specific Tips for YouTube and TikTok
Match your output settings to the platform, because compression after upload quietly erodes the realism you worked for. Creators on short-form forums repeatedly recommend exporting at the highest practical quality so the platform has more detail to compress.
A practical export starting point from creator discussions:
- Resolution: 4K when your source supports it, otherwise 1080p
- Frame rate: match your source, often 30fps or 60fps
- Bitrate: higher or highest available
- HDR: on only if your source is genuinely HDR
For TikTok and YouTube Shorts, render vertical 9:16 and keep faces large in frame. For long-form YouTube, 16:9 with cinematic grading reads as more premium. One caution worth noting: realistic AI news-style and avatar videos now blur the line between real and fake, so label AI content clearly where platforms require it.
| Platform | Recommended Format | Practical Note |
|---|---|---|
| TikTok | 9:16 vertical | Keep faces large in frame and export at the highest practical quality. |
| YouTube Shorts | 9:16 vertical | Use clean framing because compression can erode fine facial detail. |
| Long-form YouTube | 16:9 | Cinematic grading reads as more premium for longer videos. |
| Source quality | 4K when supported, otherwise 1080p | Higher source quality survives compression better than weak upscaled footage. |
| Disclosure | Label AI where required | Realistic AI avatar and news-style videos can blur the line between real and fake. |
Platform tip
Export at the highest practical quality so platform compression has more detail to work with, and label AI content clearly where platforms require it.
Common Mistakes That Break Realism
Most realism failures come from skipping steps, not from weak tools. These are the patterns I saw repeatedly when reviewing realistic ai tutorials and creator threads.
- Weak source images. If the base image is soft or plastic, animation will not save it.
- Inconsistent characters. A face that shifts between shots breaks immersion instantly. Use character sheets or a trained model.
- Over-animation. Big, unnatural movement is the fastest tell. Keep motion small and physical.
- No post-processing. Footage that is too clean looks fake. Add subtle grain and a real grade.
- Expecting plug-and-play avatars. Creator threads are clear that first attempts often disappoint. One user said a HeyGen trial looked bad until they refined inputs and committed to better source assets.
The through-line is expectation-setting. Realistic avatars and cinematic shots are not one-click. They reward iteration, better inputs, and a finishing pass.
Key Takeaways
- Fix the source image before blaming the animation.
- Lock character consistency early.
- Always finish with grain and grading.
Watch out
Realistic avatars and cinematic shots are not one-click. They reward iteration, better inputs, consistent references, controlled motion, and a finishing pass.
Key takeaway
Final Thoughts
Making ultra realistic AI videos comes down to discipline, not magic prompts. Storyboard first, generate strong photorealistic images, animate with restraint, then finish with film grain and color grading. That four-step loop is what the best creators repeat, and it is far more reliable than chasing a single perfect render.
If you want realistic, ad-ready video without filming, start with one shot through your manual pipeline, then test a faster path with VidAU AI Video or build a talking avatar using UGC Avatars . Compare the two, keep what holds up after upload, and scale the workflow that fits your content.
FAQ
Here are answers to common questions about realistic ai videos, the best AI avatar solutions for YouTube and TikTok videos, AI character consistency, cinematic AI video tools, post-processing, export settings, and making realistic clips without filming.
What is the best workflow to make realistic ai videos?
The best workflow is a four-step process: storyboard your shots, generate photorealistic base images, animate them with controlled motion, then post-process with film grain and color grading. This order catches realism problems at each stage, instead of relying on one prompt to handle everything at once.
Which AI tool creates the most realistic videos?
No single tool wins every stage. Higgsfield Cinema Studio 2.5 is strong for cinematic image-to-video motion, HeyGen excels at photorealistic talking avatars with near 100% lip sync, and Midjourney or NanoBanana2 produce cinematic base images. The most realistic results combine a strong image tool with a capable animation tool and finishing pass.
What are the best ai avatar solutions for youtube and tiktok videos?
HeyGen and Higgsfield are commonly recommended for realistic talking avatars, while VidAU UGC Avatars suit fast, ad-style spokesperson clips. For YouTube and TikTok, the best ai avatar solutions for youtube and tiktok videos pair a photorealistic base image with natural lip sync, a real-sounding voice, and vertical 9:16 export for short-form.
How do I keep my AI character consistent across shots?
Use a character sheet, a set of reference images that lock face, hair, and wardrobe, or train a custom model on several reference photos. Tools like Astria AI keep facial details intact across renders. Consistency built at the storyboard stage prevents the face from shifting between clips, which is a frequent realism killer.
Why do my AI videos still look fake?
They usually look fake because of a weak source image, over-animation, or missing post-processing. Footage that is too clean reads as synthetic. Strengthen the base image, keep motion small and physical, add subtle film grain, and apply real color grading. Realism comes from the full pipeline, not a single setting.
What export settings preserve realism on social uploads?
Export at the highest practical quality so platform compression has more detail to work with. Creator threads suggest 4K when your source supports it, a frame rate matching your source, the highest available bitrate, and HDR only if the source is genuinely HDR. Higher source quality survives compression better than upscaled footage.
Can I make realistic ai videos without filming?
Yes. You can generate photorealistic images, animate them into talking avatars or cinematic shots, and add voiceover, all without a camera. Tools like VidAU AI Video and UGC Avatars produce realistic ad-ready clips from scripts, images, or product URLs, which suits faceless channels and marketers who need output quickly.
What is the best ai to make characters realistic?
The best ai to make characters realistic depends on your goal. Astria AI trains a private model for high facial fidelity of a specific person, while Midjourney and NanoBanana2 produce cinematic photorealistic stills. Pair any of these with a texture enhancer like Enhancor to restore skin detail that AI tends to smooth over.
Do I need post-processing if the AI footage already looks good?
Yes, in most cases. AI footage often looks too clean, which signals to viewers that it is synthetic. A light layer of film grain and a careful color grade add the imperfections real cameras introduce. Keep both subtle, since heavy grading reads as a filter rather than genuine cinematic film.
Are AI-generated videos allowed on YouTube and TikTok?
Generally yes, but both platforms increasingly require creators to disclose AI-generated or synthetic content, especially when it depicts realistic people or events. Realistic AI videos can blur the line between real and fake, so label AI content where required, avoid misleading impersonation, and follow each platform’s current synthetic media policies.


