Grok Video Generator · Animate Images, Aspect Ratios & Extend Video
Grok Image Genrator: Animate Images to Video with a 7-Image Workflow and Extend Video
Use Grok AI’s Animate Images to turn 1–7 stills into a smooth, cinematic clip, tag @image references, set aspect ratios, and extend videos while keeping character consistency.
By the VidAU Editorial Team · Grok Animate Images guide · 1–7 image sequences, Grok video prompts, aspect ratio control, and Extend Video workflow
Use Grok AI’s Animate Images to turn 1–7 stills into a smooth, cinematic clip. In this tutorial, I’ll show exactly how to tag @image references, set aspect ratios, and use Extend Video to continue your scene without losing character consistency. From our review of current tutorials and community threads, clear prompts and short, controlled extensions produce the most reliable grok video results.
Use Grok AI’s Animate Images to convert 1–7 stills into a coherent grok video while keeping characters consistent. This guide shows how to tag @image references, write prompts that guide motion and transitions, and use Extend Video to continue a scene without harsh cuts.
From our team’s review of current tutorials, the strongest results come from clean @image tagging, explicit aspect ratio prompts, and short Extend Video increments. Community snapshots also remind us that free unlimited generation is rare, so plan segments and iterations accordingly.
Quick Summary
- Animate Images in Grok AI creates a smooth image-to-video sequence from 1–7 tagged @image references with clear motion and transition cues.
- For multi-step scenes, a 2-image start/end or a 5–7 image cinematic chain works best, then use Extend Video to continue the story.
- Use explicit aspect ratio prompts like 9:16, 1:1, or 16:9 to avoid auto-cropping; control framing and camera moves in the prompt.
- Creators, editors, and AI enthusiasts making social clips, shorts, and cinematic tests benefit most from this workflow.
In This Guide
- What Grok’s Animate Images is and how it works
- Who should use this workflow
- Single-image animation with @image references
- Two-image start/end sequence for a defined arc
- 5–7 image cinematic chain with the grok video generator
- How to grok image change aspect ratio without warping
- How to use Extend Video for longer clips
- Common mistakes and quick fixes
- Final Thoughts
- FAQ

What Is Grok’s Animate Images?
Grok’s Animate Images is an image-to-video feature that turns one or several stills into a continuous clip by referencing uploaded visuals with @image tags. It supports up to seven images in sequence, enabling character consistency, planned transitions, and cinematic pacing. Extend Video then continues the result while keeping the established look and motion style.
Definition
Grok’s Animate Images turns uploaded stills into a continuous grok video by using @image tags, motion prompts, transition cues, and Extend Video for continuation.
Who Is This For?
This workflow is ideal for:
- US-based creators and editors testing cinematic image-to-video ideas
- Social video makers producing shorts from stills
- AI enthusiasts exploring Grok Imagine and Grok AI updates
- Marketers prototyping concepts before full live-action shoots
Key Takeaways
- Start simple: 1 or 2 images, then scale to 5–7.
- Tag each image explicitly with @image1–@imageN.
- Use aspect ratio prompts to fit platforms.
How Do I Use Grok Image Genrator to Animate One Image?
The fastest way to learn Animate Images is a single reference image.
Step 1: Upload one reference image
Upload one reference image.
Step 2: Reference it as @image1
In your prompt, reference it as @image1.
Step 3: State the motion
State the motion: camera move, subject action, and pacing.
Step 4: Add an aspect ratio
Add an aspect ratio: 9:16, 1:1, or 16:9.
Step 5: Generate, review, and iterate
Generate, review, then iterate with clearer verbs or tighter framing.
Prompt example (single-image):
‘@image1. Slow push-in on the character’s face, soft wind, subtle eye movement, realistic motion, aspect ratio 16:9, cinematic color grade.’
Mini-troubleshooting:
- If the face warps, say ‘maintain facial structure, photoreal, minimal distortion’.
- If motion feels floaty, specify ‘short, restrained movement, 2–3 seconds of camera drift’.
Single-image tip
Use a clear @image1 reference, then state the camera move, subject action, pacing, and aspect ratio so Grok has a precise animation map.
How Do I Create a Start-to-End 2-Image Grok Video?

A 2-image setup defines a clear arc: begin with Image 1 and end on Image 2.
Step 1: Upload two references
Upload two references.
Step 2: Tag start and end images
Tag them @image1 (start) and @image2 (end goal).
Step 3: Describe the transition
Describe how to transition from @image1 to @image2.
Step 4: Specify aspect ratio and pacing
Specify aspect ratio and pacing.
Step 5: Generate, assess, and refine
Generate, assess the transition, then refine.
Prompt example (start/end):
‘@image1 to @image2. Begin wide on @image1, slow cross-dolly, match cut into @image2 for the final close-up. Keep character consistent, smooth lighting continuity, aspect ratio 9:16 for vertical.’
Mini-troubleshooting:
- If the cut is jarring, use ‘gentle dissolve’ or ‘match cut on motion’.
- If identity drifts, add ‘preserve character identity and clothing details from @image1’.
Two-image workflow
A 2-image setup works well when you need a clear visual arc: start on @image1, transition deliberately, and end on @image2.
How Do I Build a 5–7 Image Cinematic Sequence With the Grok Video Generator?
For cinematic storytelling, chain multiple images. I reviewed recent tutorials that tested 5- and 7-image runs; the best results used explicit per-image tags and short, named transitions.
Step 1: Upload 5–7 references
Upload 5–7 references; order them as the narrative.
Step 2: Tag every image
Tag in prompt: @image1, @image2, … @image7.
Step 3: Declare each transition
For each hop, declare the transition type and camera move.
Step 4: Lock look and feel
Lock look-and-feel with style terms and character notes.
Step 5: Generate and extend if the pacing works
Generate, then use Extend Video to continue if the pacing works.
Prompt example (6–7 images):
‘@image1, @image2, @image3, @image4, @image5, @image6, @image7. Start on @image1 with a slow tilt up; dissolve into @image2; whip-pan to @image3; match cut on action to @image4; gentle rack focus into @image5; quick L-cut ambience into @image6; final hold on @image7. Maintain character consistency, coherent lighting, aspect ratio 16:9, cinematic grain subtle.’
Mini-troubleshooting:
- If mid-sequence flicker appears, add ‘stable exposure, avoid flicker’ and reduce transition intensity.
- If costumes or colors drift, repeat ‘preserve outfit colors and logos from @image1 throughout’.
Key Takeaways
- Name each image in order; don’t rely on guesswork.
- Use transition words the model understands: dissolve, match cut, whip-pan.
- Repeat character and lighting constraints across the entire chain.
How Do I Grok Image Change Aspect Ratio Without Warping?
To grok image change aspect ratio, put the target format in your prompt and guide framing.
Use these templates:
- Vertical 9:16: ‘aspect ratio 9:16, center subject waist-up, safe headroom, social vertical framing.’
- Square 1:1: ‘aspect ratio 1:1, symmetrical composition, subject centered, minimal edge crop.’
- Landscape 16:9: ‘aspect ratio 16:9, rule-of-thirds composition, wide establishing view.’
| Aspect Ratio | When to Use | Prompt Hint |
|---|---|---|
| 9:16 | Shorts/Reels | ‘vertical, center framing’ |
| 1:1 | Grid posts | ‘square, symmetrical’ |
| 16:9 | YouTube/desktop | ‘landscape, wide view’ |
Mini-troubleshooting:
- If faces crop, add ‘keep full head and chin visible’ and re-generate.
- If auto-cropping misbehaves, specify ‘do not reframe; maintain original composition’.
Aspect ratio warning
Do not rely on auto-cropping. State the target format and framing notes together so important details stay inside the frame.
How Does Extend Video Work for Longer Clips?
Extend Video continues the generated clip using the established style and motion. Keep extensions short and intentional.
Step 1: Generate a base clip you like
Generate a base clip you like.
Step 2: Invoke Extend Video
Invoke Extend Video and restate key constraints: character, lighting, aspect ratio.
Step 3: Define the next beat
Define the next beat: camera move, action, or reveal.
Step 4: Extend in small increments
Extend in small increments, reviewing after each.
Prompt nudge for extension:
‘Continue from last frame. Maintain @image1 character identity, same lighting and grade, slow push forward, hold 2 more beats, aspect ratio 9:16.’
Mini-troubleshooting:
- If style shifts, repeat the same look descriptors you used initially.
- If motion loops, say ‘introduce new motion path; avoid repeating previous pattern’.
From our information-gain review, free unlimited generation is effectively nonexistent, so plan short segments and iterate. Also, creators often chase export settings when source quality is the issue; start from high-quality reference images for best detail.
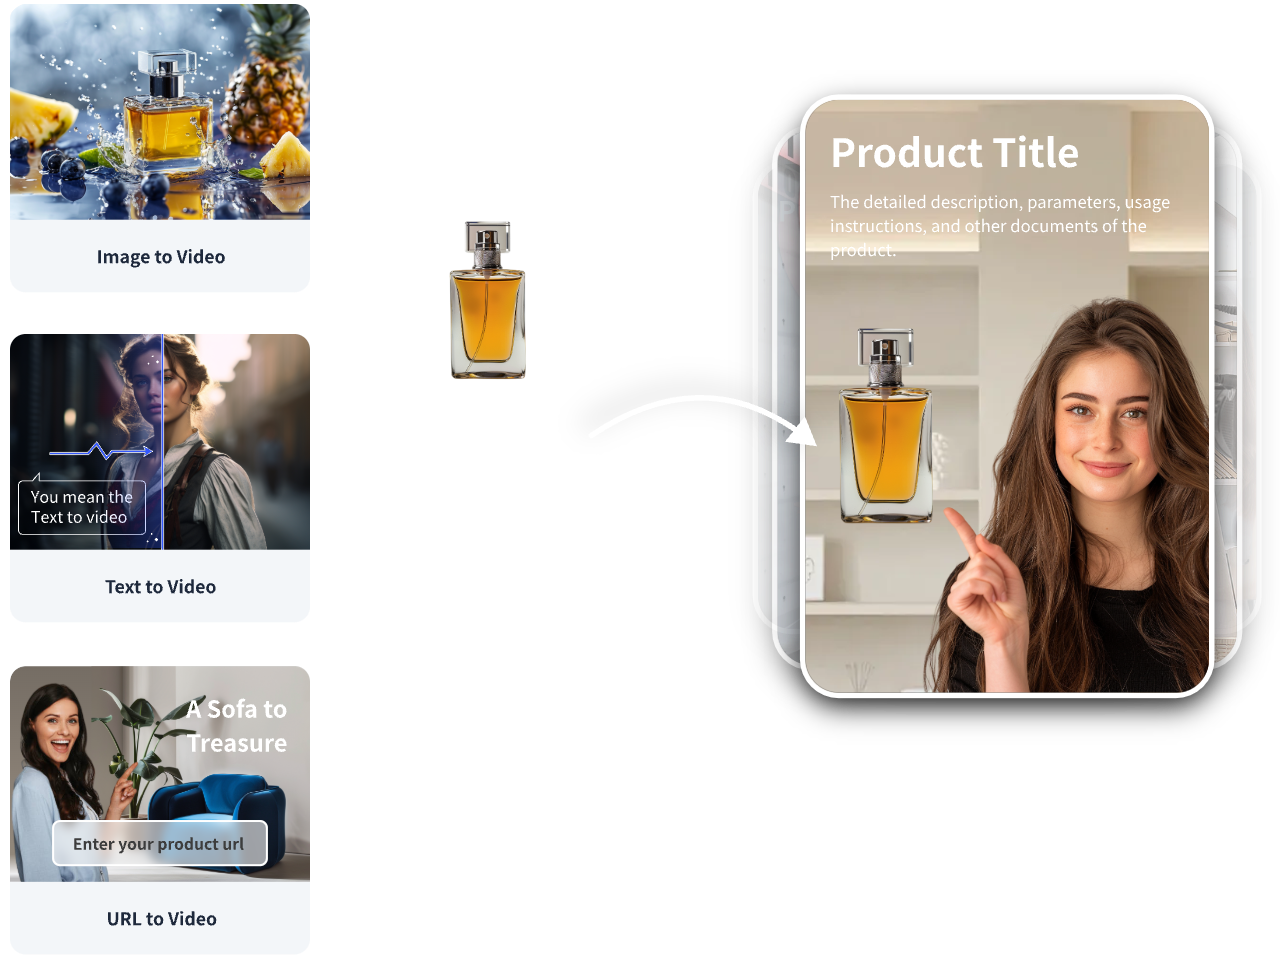
Mid-workflow tip: If you need ad-ready variants, translation, or quick product demos alongside Grok, VidAU is an AI video ad platform that generates video ads from product URLs, images, or scripts in 49 languages. Try these complementary tools: VidAU AI Video, URL to Video, VidAU Vid Remix, Video Enhancer, Text to Speech, and UGC Avatars.
Extend Video tip
Extend Video works best in short, intentional increments. Restate character, lighting, aspect ratio, and the next motion beat before each extension.
Turn Images Into Videos With VidAU
Use Grok Animate Images for cinematic tests, then use VidAU AI Video, URL to Video, Vid Remix, Video Enhancer, Text to Speech, and UGC Avatars when you need ad-ready variants, translation, product demos, or production-ready deliverables.
VidAU workflow
Where VidAU Fits Beside Grok Animate Images
- Use Grok Animate Images for cinematic motion tests: Start with 1–2 reference images, then scale to 5–7 tagged @image references when you need a more complete grok video sequence.
- Use Grok aspect ratio prompts for platform fit: Prompt 9:16 for Shorts and Reels, 1:1 for grid posts, or 16:9 for YouTube and desktop playback before exporting or repurposing.
- Use Extend Video for controlled continuation: Extend in short increments and restate character, lighting, and aspect ratio to avoid style drift.
- Use VidAU AI Video and URL to Video for ad-ready variants: Move from cinematic tests into production ads, product demos, or social assets when the goal is marketing output.
- Use Vid Remix, Video Enhancer, Text to Speech, and UGC Avatars for polish and scale: Repurpose Grok outputs, improve soft footage, add multilingual voiceovers, and create creator-style variants for campaigns.
Common Mistakes and Quick Fixes
- Missing @image references: Always tag @image1–@imageN in the prompt; re-ordering without tags causes drift.
- Vague transitions: Name the cut or move; ‘smooth transition’ is too broad.
- Aspect ratio surprises: State ‘aspect ratio 9:16/1:1/16:9’ plus framing notes.
- Character inconsistency: Repeat ‘preserve identity, outfit, and colors from @image1’.
- Over-extending: Extend Video in short steps to keep continuity.
- Soft output: Begin with higher-resolution stills; if needed, run results through Video Enhancer.
Mistake to avoid
Do not use vague transitions or missing @image references. Name every image and every transition so Grok does not guess the sequence for you.
Key takeaway
Final Thoughts
Animate Images turns stills into moving stories when your prompt gives the model a map: clear @image tags, explicit transitions, and a set aspect ratio. Use 1–2 images to learn control, then scale to 5–7 and Extend Video in short, reviewed increments.
When you need ad-focused outputs, variants, or multilingual voiceovers alongside Grok, build with VidAU AI Video, Text to Video, and Text to Speech for production-ready deliverables.
FAQ
Here are answers to common questions about the grok image genrator, Grok Animate Images, grok video generator prompts, @image references, changing aspect ratios, Extend Video, character consistency, flicker, social video formats, and output quality.
What is grok image genrator Animate Images?
Animate Images is a Grok AI feature that converts one or several stills into a single grok video. You upload images, reference them with @image tags, describe motion and transitions, and generate a coherent clip. It supports up to seven images, plus Extend Video to continue the scene while keeping the established look.
How many images can I animate in one sequence?
You can sequence up to seven images in Animate Images. For best results, start with 1–2 to understand controls, then scale to 5–7 for a cinematic chain. Use precise @image references and named transitions to avoid jump cuts or identity drift, then apply Extend Video for incremental lengthening.
How do I tag images correctly with @image references?
Tag each image in the prompt using @image1, @image2, and so on, in the same order you want them to appear. Then describe how to move between them, such as dissolve or match cut. Repeating identity and lighting constraints across the entire prompt helps maintain character consistency.
How do I grok image change aspect ratio without losing composition?
Include the target format directly in your prompt, for example ‘aspect ratio 9:16’ for vertical, and add framing notes like ‘center subject, keep full head visible’. This reduces auto-cropping surprises and keeps important details in frame for Shorts, Reels, or landscape players.
What is the best way to use Extend Video?
Generate a base clip you like, then Extend Video in short increments. Restate character, lighting, color, and aspect ratio so the continuation remains consistent. If motion loops or style drifts, clarify the next beat and repeat your look descriptors before extending again.
Why does my output flicker or the character change mid-sequence?
Flicker or identity drift usually comes from vague constraints or aggressive transitions. Add ‘stable exposure, avoid flicker’ and repeat ‘preserve character identity, outfit, and colors from @image1’. Use named transitions like dissolve or match cut, and keep each step short and reviewable.
Can I use this with grok video generator prompts for social content?
Yes. Add explicit platform formats like ‘aspect ratio 9:16’ plus framing directions such as ‘centered waist-up, safe headroom’ to align with short-form platforms. If you need ad variants or localization, pair your Grok output with tools like VidAU AI Video (https://www.vidau.ai/vidau-ai-video/) and Text to Speech (https://www.vidau.ai/vidau-text-to-speech/).
Do I need high-resolution images to get good results?
Higher-quality stills help the model maintain detail, especially on faces and fine textures. From our review of creator discussions, chasing export settings rarely fixes soft inputs; it’s better to start with sharp references and clear lighting. If results are still soft, consider an upscaling pass with Video Enhancer (https://www.vidau.ai/vidau-video-enhancer/).


 – VidAU.ai")

