AI Video From Image · Free Step-by-Step Workflow
How to Make AI Video from Image: Free Step-by-Step Guide (2026)
Learn how to prepare source images, use AI image to image generators, train personal models, write better prompts, and turn AI-generated images into finished videos with VidAU.
By the VidAU Editorial Team · Updated 2026 · 16 min read
Turning a single photo into a fully produced video sounds like a high-budget production problem. In 2026, it is a free afternoon project. The ability to make AI video from image sources, including your own face, branded assets, or AI-generated artwork, is now accessible through free tools that require no design background or technical expertise.
But before you dive in, there are things most guides skip: the difference between an AI image to image generator and a true video production tool, what “free” actually covers on each platform, and the critical step most creators miss: converting strong AI images into video content that actually performs.
This guide covers the full pipeline: how to prepare your source images, use free platforms to personalise and refine them, write prompts that produce usable output, and then make AI video from image assets using VidAU.ai as the final production layer.
Create AI Video from Image Now
Quick Summary
- Making AI video from image sources is a two-stage process: generate or prepare your images first, then bring them into a video production platform.
- Free tools like Replicate, Fal, and Google Colab let you train personal AI image models without upfront cost.
- An AI image to image generator refines existing photos into new styles, scenes, or compositions.
- The AI image to text generator pro approach lets you describe a scene and generate the visual from scratch.
- VidAU.ai is the bridge between static AI images and finished video — built specifically for this workflow.
- This guide walks through the full process from photo preparation to final video export.
What Does It Mean to Make AI Video from Image?
Making AI video from image means using one or more still images — AI-generated or photographed — as the visual foundation for a video production. The workflow has two distinct stages that most tutorials collapse into one, causing confusion:
Stage 1 — Image generation: Creating or personalising the still images you will use. This is where AI image to image generators, personal model training, and prompt-based generation come in.
Stage 2 — Video production: Animating, sequencing, or contextualising those images inside a video format, adding voiceover, music, captions, and motion.
Most free tools cover Stage 1 well. Stage 2 — where the real commercial value lives — requires a platform built for it. Understanding this distinction upfront shapes every decision in your workflow.
Key definition
What Is an AI Image to Image Generator? An AI image to image generator takes an existing photo as input and transforms it based on a text prompt or style instruction. Unlike text-to-image tools that build from scratch, image-to-image generators preserve the structure or composition of your source image while applying new visual treatments — making them ideal for personalising AI content with your own likeness, brand assets, or existing footage.
How to Incorporate Yourself in AI Image Generators
Learning how to incorporate yourself in AI image generators is the most powerful personalisation technique available on free platforms. Once trained, your personal model can place you in any scene, style, or setting — generating images that feed directly into your video production workflow.
Using Replicate, Fal, and Google Colab — Step by Step
Step 1 — Train Your Model on Replicate
Go to replicate.com and create an account. New users receive free credits sufficient for several training sessions.
Navigate to the AI toolkit section and locate LoRA training for Flux or Stable Diffusion models.
Upload your prepared photos and set a trigger word — a unique identifier the AI associates with your face. Use something uncommon like “TOK” or “ohwx” to avoid conflicts with existing training data.
Start training. Processing typically takes 10 to 30 minutes. You will receive a notification when complete.
Step 2 — Train Your Model on Fal
Fal offers faster processing and a simpler interface, making it a strong alternative to Replicate.
Create an account at fal.ai and navigate to the model training section.
Upload your photo set in batch. Select Flux as your base model for maximum realism.
Set your trigger word using the same principles as Replicate.
Training typically completes in 15 to 20 minutes.
Once trained, test your model by generating images using your trigger word in the prompt: “TOK person in a modern office, natural window light, professional headshot.” The output becomes your source material for video.
Step 3 — Use Google Colab for Full Control
Google Colab is the most flexible free option but requires slightly more comfort with a code-cell interface. It is the right choice when you need custom training configurations or want to save your model weights for long-term reuse.
Search for a current LoRA training notebook for Flux or Stable Diffusion. The AI community regularly shares updated versions.
Open in Colab and select a GPU runtime from the Runtime menu.
Run cells sequentially — early cells install dependencies; later cells handle your photo upload and training configuration.
Training takes 30 to 60 minutes depending on GPU availability and your settings.
Save your trained model to Google Drive for reuse across future sessions.
How AI Image to Image Generators Work
Personal AI image generation works by training a model to recognise and recreate specific visual characteristics, your face, a product, a branded scene, and then generating new images that incorporate those characteristics in any setting.
The standard method is LoRA training: a lightweight technique that teaches an AI model to recognise a specific subject without requiring massive computational resources or paid subscriptions.
| Approach | How it works | Best for |
|---|---|---|
| Text-to-image (AI image to text generator pro) | Describe a scene; AI builds it from scratch. | Original creative assets, concept art. |
| Image-to-image | Upload a source image; AI transforms it by prompt. | Personalised content, brand visuals. |
| Personal model (LoRA) | Train AI on your photos; generate yourself in any scene. | Consistent character, social content, headshots. |
All three approaches can feed into a make AI video from image workflow. The choice depends on whether you are starting from scratch or working from existing visual assets.
Preparing Your Source Images for AI
Image quality at this stage directly determines video quality at the end. Weak inputs produce weak outputs regardless of how good your production platform is.
Photo Selection Criteria
Choose 10 to 20 images that represent the subject clearly. For face-based training, include front-facing, three-quarter, and profile angles. Vary lighting conditions slightly but avoid extreme contrasts that obscure facial features.
For product or brand asset training, capture from multiple orientations and in different ambient conditions. Consistency in representation teaches the model what is fixed versus variable about the subject.
What to Avoid
| Avoid | Why |
|---|---|
| Other people’s faces in frame | Confuses the model about what it is learning. |
| Heavy filters or glasses | Masks real features the model needs to learn. |
| Blurry or low-resolution images | Degrades output quality across all generations. |
| Wildly different appearances | Creates inconsistency in generated output. |
File Preparation
Use JPG or PNG format. Review your collection as a unified set before uploading — does it accurately represent the subject? Crop any images where the primary subject shares frame with unwanted elements.
Tip
Photo preparation is not a minor step. Clear angles, consistent subject representation, and clean files improve every stage that follows, from AI image generation to final video production.
Writing Effective Prompts: The AI Image to Text Generator Pro Approach
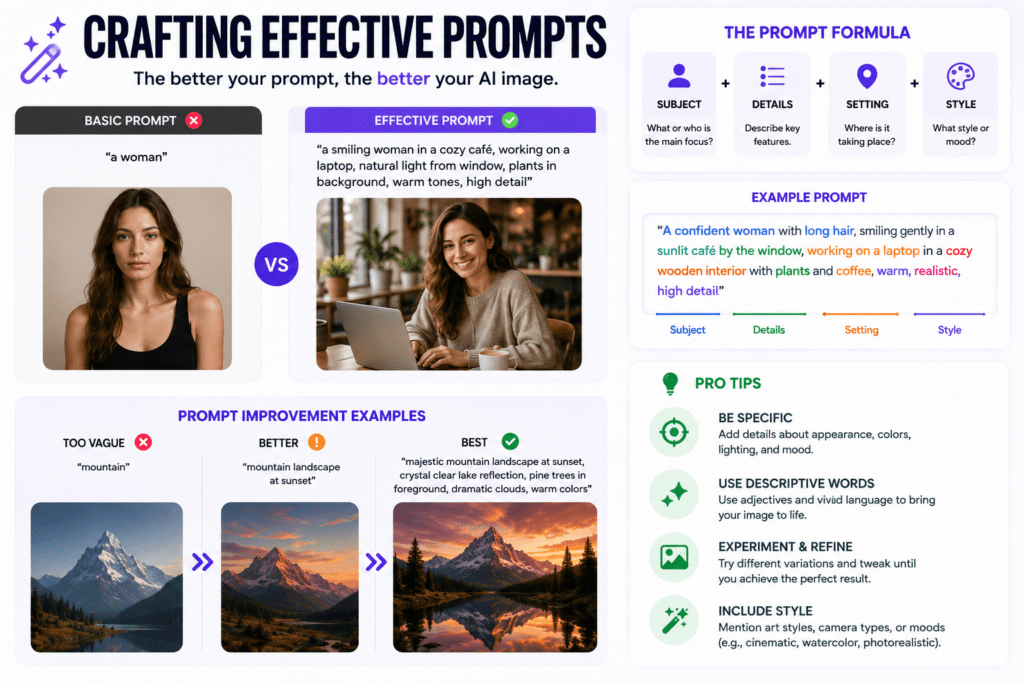
Prompt quality is the highest-leverage variable in this entire workflow. A well-structured prompt using the AI image to text generator pro approach produces usable, consistent images that translate into strong video content. Vague prompts produce generic output that underperforms at every stage.
Basic Prompt Formula
[Trigger word] + [Subject/action] + [Setting/context] + [Lighting] + [Style] + [Quality descriptors]
Example: “TOK person standing in a rooftop garden at golden hour, natural warm light, shallow depth of field, cinematic photography, sharp focus, professional quality.”
Prompt Examples by Use Case
| Use case | Example prompt |
|---|---|
| LinkedIn headshot | TOK person, professional portrait, studio lighting, neutral background, business attire, sharp focus. |
| Social media content | TOK person at a rooftop bar, evening light, candid style, vibrant atmosphere. |
| Brand campaign visual | TOK person reviewing a laptop in a bright co-working space, warm ambient light, authentic feel. |
| AI video thumbnail | TOK person looking directly at camera, high contrast lighting, cinematic crop, dramatic mood. |
Negative Prompts
Add negative prompts to prevent common AI image artifacts: “blurry, distorted, disfigured, low quality, bad anatomy, extra limbs.” Most platforms have a dedicated negative prompt field. Use it on every generation.
Tip
Specific prompts outperform generic prompts at every stage. The prompt should define the subject, action, setting, lighting, visual style, and quality target before the image ever reaches the video workflow.
Optimising Images for Different Platforms
Before you make AI video from image assets, generate them in the correct format for their intended platform.
YouTube Thumbnails and B-Roll
- Generate in 16:9 (1920×1080) landscape orientation.
- Use high-contrast lighting and clear subject placement.
- Cinematic prompts (“dramatic lighting”, “85mm lens”, “bokeh background”) produce the most professional results.
TikTok and Instagram Reels
- Generate in 9:16 vertical orientation where possible, or crop in post.
- Energetic, well-lit, visually clean compositions perform best.
- Avoid dark or ambiguous imagery — clarity drives completion rates.
LinkedIn and Professional Content
- Use neutral backgrounds, professional attire, and studio-style lighting.
- Shallow depth of field adds polish without visual noise.
- Avoid heavy stylisation; photorealism performs better in professional contexts.
Content Rights: What You Must Know Before Publishing
This is the section most guides skip. For professional and commercial creators, it is the most important part of the workflow.
Your Content vs. Platform Rights
Most free training platforms retain certain rights over uploaded content or generated output. Review current Terms of Service before uploading proprietary images, client assets, or brand materials.
| Creator type | Risk level | Recommendation |
|---|---|---|
| Personal social creator | Low | Free platforms are fine; review ToS. |
| Small business owner | Medium | Avoid uploading confidential brand assets to platforms without clear IP terms. |
| Marketing agency | High | Use platforms with explicit commercial rights for client work. |
| Enterprise or brand | High | Use VidAU.ai or platforms with clean commercial licensing. |
Consent and Ethical Use
Only train models on images of yourself or individuals who have given explicit, informed consent. This applies to every platform in this guide. Generating images of other people’s likenesses without permission creates legal exposure regardless of the tool used.
Disclose AI-generated content when publishing publicly, particularly in professional or brand contexts. Transparency is increasingly an audience expectation and, in some markets, a legal requirement.
Watch out
Do not train AI models on someone else’s likeness without explicit, informed consent. For client, brand, agency, or paid advertising work, review platform rights carefully before uploading assets or publishing output.
Create AI Video from Image with VidAU
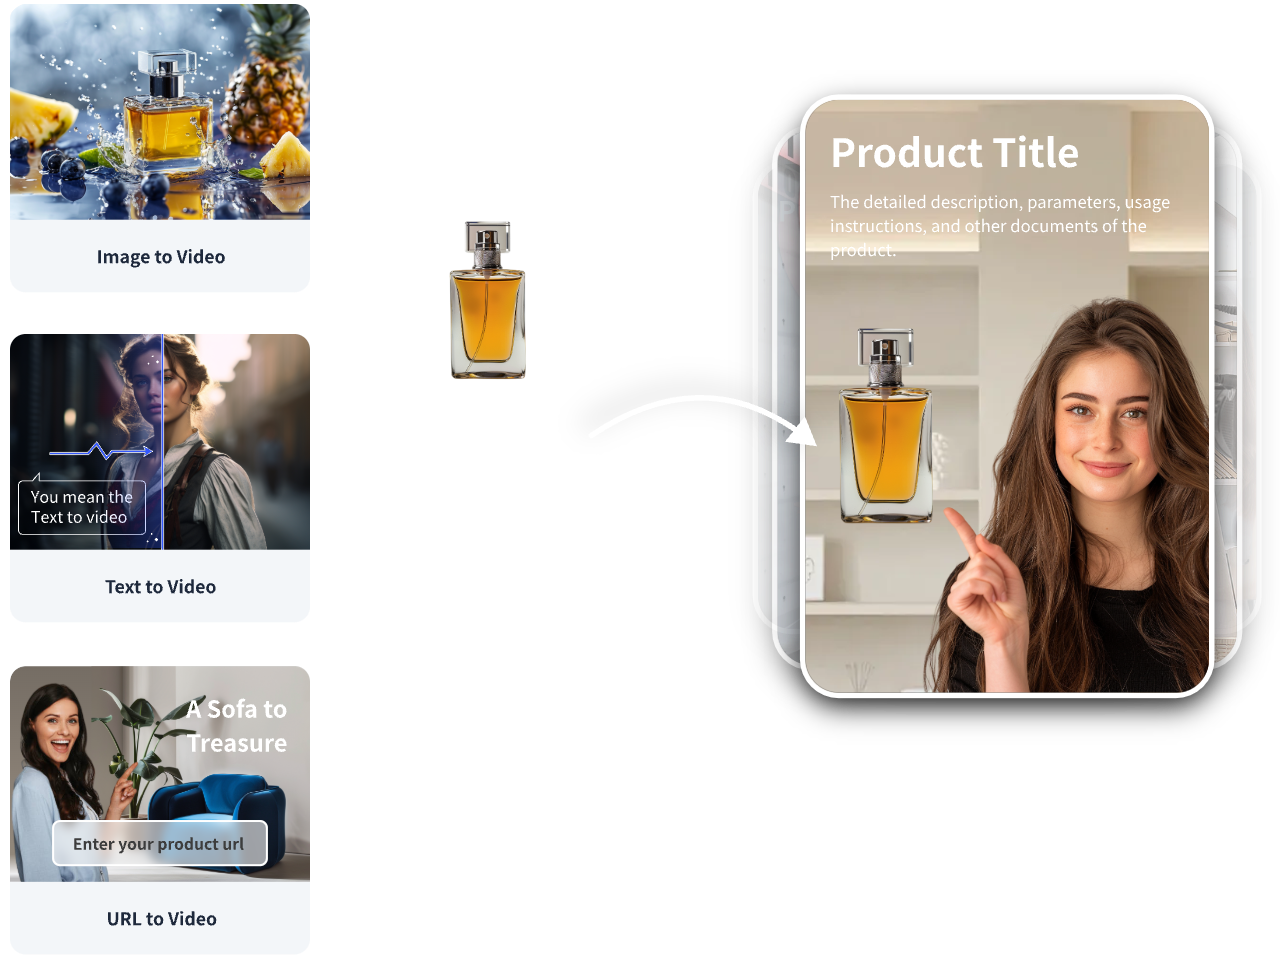
Use VidAU.ai to turn AI-generated images, personal model outputs, product visuals, voiceovers, captions, avatars, and image-based concepts into finished video ads, social content, and marketing assets.
VidAU workflow
From AI image to finished video content
- Start with prepared images: Use photographed images, AI-generated visuals, personal LoRA outputs, product images, or branded assets as your visual foundation.
- Bring the images into video production: Use VidAU.ai to convert static images into video content instead of stopping at the still-image stage.
- Add production layers: Combine image input with voiceover generation, AI avatars, captions, video sequencing, and motion.
- Build platform-ready versions: Create assets for video ads, social reels, brand campaigns, YouTube content, and marketing workflows.
- Scale output safely: Use a platform built for high-volume commercial production when free community tools are no longer enough.
When to Use VidAU Instead
Free image tools cover Stage 1 of the workflow well. For Stage 2 — turning those images into finished, professional video content — VidAU.ai is the purpose-built platform.
Choose VidAU.ai when you need to:
Make AI video from image at scale
VidAU.ai is built to take your AI-generated or uploaded images and convert them directly into video ads, social content, and marketing assets — without stitching together separate tools.
Combine image, voiceover, and motion in one workflow
VidAU.ai integrates AI image input with voiceover generation, AI avatars, captions, and video sequencing. This is the full production pipeline in a single platform.
Produce commercial content with clean IP
For brand campaigns, agency deliverables, and paid advertising, VidAU.ai provides the commercial licensing clarity that free community platforms cannot.
Handle high-volume content production
Teams producing 50+ video assets per month need a platform built for that output. Free tier tools are not designed for production volume.
Common Mistakes When Making AI Video from Image
Mistake 1 — Skipping photo preparation. Uploading the first available photos without reviewing quality, angles, or consistency produces weak training results. Poor images at Stage 1 mean poor video assets at Stage 2. Invest 20 minutes in photo curation; it compounds through the entire workflow.
Mistake 2 — Vague AI image to text generator pro prompts. “A professional photo” produces generic output. “TOK person in a bright co-working space, natural window light, shallow depth of field, professional business attire, sharp focus” produces something usable. Specificity is the entire job.
Mistake 3 — Stopping at image generation. Most creators generate strong AI images and publish them as static posts. The far higher-value move is bringing those images into a video workflow on VidAU.ai — the same asset that works as a photo can become a video ad, a social reel, or a brand campaign with proper production.
Mistake 4 — Using the wrong aspect ratio. Generating images in landscape and then needing vertical video for TikTok creates cropping problems. Know your platform before you prompt. Match the aspect ratio at generation time, not in post.
Mistake 5 — Ignoring negative prompts. Skipping the negative prompt field is the fastest way to produce distorted anatomy, blurry edges, and AI artifacts. Add standard negative prompts to every generation without exception.
Mistake 6 — No documentation of settings. Recreating a specific character or visual style six weeks later is nearly impossible without notes. Document your trigger word, model version, base model, prompt structure, and key parameters for every project.
Watch out
The most common mistake is stopping at the image stage. Strong AI images become far more valuable when converted into video ads, social reels, brand campaigns, or content assets through a proper video production workflow.
Key takeaway
Conclusion
The ability to make AI video from image sources has compressed what used to be a multi-tool, multi-day production process into an accessible single-session workflow. Free platforms like Replicate, Fal, and Google Colab handle personal model training and AI image to image generation at zero upfront cost. The AI image to text generator pro approach turns a well-written prompt into production-ready visual assets in minutes.
But two things hold most creators back: stopping at the image stage without converting assets into video, and underestimating how much prompt quality drives output quality.
For image generation and how to incorporate yourself in AI image generators, the free tools in this guide deliver real results. For the full workflow, from AI image to finished video — VidAU.ai is the platform built for the job.
FAQ
Here are answers to common questions about how to make AI video from image, AI image to image generators, AI image to text generator pro prompting, personal LoRA training, Replicate, Fal, Google Colab, source image preparation, content rights, and VidAU.ai video production workflows.
What does it mean to make AI video from image?
Making AI video from image means using one or more still images — AI-generated or photographed — as the source material for a video production. The workflow has two stages: generating or preparing the images using tools like Replicate, Fal, or Google Colab, then bringing those images into a video platform like VidAU.ai to add motion, voiceover, captions, and sequencing.
What is an AI image to image generator?
An AI image to image generator takes an existing photo as input and transforms it based on a text prompt or style instruction. It preserves the composition or structure of your source image while applying new visual treatments — making it ideal for incorporating your own likeness, brand assets, or real photography into AI-generated scenes.
How do I incorporate myself in AI image generators?
Train a personal LoRA model on a set of 10 to 20 clear photos of yourself using free platforms like Replicate or Fal. The model learns your facial characteristics and assigns them to a trigger word. Use that trigger word in any generation prompt to place yourself in any setting, style, or scene the AI can produce.
What is the AI image to text generator pro approach?
It refers to writing detailed, structured text prompts that describe a full scene — including subject, setting, lighting, style, and quality descriptors — to generate precise, production-ready AI images. The more specific the prompt, the more targeted and usable the output. This approach consistently outperforms vague or minimal prompts across every AI image platform.
How long does personal AI model training take?
Replicate and Fal typically complete training in 10 to 30 minutes. Google Colab may take 30 to 60 minutes depending on GPU availability and training parameters. All three platforms are free for initial use, with credits or GPU time sufficient for personal training and generation.
Can I use free AI-generated images for commercial content?
It depends on the platform’s Terms of Service. Most free training platforms allow personal use but have varying terms around commercial publication. Review each platform’s current ToS before using generated images in paid advertising, client deliverables, or licensed work. For commercial production, VidAU.ai provides clear rights frameworks.
What file formats work best for AI image training?
JPG and PNG work universally across all platforms in this guide. Ensure images are reasonably high resolution — phone photos taken in good lighting typically work well. Avoid heavily compressed files or WebP format, which some platforms do not support.
How do I make my generated images look more realistic?
Use photography-specific prompt terms: “shallow depth of field,” “natural window light,” “85mm lens,” “bokeh background,” “professional photography.” Add quality descriptors like “sharp focus” and “high resolution.” Include negative prompts for common artifacts: “blurry, distorted, disfigured, low quality.” Flux-based models produce more realistic output than Stable Diffusion for photographic styles.
What are negative prompts and should I use them?
Negative prompts specify what you want the AI to exclude from generated images. They prevent common artifacts like distorted anatomy, blurry details, or unwanted background elements. Add them to every generation — most platforms have a dedicated negative prompt field. Common examples: “blurry, low quality, distorted, disfigured, extra limbs, bad anatomy.”
What is the best platform for making AI video from images?
VidAU.ai is the purpose-built platform for converting AI-generated images into finished video content. It combines image input, voiceover generation, AI avatars, captions, and video sequencing in a single workflow — purpose-built for commercial creators, marketing teams, and brands producing video at scale. Try it at vidau.ai.
How do I improve results if generated images do not look like me?
Evaluate your training photo set first. Add more photos with varied angles and consistent lighting. Confirm you are including your trigger word correctly in generation prompts. If resemblance is still weak, retrain with an improved photo set — most creators find their second training attempt produces notably stronger results than the first.
Can AI-generated images be used as YouTube thumbnails?
Yes. With proper prompting — high contrast, clear subject placement, cinematic framing — AI-generated images produce strong YouTube thumbnails. Generate in 16:9 landscape at high resolution, then bring the image into VidAU.ai or your video editor for the full production workflow.