iPhone Live Photo Guide · Convert Live Photo to Video
How to Turn Live Photo into Video on iPhone
Learn how to turn Live Photo into video on iPhone. Convert Live Photos, keep audio, combine clips, and share them anywhere.
By the VidAU Editorial Team · iPhone Live Photo guide · Step-by-step tutorial
Knowing how to turn live photo into video on iPhone solves a common headache: many apps and platforms won’t play Live Photos, so your favorite moving moments stay stuck in your camera roll.
Knowing how to turn live photo into video on iPhone is the fastest way to share those short moving moments anywhere. A Live Photo records 3 seconds of motion and sound, but many apps treat it as a still image. Apple’s Photos app fixes this with a built-in Save as Video option that creates a standard video file in seconds.
This guide is for iPhone and iPad users who want to convert Live Photos for social media, easier editing, or apps that don’t support the format. You’ll get the native single-photo method, an iMovie workflow for combining several Live Photos, and the common mistakes to avoid.
Quick Summary
- The fastest way to turn live photo into video on iPhone is the built-in Photos app: open the Live Photo, tap Share, then Save as Video.
- For combining multiple Live Photos into one clip, use iMovie, which lets you reorder and trim each segment.
- A Live Photo records about 3 seconds total (1.5 seconds before and 1.5 after the shot) plus audio, and the saved video keeps that sound.
- This method suits iPhone and iPad users who want to post Live Photos on TikTok, Instagram, or any platform that only accepts standard video files.
In This Guide
- What a Live Photo is and how the conversion works
- Why you would want to convert live photo to video
- Step-by-step: turn a single Live Photo into a video
- How to convert multiple Live Photos into one video with iMovie
- How to do it on iPad and Mac
- Common mistakes when you animate a photo or convert it
- When a native method is enough versus an AI video tool
- Final Thoughts
- FAQ
How to Turn a Single Live Photo into a Video on iPhone
To turn a single Live Photo into a video on iPhone, open the photo in the Photos app, tap the Share button, scroll to Save as Video, and the clip saves to your camera roll. The whole process takes a few seconds.
Follow these steps:
Step 1: Open the Photos app and find the Live Photo
Open the Photos app and find the Live Photo you want to convert. Live Photos show a small circular icon, usually in the top-left corner.
Step 2: Open the photo full screen
Tap the photo to open it full screen.
Step 3: Tap the Share button
Tap the Share button, which is the square with an arrow pointing up.
Step 4: Choose Save as Video
Scroll down through the share actions until you see Save as Video, then tap it.
Step 5: Find the saved video
The new video saves to your library. Find it in your Recents album or the Videos album.
That’s it. Your original Live Photo stays untouched, and you now have a standard video you can edit or upload.

What Is a Live Photo?
A Live Photo is an iPhone photo format that captures roughly 3 seconds of motion and sound around the moment you press the shutter. It records about 1.5 seconds before and 1.5 seconds after, then stores a still frame plus a short motion clip. When you convert it, the Photos app extracts that motion into a standard video file.
The key point: converting a Live Photo to a video is non-destructive. Your original Live Photo stays in your library, and a separate video lands in your camera roll. You end up with both versions.
Key point
Converting a Live Photo to video is non-destructive. Your original Live Photo stays in your library, and a separate video lands in your camera roll.
Why Convert a Live Photo to Video?
The main reason to convert a Live Photo to a video is compatibility. Most non-Apple platforms either flatten a Live Photo into a still or won’t accept the format at all, so the motion gets lost when you share it.
Here are the most common reasons people want to animate a photo into a shareable clip:
- Social sharing: TikTok, Instagram Reels, YouTube Shorts, and messaging apps accept standard video, not Live Photos.
- Editing: A video file can be trimmed, sped up, or dropped into an editor far more easily than a Live Photo.
- Audio: The saved video keeps the sound recorded during the Live Photo, so you don’t lose the moment’s ambience.
- Backup and portability: A regular video plays anywhere, including Android phones, Windows PCs, and web uploads.
Key Takeaways
- Converting solves the platform-compatibility problem at the root.
- The process keeps both the original Live Photo and the new video.
- Saved videos retain the audio captured during the Live Photo.
How to Convert Multiple Live Photos into One Video
To combine several Live Photos into one video, use iMovie, which lets you import each Live Photo, reorder them, and trim each segment before exporting a single clip. The native Save as Video option only handles one photo at a time, so iMovie fills that gap.
Here’s the workflow:
Step 1: Create an album in Photos
First, create an album in Photos and add the Live Photos you want in the order you’d like them to play. This makes selection easier later.
Step 2: Open iMovie
Open iMovie and start a new Movie project.
Step 3: Import your Live Photos
Import your Live Photos. iMovie brings in the motion portion of each one as a short clip.
Step 4: Reorder the clips
Drag the clips into your preferred order on the timeline.
Step 5: Trim each segment
Trim each segment to keep only the part you want.
Step 6: Export the finished video
Tap Done, then use the Share button to export and save the finished video to your camera roll.
A practical tip from creator tutorials: before importing, switch your Photos view from the standard square grid to the aspect-ratio grid. This lets you see the true framing of each Live Photo, which helps when you’re building a clean sequence.
Tip
Before importing multiple Live Photos into iMovie, switch your Photos view from the standard square grid to the aspect-ratio grid so you can see the true framing of each clip.
How to Do It on iPad and Mac
The iPad method is identical to iPhone: open the Live Photo in Photos, tap Share, then Save as Video. The Mac workflow is slightly different. In the Photos app on Mac, select the Live Photo, then use the export options to save it as a movie file, or drag it into iMovie for editing.
If you’re working across devices, iCloud Photos keeps your Live Photos in sync, so you can capture on iPhone and convert on iPad or Mac without re-importing.
| Device | Best Method | Why |
|---|---|---|
| iPhone | Photos app → Share → Save as Video | Fastest built-in method for one Live Photo. |
| iPad | Photos app → Share → Save as Video | Same workflow as iPhone. |
| Mac | Photos export options or iMovie | Use export options for a movie file or iMovie for editing. |
| Across devices | iCloud Photos | Keeps Live Photos in sync so you can capture on iPhone and convert elsewhere. |
Common Mistakes When You Animate a Photo or Convert It

The most common mistake is expecting the Live Photo’s full quality to change when you convert it. The output video matches the resolution of the original capture, so converting won’t sharpen a blurry or dark Live Photo.
Watch out for these issues:
- Looking for a quality boost. Conversion preserves the source. It doesn’t upscale or improve detail. If your Live Photo was shot in low light, the video will look the same.
- Expecting a separate file format choice. Save as Video produces a standard iPhone video. You can’t pick MP4 versus another container inside this menu, though the saved file shares and edits like any normal video.
- Deleting the original too soon. Since the process is non-destructive, keep the Live Photo until you’ve confirmed the video saved correctly.
- Muted clips. If your Live Photo was captured with the ringer or audio off, check that sound was actually recorded before assuming the conversion dropped it.
- Wrong aspect ratio for the platform. A standard Live Photo is roughly 4:3. For Reels or TikTok you may need to crop to 9:16 in a separate editor.
This is where most people get stuck: they treat the editor as a quality fix. As one widely shared editing thread put it bluntly when users asked how to make footage look cinematic, the truth is,you can’t do it in the editor Source quality, lighting, and framing matter far more than any single export setting.
Watch out
Conversion preserves the source. It does not sharpen a blurry Live Photo, upscale a low-light clip, or fix weak framing. Keep the original until you confirm the video saved correctly.
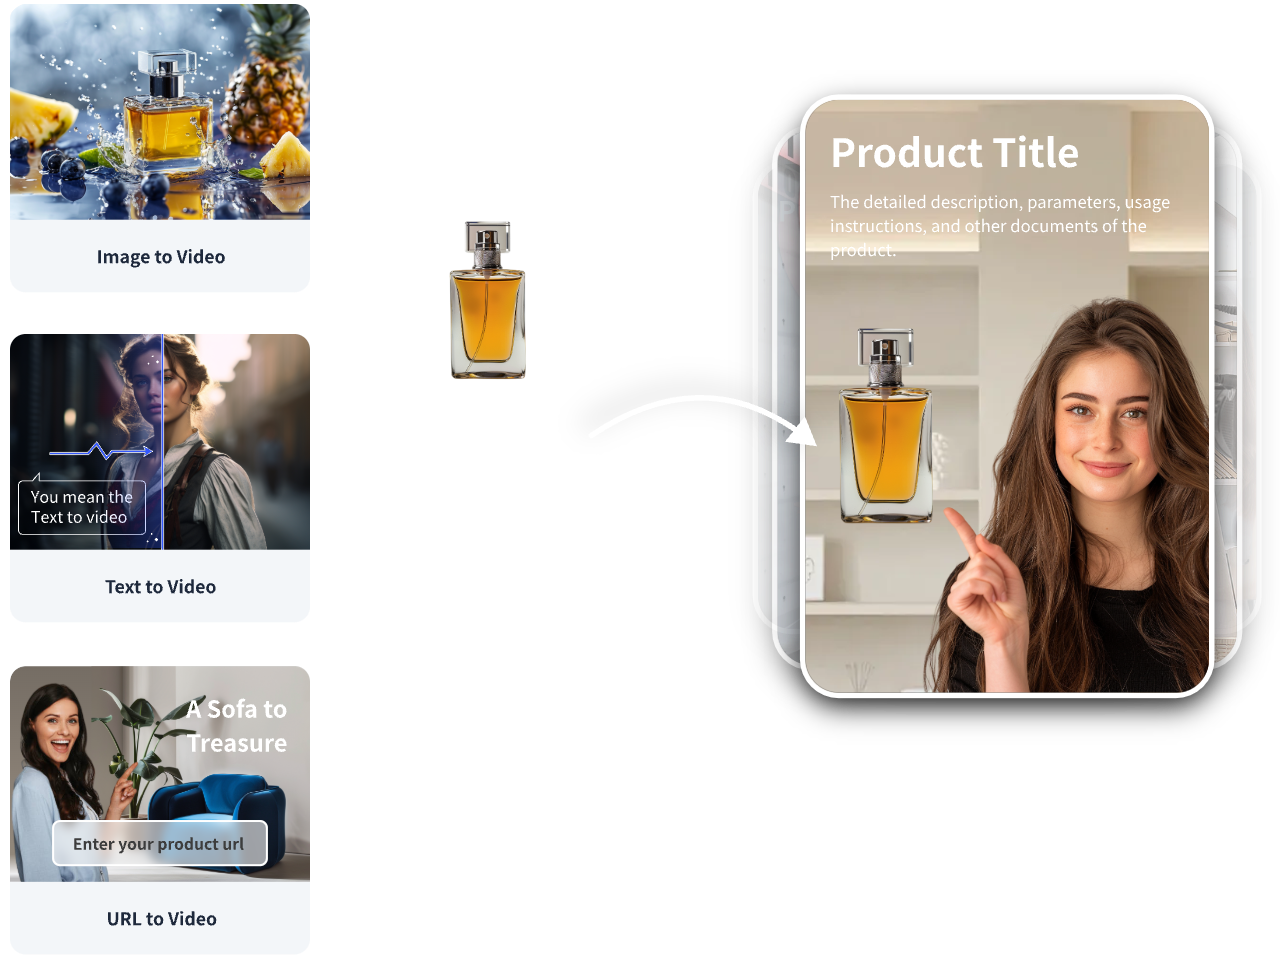
Create Polished Videos With VidAU
Use VidAU AI Image, VidAU AI Video, Product Sample to Video, Text to Video, and Video Enhancer when your goal shifts from quickly sharing Live Photos to creating polished branded or product-ready video content.
VidAU workflow
Where VidAU fits after converting Live Photos
- Use Photos for one Live Photo: Choose the native Save as Video method when you simply want to share or lightly edit a single Live Photo.
- Use iMovie for multiple Live Photos: Choose iMovie when you need to combine, reorder, and trim several Live Photos into one clip.
- Use VidAU AI Image and VidAU AI Video for promotional clips: Choose these tools when still images need to become branded or product-ready videos.
- Use Product Sample to Video and Text to Video for marketing assets: Choose these workflows when raw assets or a short script need to become a finished video.
- Use Video Enhancer for cleanup: Choose a targeted enhancement step when an exported clip looks soft and you want to clean it up after conversion.
When the Native Method Is Enough vs an AI Video Tool
The native Save as Video method is the right choice when you simply want to share or lightly edit a single Live Photo. It’s free, fast, and built in. But if your goal is to turn personal clips into polished marketing content, a dedicated video tool does more.
When the marketing team at VidAU AI reviewed common creator workflows, a recurring pattern stood out: people convert Live Photos hoping the editor will make them look professional, when the real lift comes from a proper production pipeline. VidAU is an AI video ad platform that generates video ads from product URLs, images, or scripts in 49 languages.
| Need | Best Choice | Why |
|---|---|---|
| Share one Live Photo | iPhone Photos app | Free, built in, instant |
| Combine several Live Photos | iMovie | Reorder and trim segments |
| Turn photos into ad-ready video | VidAU AI Video | Scripted, branded, multi-language |
If you’re a creator or small business turning still images into promotional clips, VidAU AI Image and VidAU AI Video handle that better than a Live Photo export. For product-focused content, Product Sample to Video and Text to Video turn raw assets or a short script into a finished video.
That said, here’s the honest limitation: for converting your own personal Live Photos for a quick family share or a casual social post, you don’t need any of this. The built-in iPhone method is the better fit, and reaching for an AI platform would only add steps. If you do want to clean up or sharpen exported clips, the Video Enhancer is a more targeted option.
Honest limitation
For personal Live Photos, a quick family share, or a casual social post, the built-in iPhone method is the better fit. Reaching for an AI platform would only add steps unless your goal is branded or product video content.
Key takeaway
Final Thoughts
To turn live photo into video on iPhone, the built-in Photos app is the answer for most people: open the Live Photo, tap Share, then Save as Video, and you keep both versions. For multiple clips, iMovie lets you sequence and trim them into one video. Match the method to the job, and don’t expect conversion alone to improve quality that was never in the original capture.
If your aim shifts from personal sharing to creating branded or product video content from images and scripts, explore VidAU AI Video to build polished, platform-ready clips without manual editing.
FAQ
Here are answers to common questions about how to turn live photo into video, converting Live Photos to video on iPhone, keeping the original, keeping sound, combining multiple Live Photos, converting to MP4, sharing to Instagram or TikTok, using iPad or Mac, and animating still photos.
How do I turn a Live Photo into a video on iPhone?
Open the Live Photo in the Photos app, tap the Share button, scroll down, and tap Save as Video. The clip saves to your camera roll as a standard video while the original Live Photo stays in your library. The process takes only a few seconds.
Does converting a Live Photo to video keep the original?
Yes. The conversion is non-destructive. When you use Save as Video, iPhone creates a new video file in your camera roll and leaves the original Live Photo untouched in your library. You end up with both the Live Photo and the standard video version to use as needed.
Does the converted video include sound?
Yes. A Live Photo records about 3 seconds of motion plus the audio captured during that window. When you save it as a video, that sound carries over into the new file. If the original had no audio, check whether your device or settings muted the recording at capture time.
How long is a Live Photo video?
A Live Photo captures roughly 3 seconds total, about 1.5 seconds before you press the shutter and 1.5 seconds after. The video you save reflects that same short length. It is not a long recording, so it works best for quick moments rather than full clips.
Can I combine multiple Live Photos into one video?
Yes, but not with the native Save as Video option, which handles one photo at a time. Use iMovie instead. Import your Live Photos, drag them into order on the timeline, trim each segment, then export the project as a single video to your camera roll.
Can I convert a Live Photo to MP4?
The Save as Video option produces a standard iPhone video that shares and edits like a normal video. You can’t choose a specific container such as MP4 inside that menu. If you need a precise format, export the saved video through an editor or converter that lets you set the output type.
Why won’t my Live Photo play on Instagram or TikTok?
Most non-Apple platforms don’t support the Live Photo format, so they show only the still frame and drop the motion. Convert the Live Photo to a video first using Save as Video, then upload the standard video file. You may also need to crop it to a 9:16 aspect ratio for full-screen feeds.
Can I turn a Live Photo into a video on iPad or Mac?
Yes. On iPad the steps match iPhone: open the Live Photo, tap Share, then Save as Video. On Mac, select the Live Photo in the Photos app and export it as a movie file, or drag it into iMovie. iCloud Photos keeps everything in sync across your devices.
Will converting improve the Live Photo’s quality?
No. Conversion preserves the source resolution and detail, so it won’t sharpen a blurry or dark Live Photo. Quality comes from the original capture, including lighting and framing. To clean up an exported clip afterward, a dedicated tool like a video enhancer is a better option than the export step itself.
How do I animate a still photo that isn’t a Live Photo?
A standard still photo has no recorded motion, so you can’t simply save it as a video the way you can with a Live Photo. To animate a photo, use an editing or AI image-to-video tool that adds movement, or import the image into iMovie and apply a pan-and-zoom effect.


